

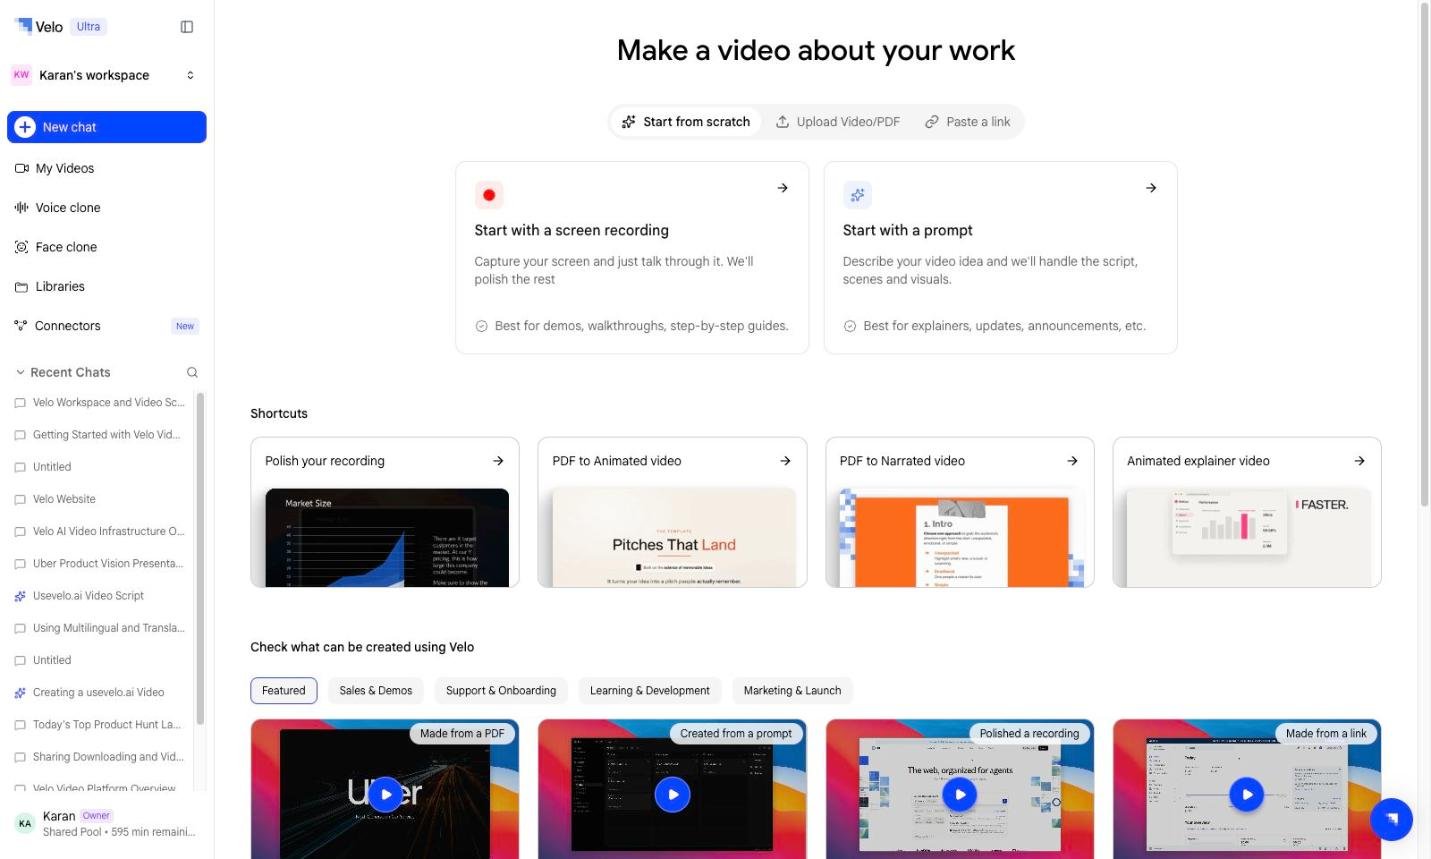
Choosing where to start
Three tabs above the main cards set what you are starting from:
Under Start from scratch, two cards split the two ways of beginning with nothing:
- Start with a screen recording — capture your screen and talk through it. Best for demos, walkthroughs, and step-by-step guides. See Capture screen.
- Start with a prompt — describe the video and Velo handles the script, scenes, and visuals. Best for explainers, updates, and announcements. See Prompt to Video.
Shortcuts
Below the cards, Shortcuts are preconfigured starting points for common jobs, so you skip straight past the setup questions:- Polish your recording — clean up an existing screen recording
- PDF to Animated video — turn a document into an animated explainer
- PDF to Narrated video — turn a document into a narrated walkthrough
- Animated explainer video — build an explainer from a prompt
Examples
Check what can be created using Velo shows finished videos grouped by team — Featured, Sales & Demos, Support & Onboarding, and Learning & Development. Each is tagged with how it was made (Made from a PDF, Created from a prompt, Polished a recording, Made from a link, Captured on Velo), so you can trace an output you like back to the path that produced it.The sidebar
The left sidebar carries the rest of the workspace:
Recent Chats below them lists your sessions so you can reopen one and keep working. The workspace switcher sits at the top, and your plan and remaining balance at the bottom.