
Create your account and workspace
Step 1: Sign up at app.usevelo.ai using your email or Google account. Step 2: After signing in, you’ll be prompted to set up your first workspace. Give it a name (you can rename it later) and optionally upload a logo.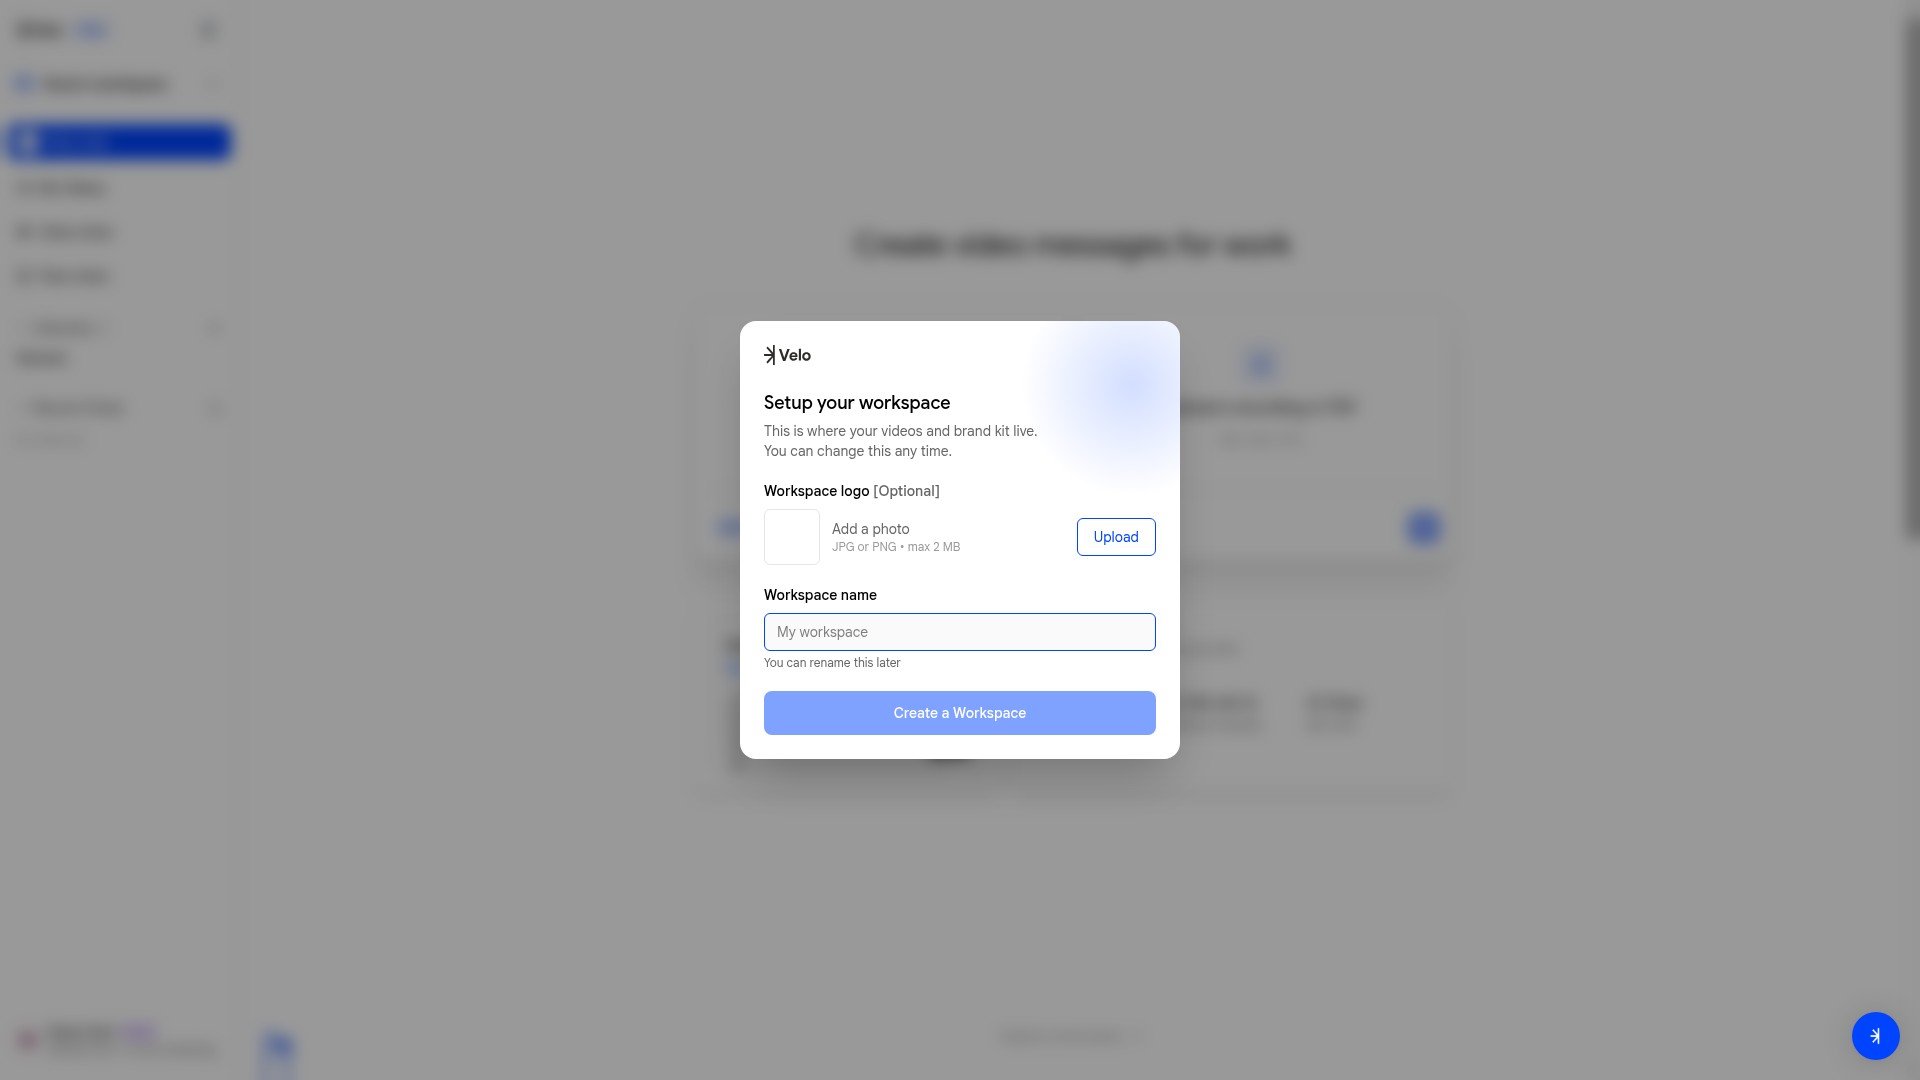
Select a Project Type
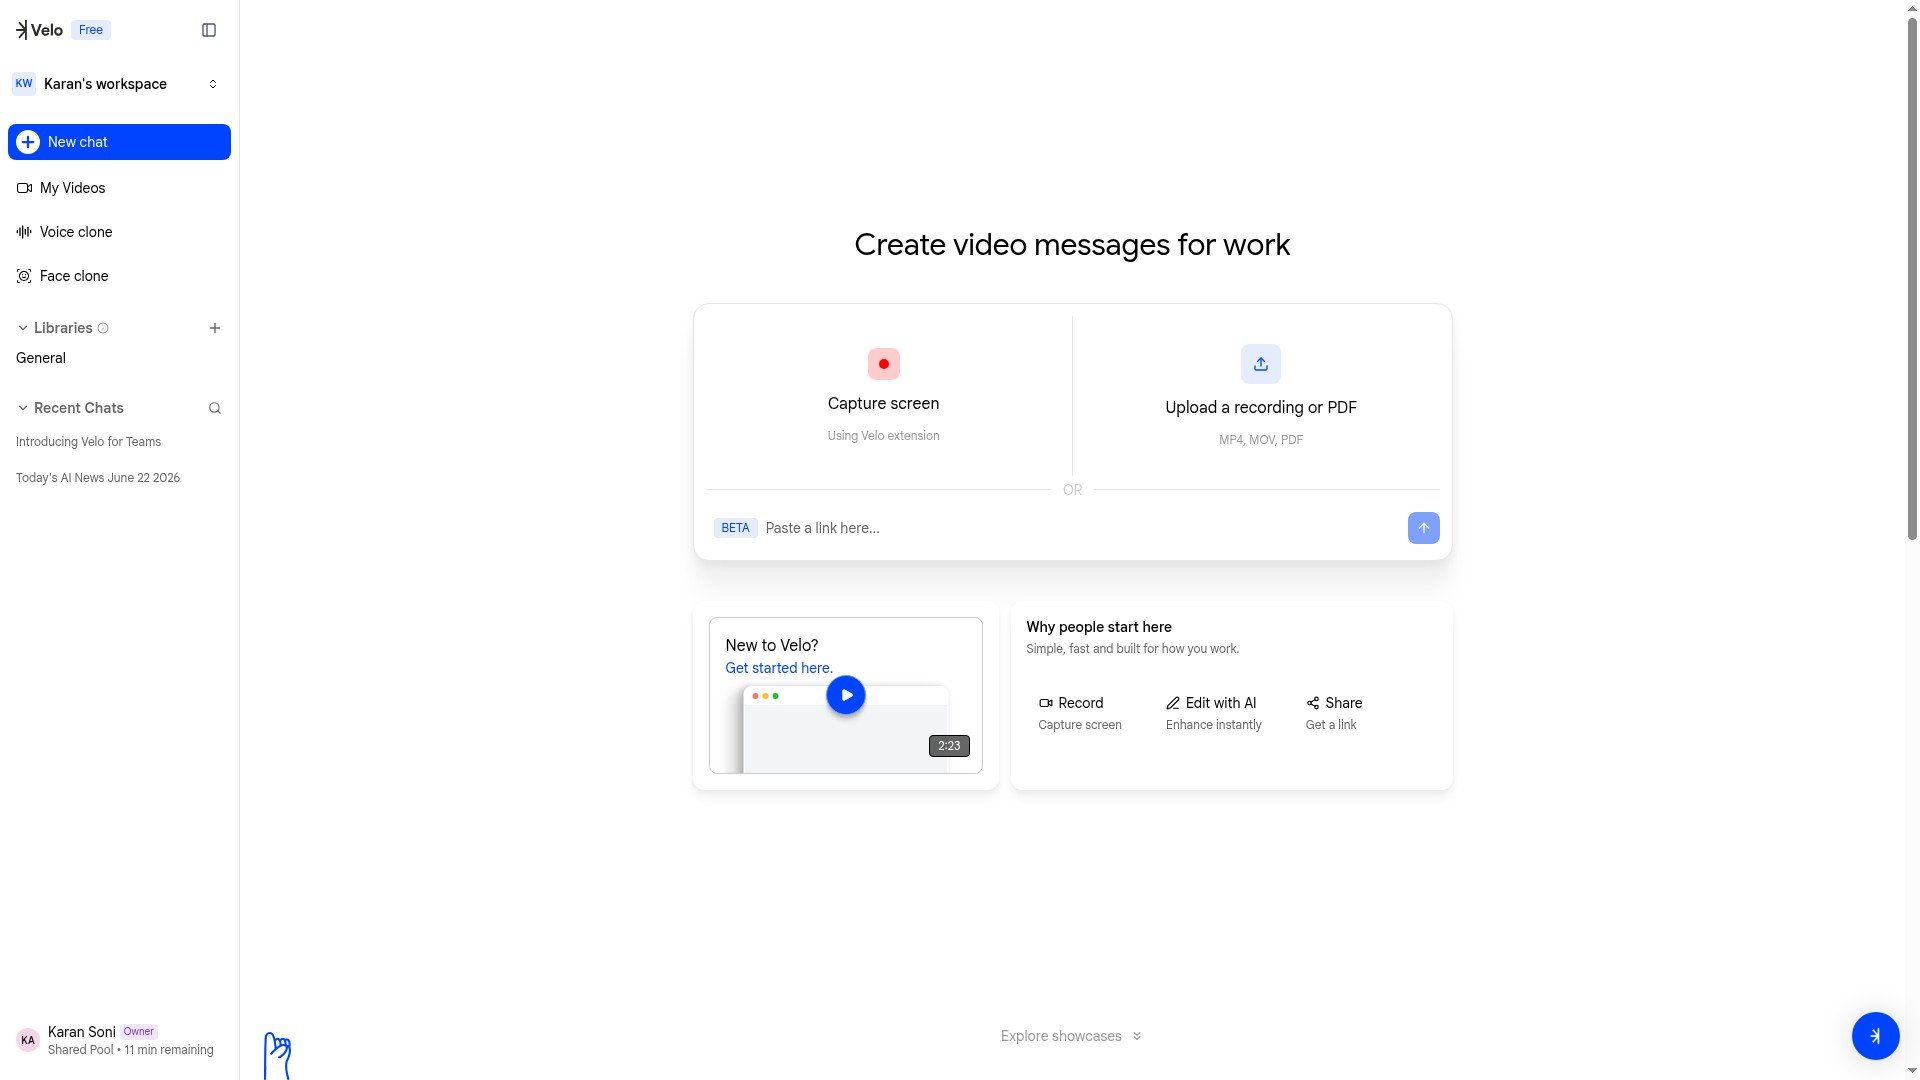
From the workspace home screen, choose how you want to create your first Velo:- Capture screen — record your screen live using the Velo Chrome extension
- Upload a recording or PDF — import an existing MP4, MOV, or PDF file
- Paste a link — provide a URL and let Velo’s browser agent record a demo (beta)
Upload Content and Choose a Voice
After choosing to upload a recording, select the desired file from your local storage. Once the upload is confirmed, select a narration style. You can use your own cloned voices or choose from a list of Public Voices categorized by tone — Drew (casual, curious, and fun), Viraj (energetic and confident), Hope (professional and clear), or Monika (deep and natural).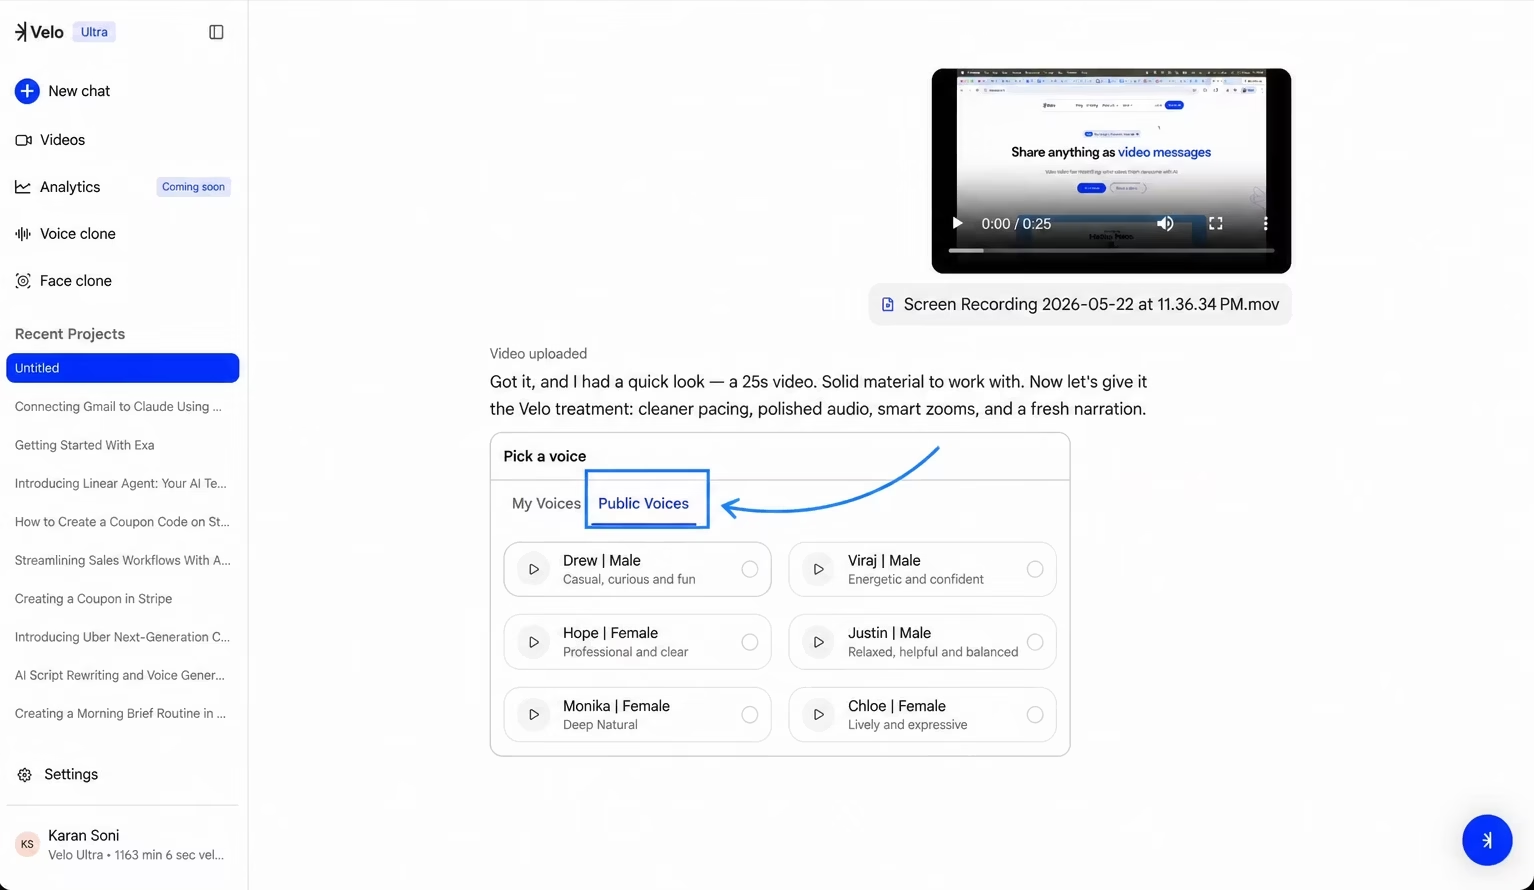
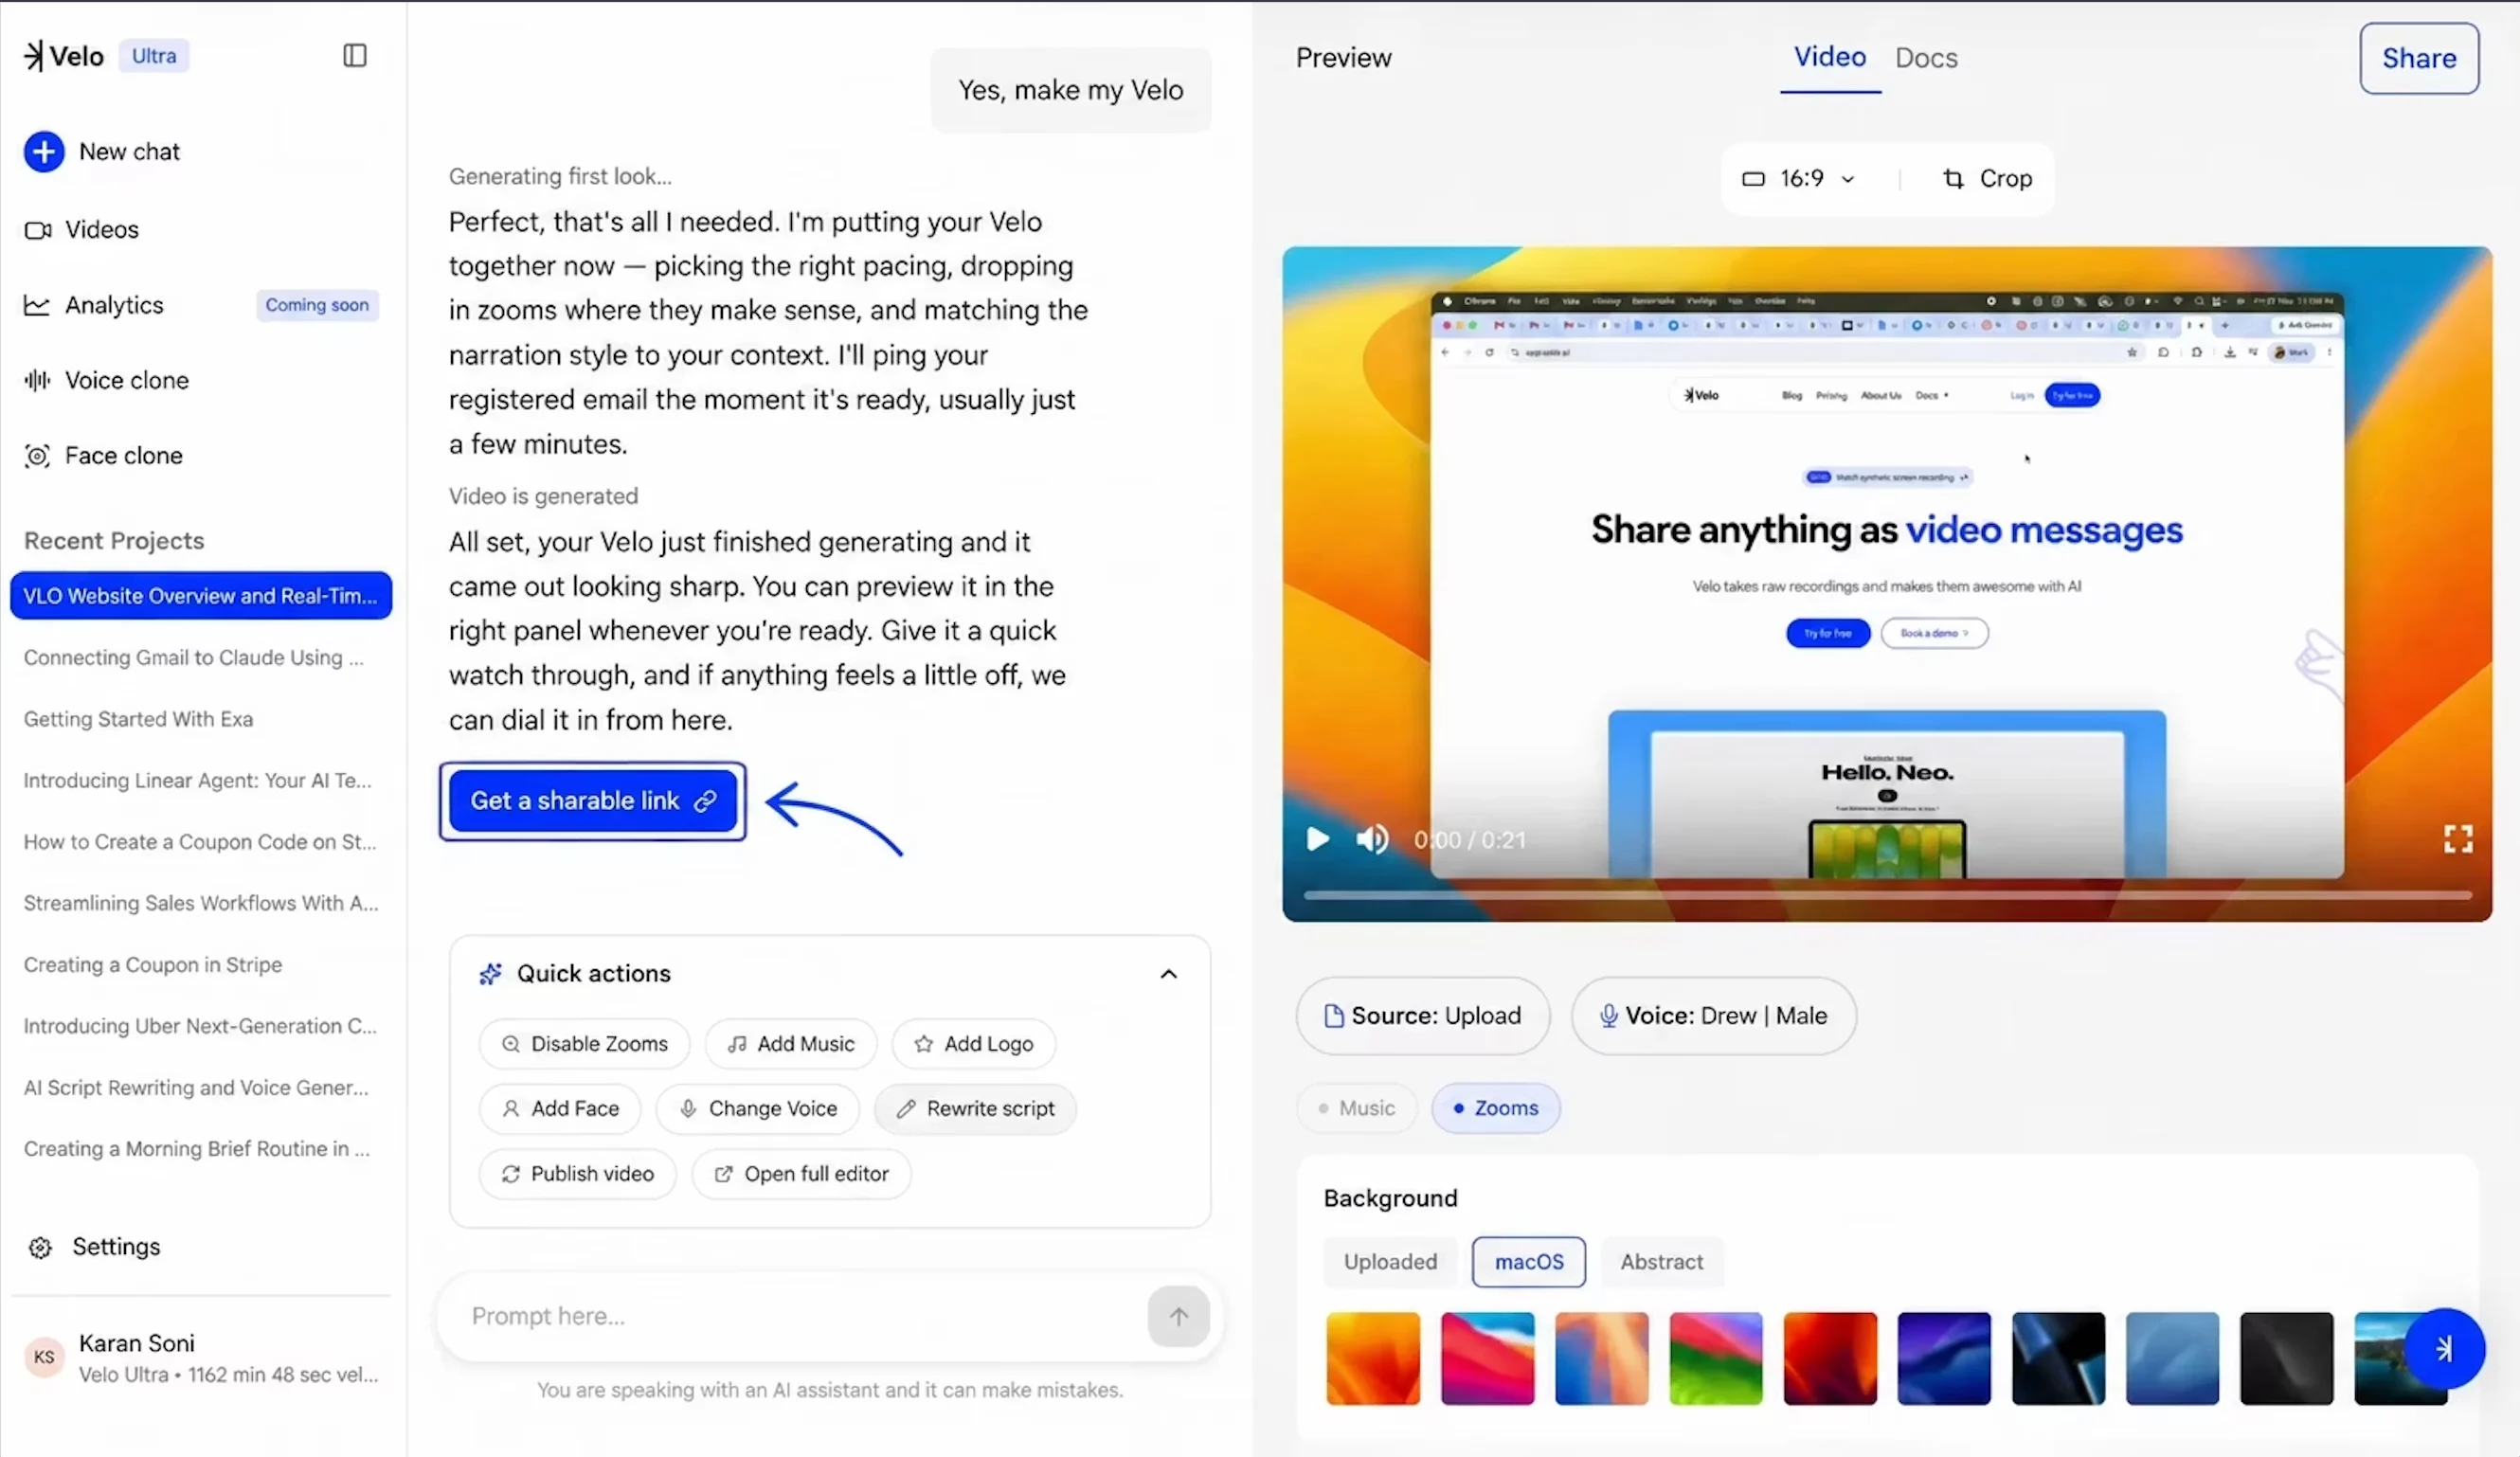
Process and Refine Your Video
After confirming your voice selection, the system begins generating the “first look.” During this phase, the platform automatically separates and polishes the audio, transcribes speech to text, and applies smart zooms while matching the new audio to the video frames.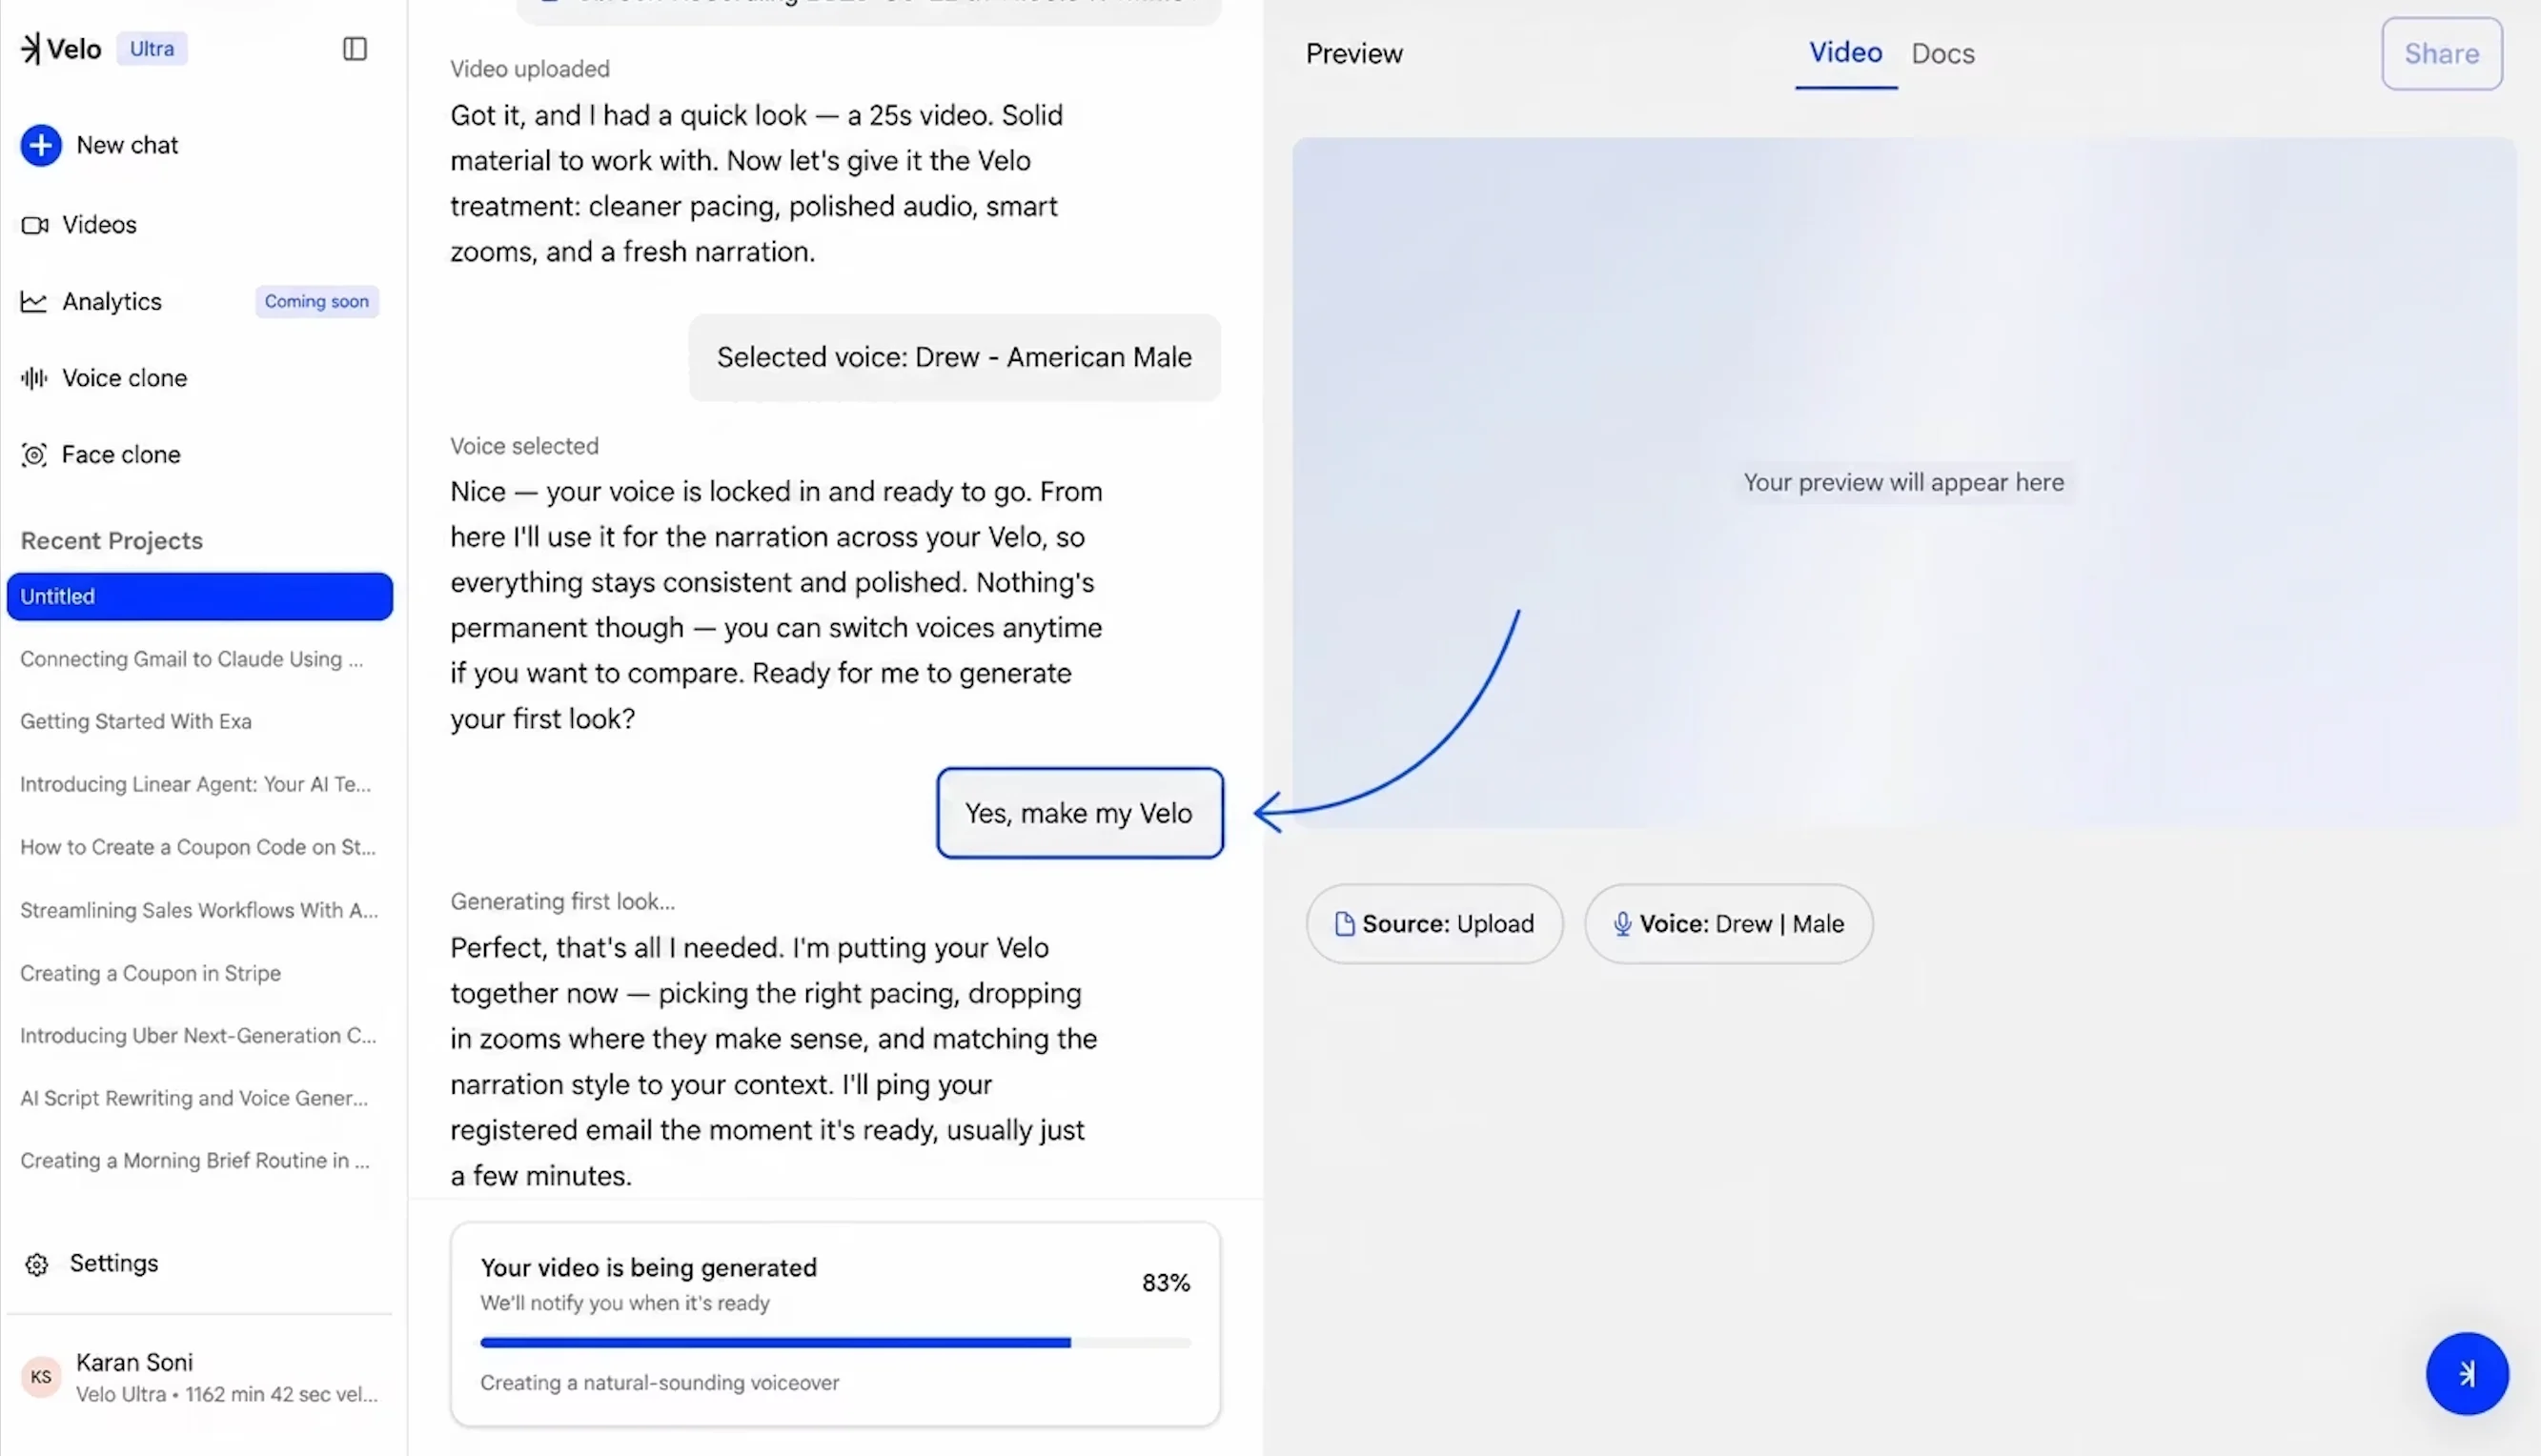
Next steps
Invite your team
Add teammates to your workspace.
Set up your VeloTwin
Create your AI avatar and voice clone.