
Initialize the Recording
Step 1: Locate the Paste a link here… container on the dashboard. Step 2: Paste the URL of the website you wish to create a Velo about and click the submission arrow..png?fit=max&auto=format&n=Rr1R_9ovDeX34qDf&q=85&s=1e2c606ebc3cc9e970f32aad020e9fb2)
.png)
Guide the Browser Agent
Step 1: Click Start Session to begin recording your walkthrough. Step 2: Navigate through the website’s pages while explaining your goals in natural, simple language. Speak as if talking to a colleague, helping the backend agent map your intent and understand the context of what you are building. Step 3: When you have finished explaining the site and your intent, click Finish Session to begin the upload process.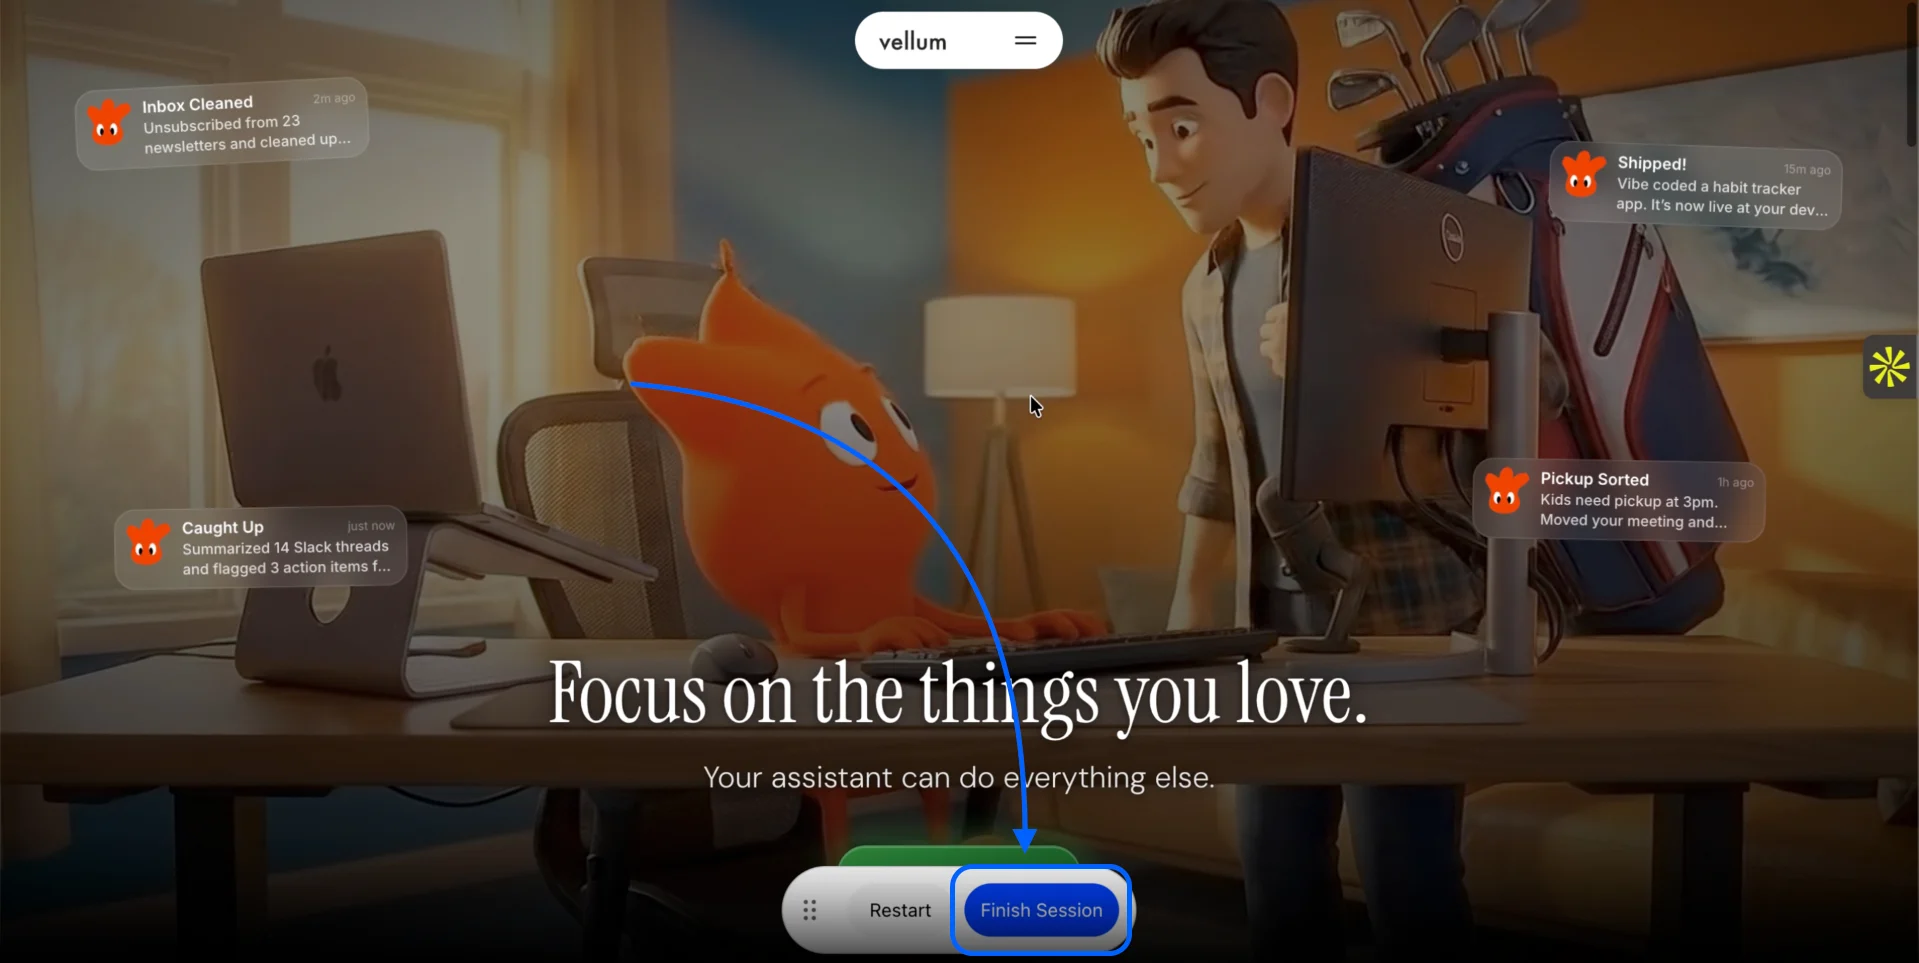
Configure Tone and Authority
Step 1: Select the desired persona from the provided options. For high-stakes internal communications, choose Founder. Step 2: Define the primary audience by selecting Internal team. Step 3: Provide specific stylistic requirements in the additional instructions field to ensure the tone matches your intent..png?fit=max&auto=format&n=Rr1R_9ovDeX34qDf&q=85&s=d4870de1bfb0b94e88ecb8249e2a9070)
.png)
Review and Finalize
Step 1: Review the generated script and scene list. Each scene includes a visual description and the corresponding narration mapped to your initial walkthrough. Step 2: Edit the narration or scene details if any adjustments are needed to ensure the tone is correct. Step 3: Click Go Make My Velo to start the automated recording..png?fit=max&auto=format&n=Rr1R_9ovDeX34qDf&q=85&s=0b0accf5e04167c0dc3cb0208910c1b2)
.png)