
Uploading and Configuring the PDF
Step 1: From the dashboard, select Upload a recording or PDF. Choose a PDF file from your local storage to begin the upload process..png?fit=max&auto=format&n=Rr1R_9ovDeX34qDf&q=85&s=6506af30e10c65f7da04998e843fcdc6)
.png?fit=max&auto=format&n=Rr1R_9ovDeX34qDf&q=85&s=a15a006b26c1456370b18358deab2e63)
.png)
Recording Your Intent
Step 3: Choose the “Record my intent” option. This allows you to narrate your instructions directly to the agent rather than typing a text prompt. Step 4: Grant microphone permissions when prompted. Start the recording and explain the specific elements you want the video to highlight. Step 5: Click Stop once you have finished describing your requirements.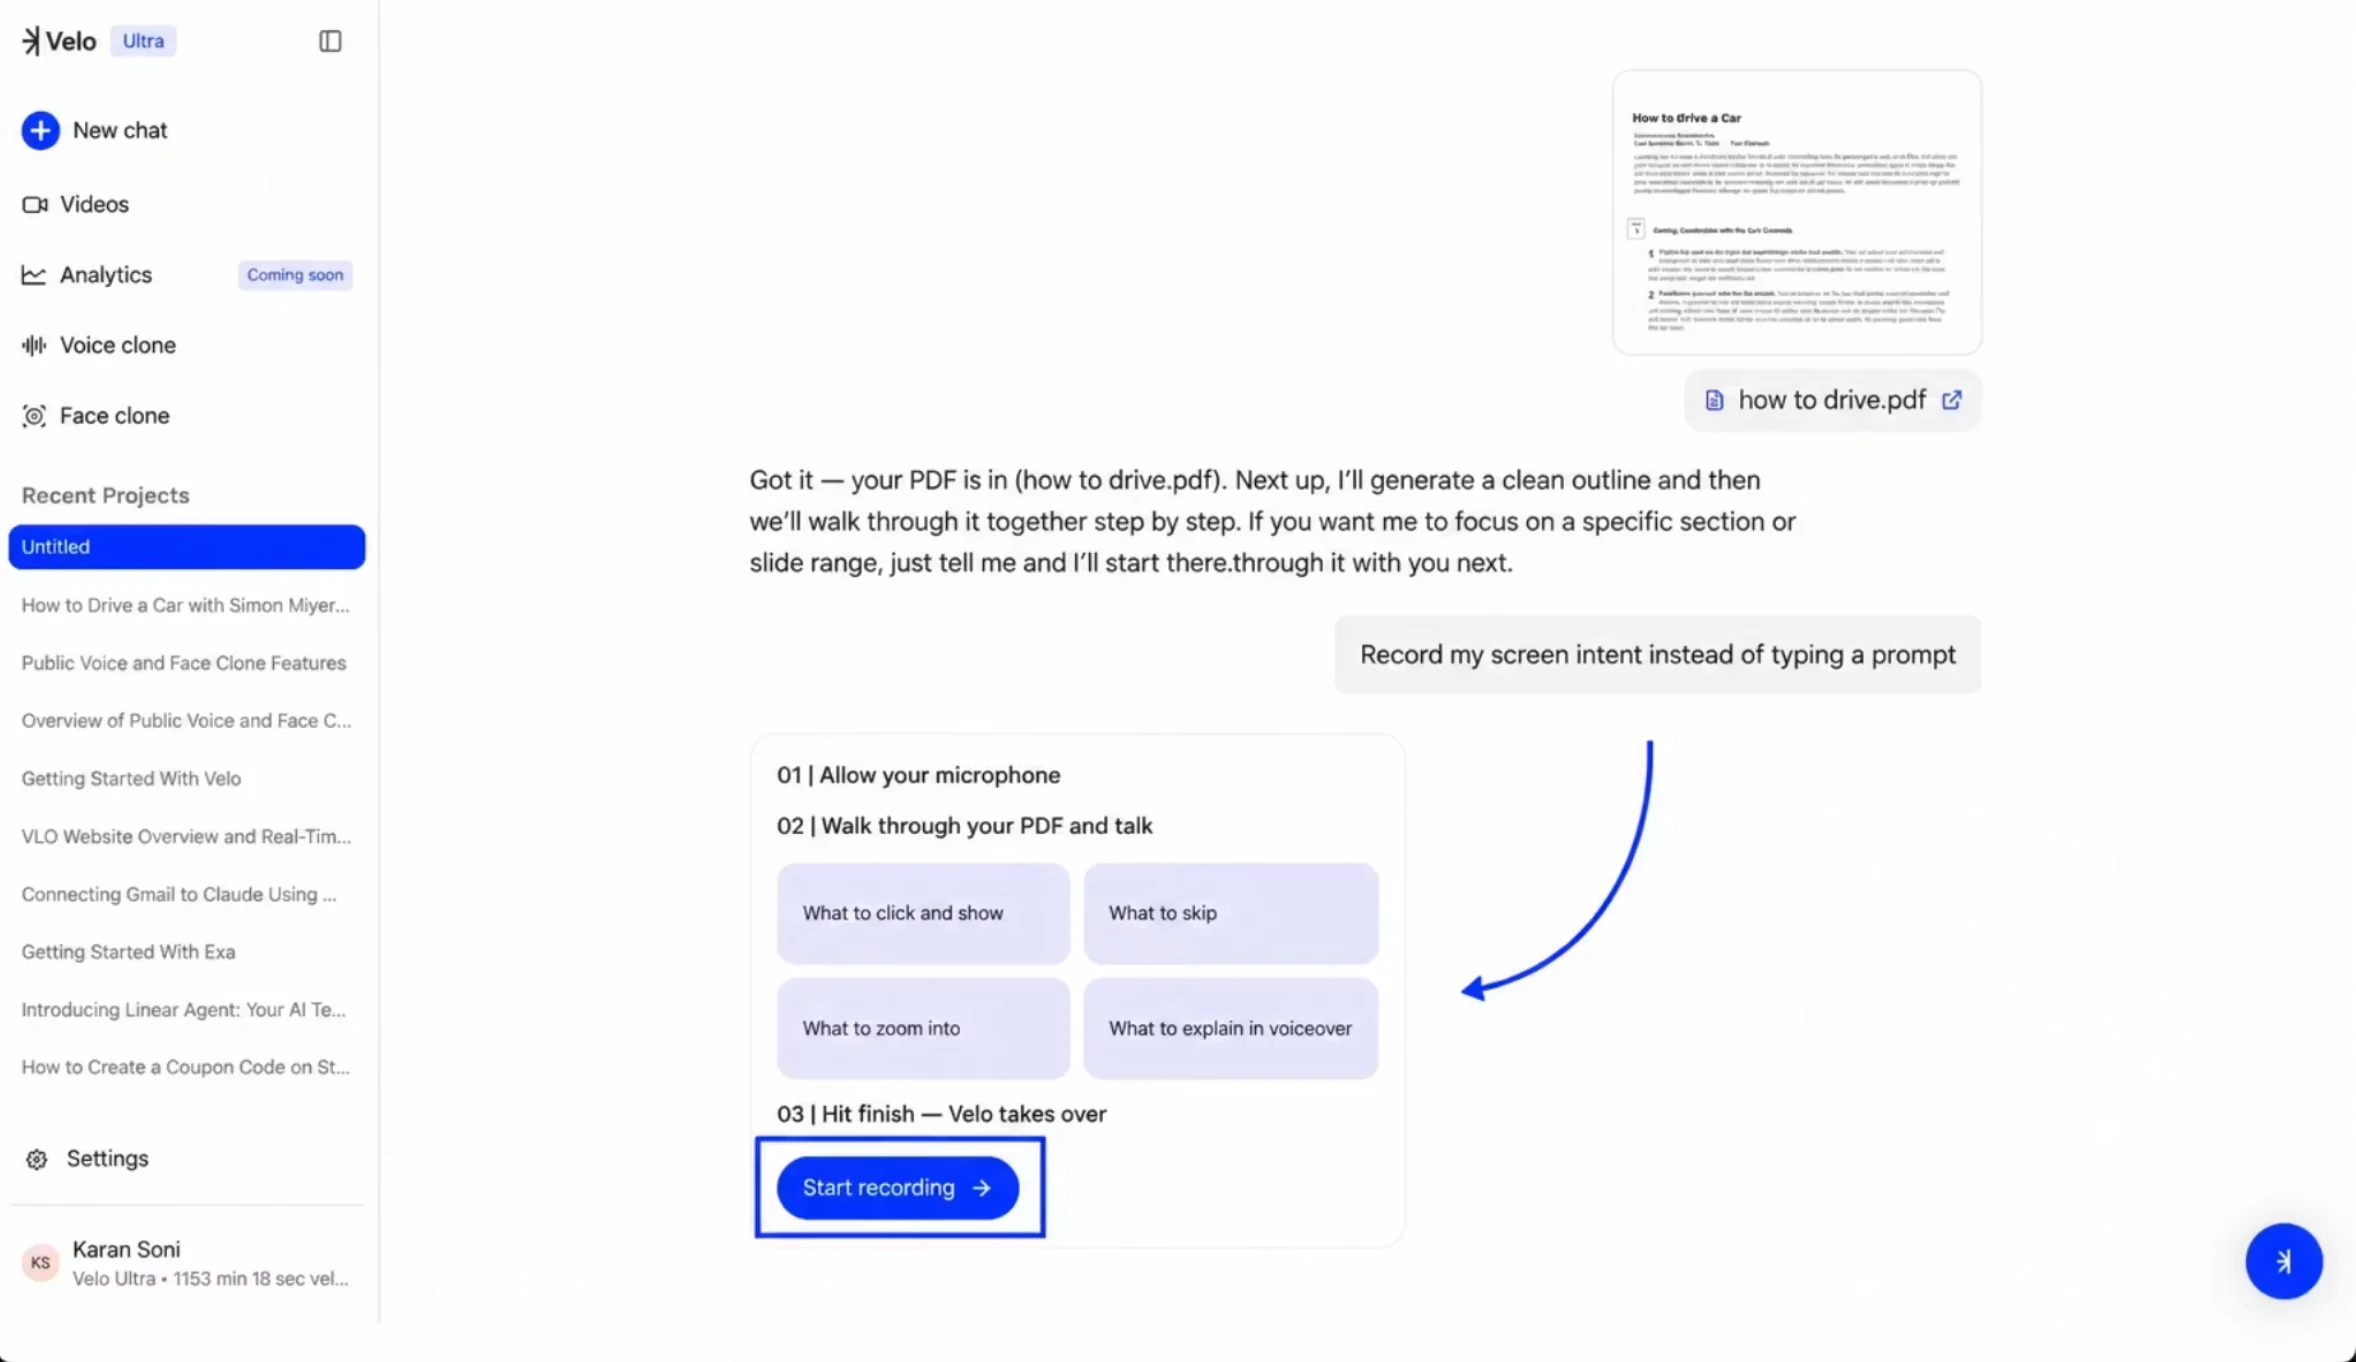
Guiding the Agent Session
Step 6: Select Start Session to enter the live guidance mode. In this mode, the agent processes the PDF in real-time based on your verbal cues. Step 7: Speak in natural language to direct the script — for example, “Talk about opening the insert panel, applying effects, and managing focus.” Velo maps these requests to the document structure and drafts the script accordingly. Step 8: Select Finish Session once the agent has captured all relevant points.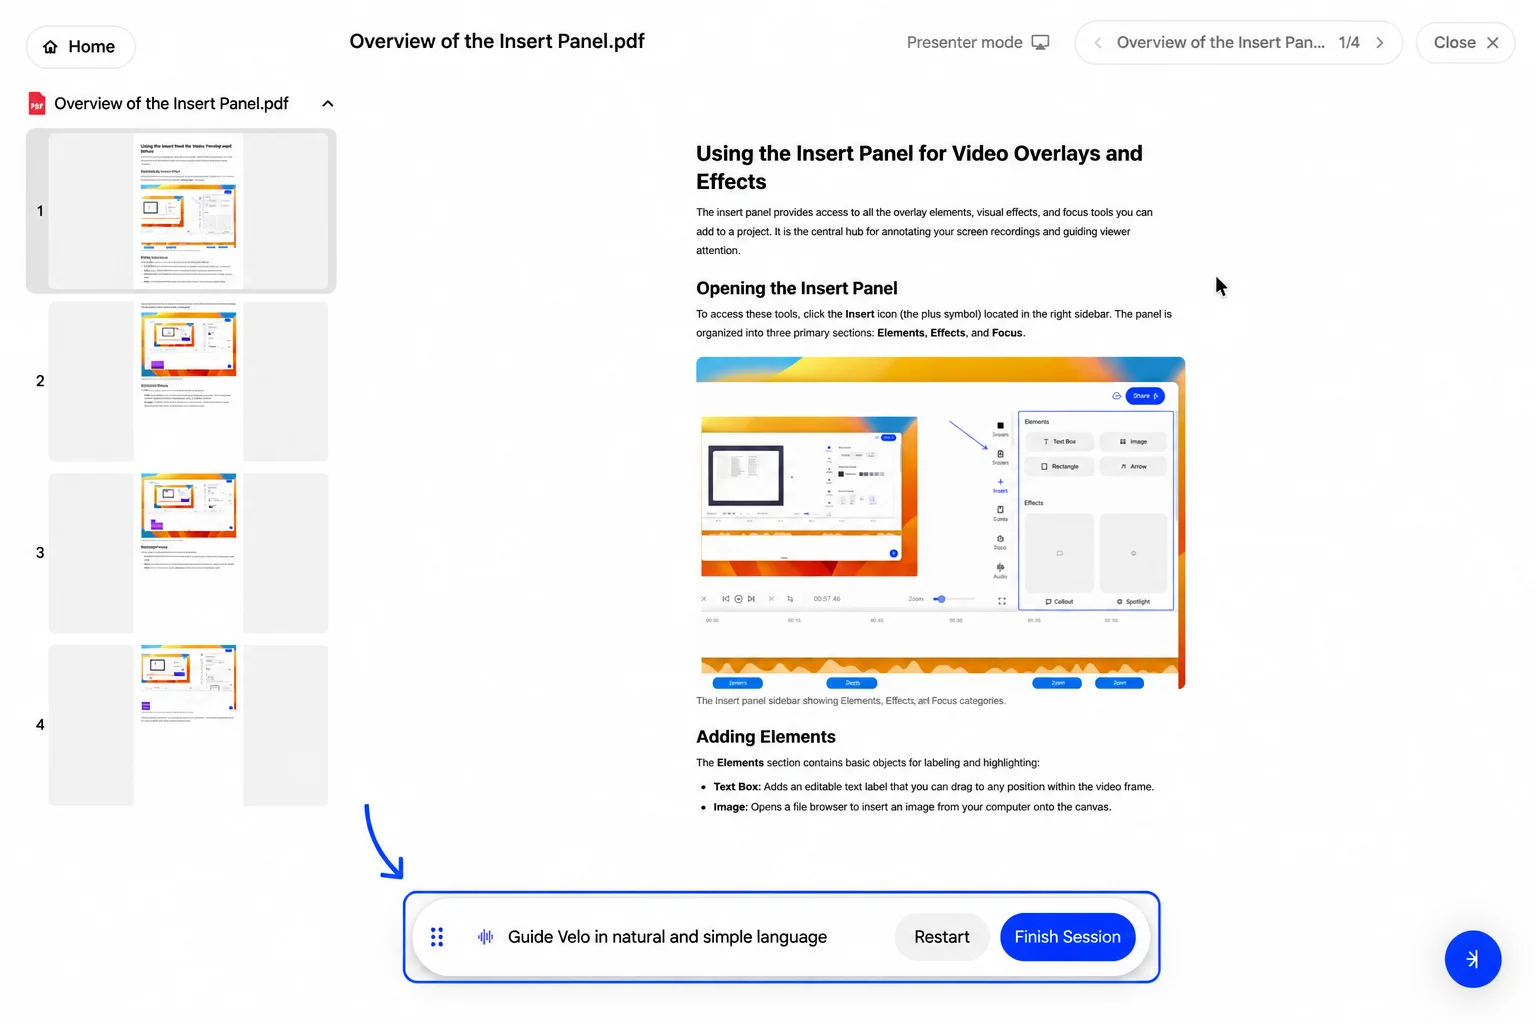
Selecting Voice and Persona
Step 9: Configure the persona for the video. Choose from options like Founder, Marketer, or Customer Support to set the tone of the communication. Step 10: Choose your voice. Select from a library of Public Voices or use a Voice Clone to make the narration sound personaliSed. Step 11: Submit your preferences. The agent will then draft a full script based on your inputs and selected persona.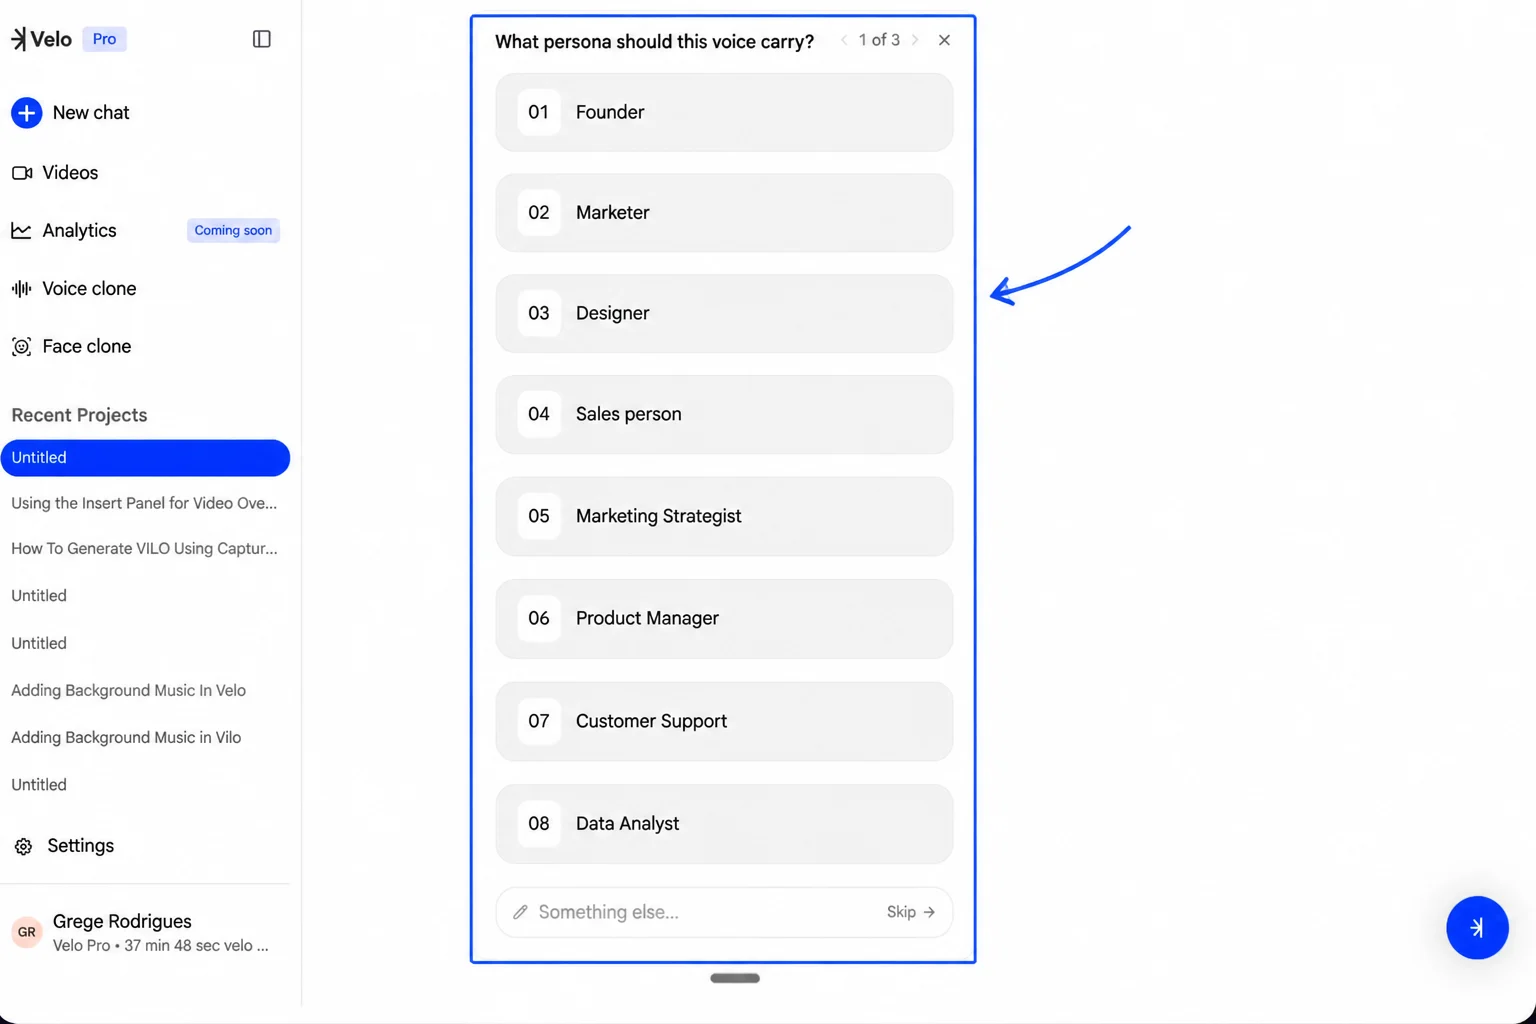
Finalizing the Video
Step 12: Review the drafted script. You can edit individual scene descriptions or narration text to ensure a professional tone. Step 13: When satisfied, click Go, Make my Velo. The system will process the walkthrough, match the audio to the visuals, and generate the final video file..png?fit=max&auto=format&n=Rr1R_9ovDeX34qDf&q=85&s=bdd2de34c619e403fb530a0a618367af)
.png)