Once a video is generated, the video chat panel provides a suite of quick actions to refine the output without needing to enter the full timeline editor. These tools allow for rapid adjustments to visuals, audio, and the underlying script.

Customizing Visuals and Audio

Step 1: Open the Quick actions row in the chat panel. It carries seven one-click actions: Disable Zooms, Add Music, Add Logo, Add Face, AI Rewrite, Publish video and Open full editor. Actions that toggle change their label once applied — Add Music becomes Remove Music.
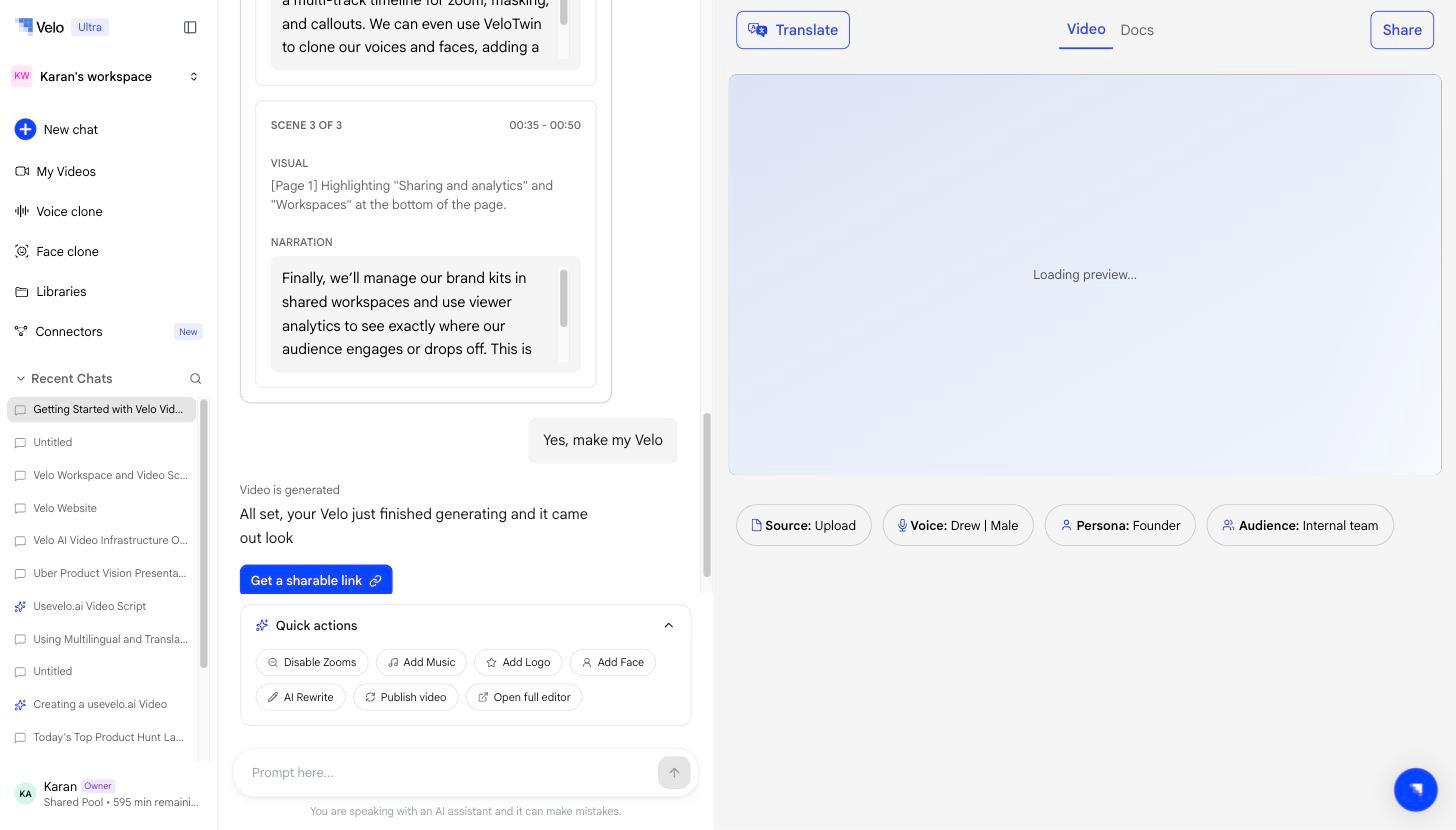
Quick actions menu
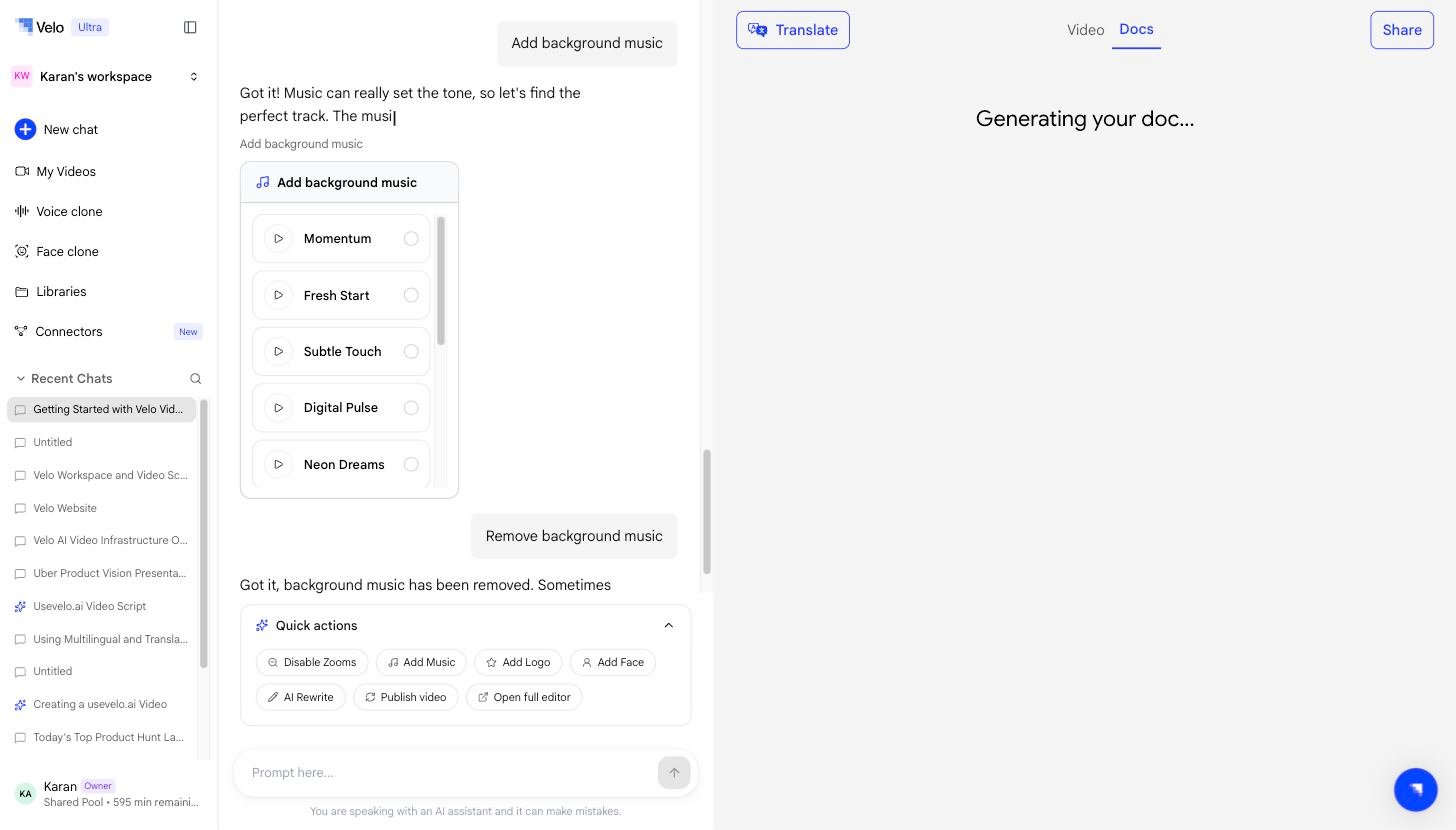
The Quick actions panel offers one-click shortcuts for common video edits. Step 2: Select Add Music and a track list opens in the chat — Momentum, Fresh Start, Subtle Touch, Digital Pulse, Neon Dreams and more. Play any of them before choosing.
Screenshot 2026 05 26 At 9 50 29 PM

The background music menu allows you to preview and apply different audio tracks.
Step 3: Update the visual style by choosing a Background. Select from macOS inspired styles, Abstract gradients, or click Uploaded to provide your own image.

Refining Script and Voice

Step 1: Use Change Voice to swap the narrator or Rewrite script to modify the spoken content. Step 2: When rewriting, select a persona - such as Product Manager, Founder, or Marketing Strategist and define the target audience (e.g., Executives) to ensure the tone matches your goals.
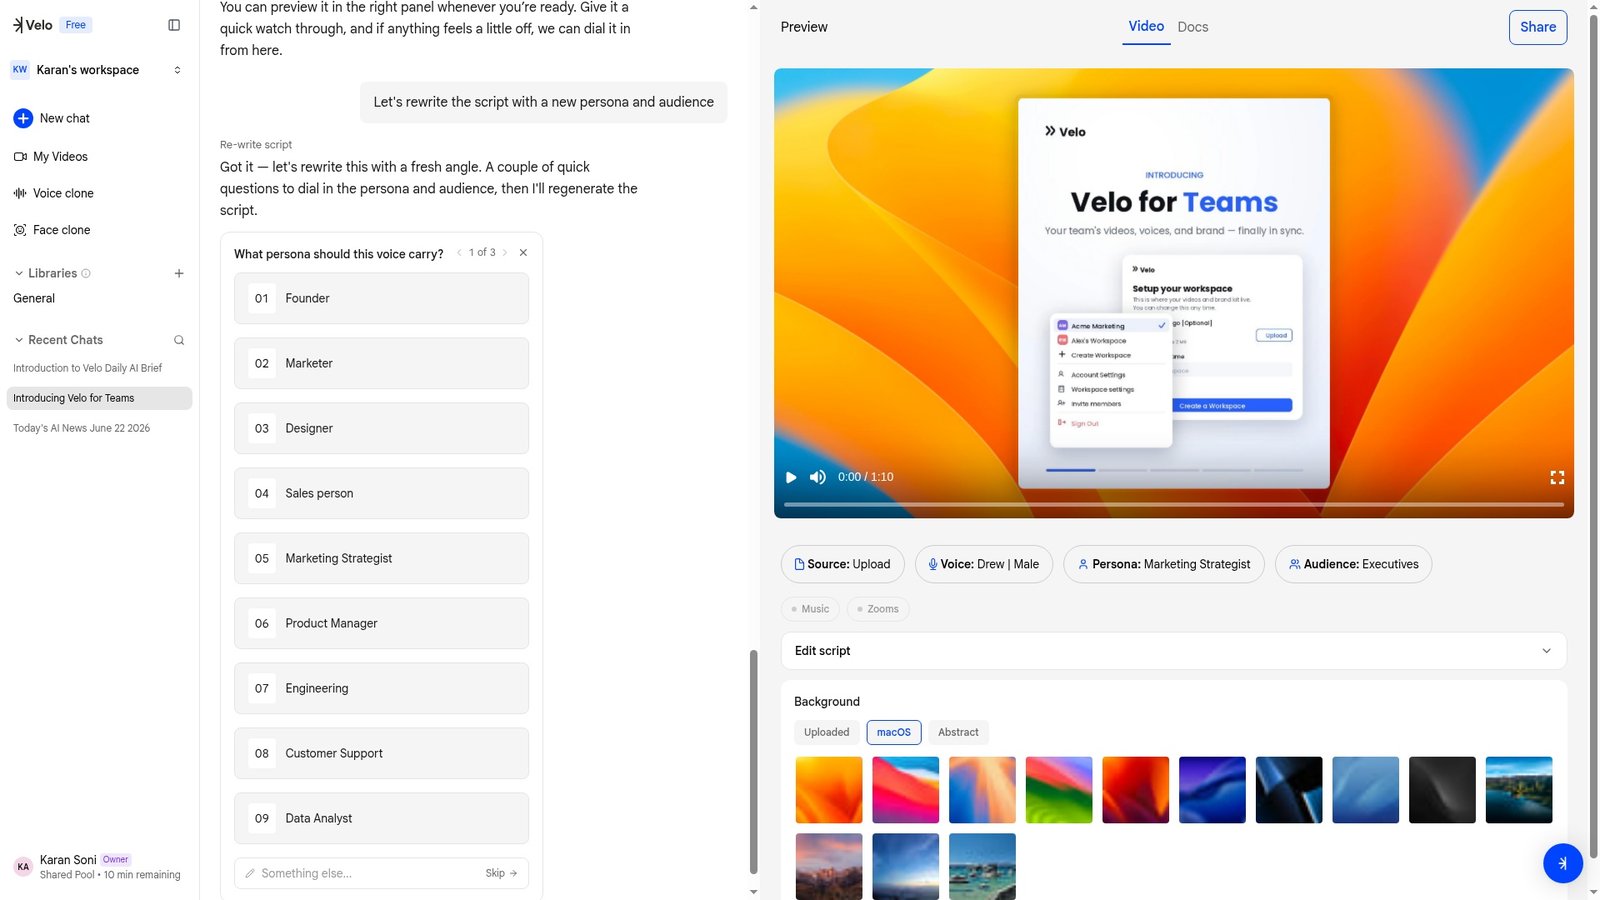
Screenshot 2026 05 27 At 8 57 04 PM
Rewriting the script allows for persona and audience-based tone adjustments. Step 3: Click Republish video to apply all changes and generate a new shareable link.

Exporting and Advanced Editing

Step 1: If the quick actions are insufficient, select Open full editor to access exhaustive editing tools and more detailed background options. Step 2: Once satisfied with the results, select Download MP4 to save the final video file locally. These quick actions provide a streamlined way to iterate on your content directly through the AI assistant interface before finalizing your project.