1. How to change the background of your Velo
You can choose from four different background styles at the top of the menu:- Wallpaper: Select from presets like macOS themes or upload your own image.
- Gradient: Choose a preset gradient or input two custom hex codes to create a smooth color transition.
- Color: Apply a clean, single solid color using a hex code (e.g., #3F37C9).
- Image: Click to select or drag and drop a custom background image from your computer.
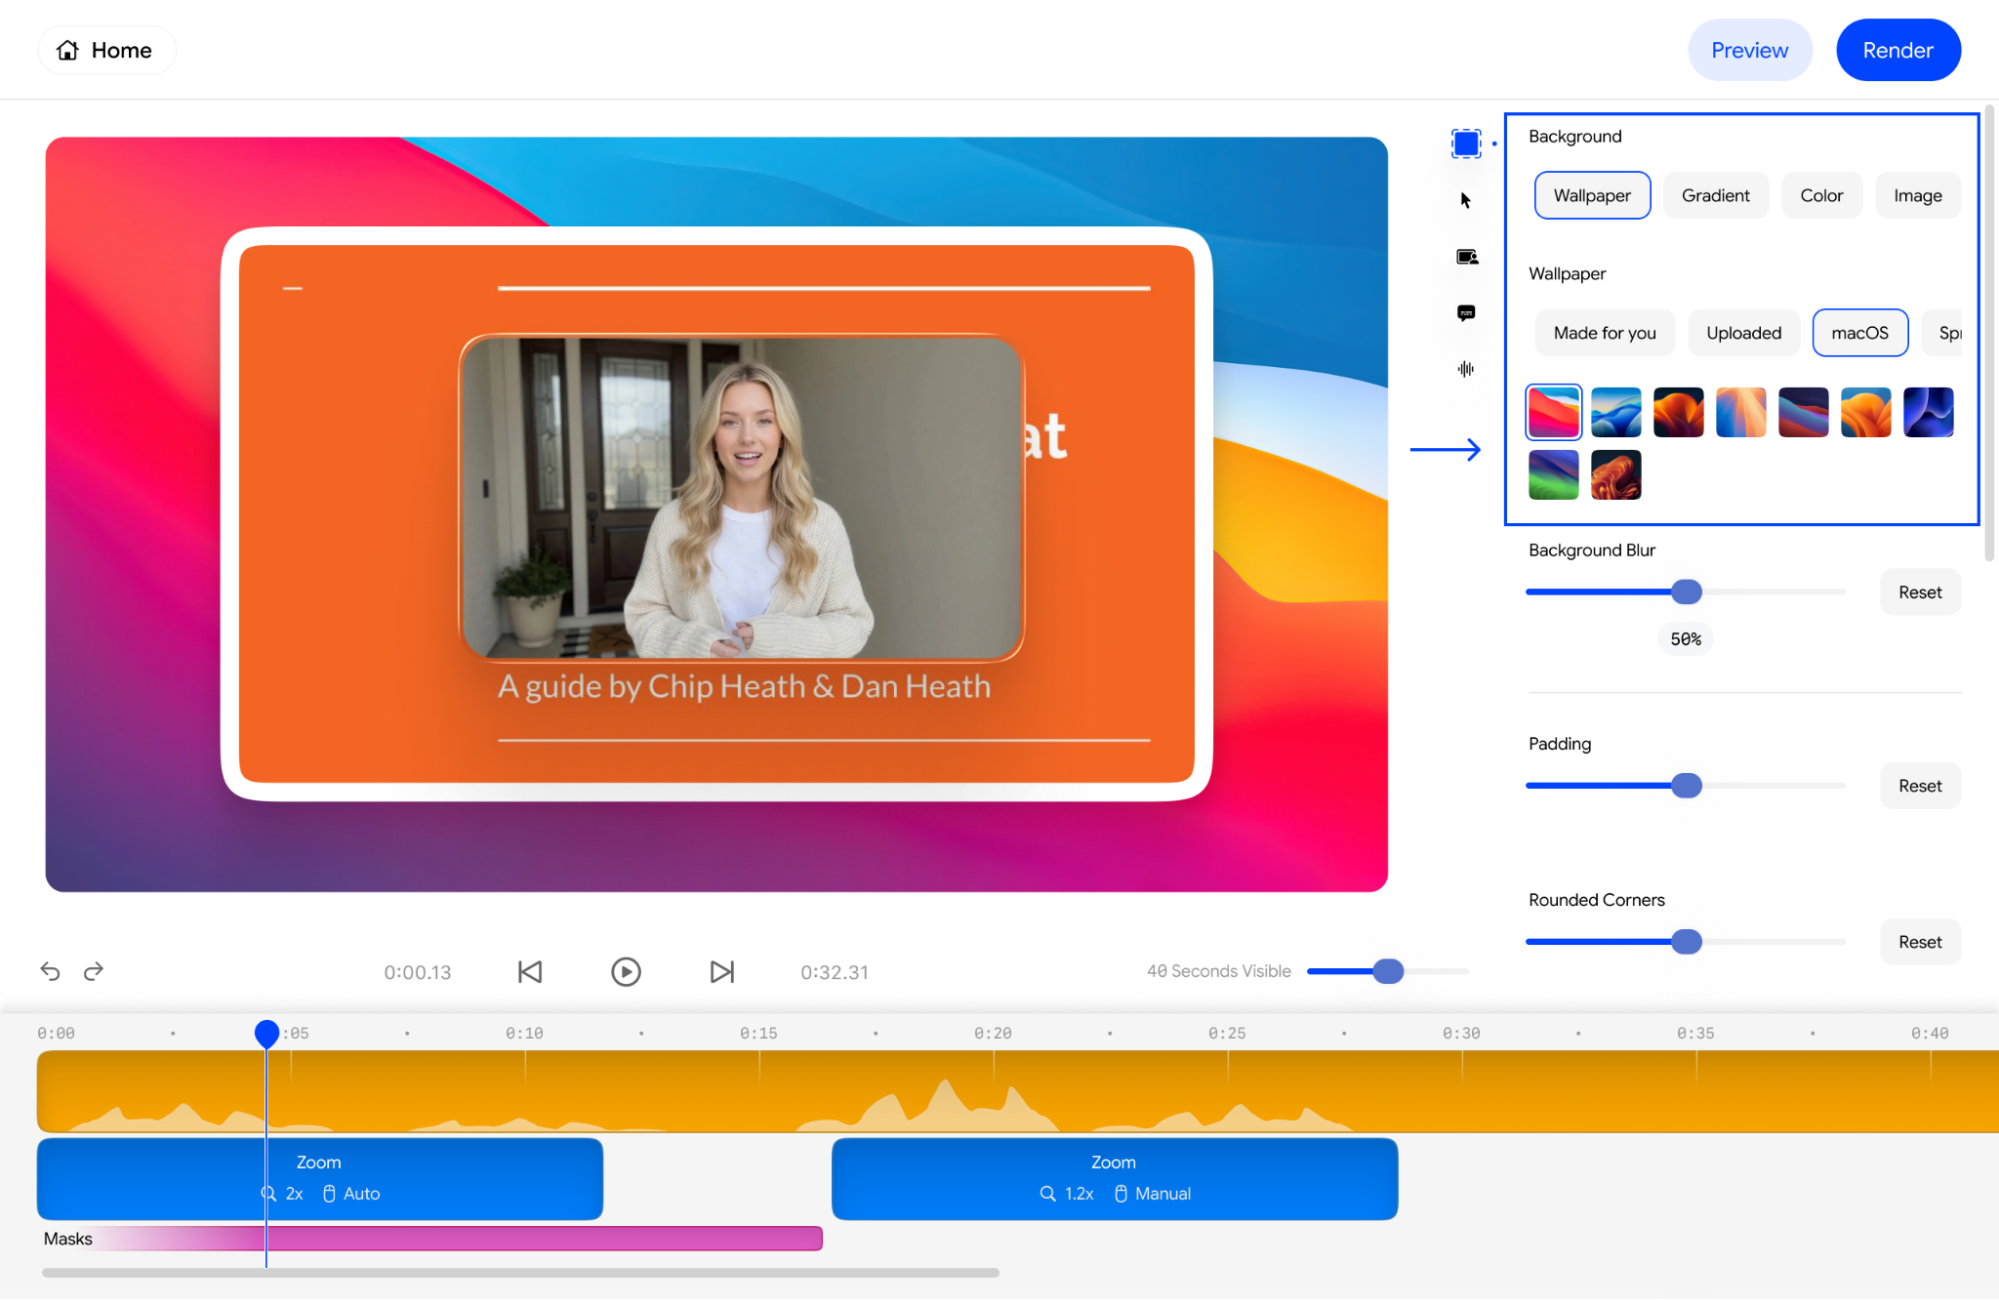
2. How to change the blur level of my background
When you have selected a Wallpaper, you will see a Background Blur slider. Move the slider to the right to increase the blur percentage (e.g., 50%) or click Reset to return to the original sharp image.
3. How to change padding of my velo
The Padding slider controls the amount of space between your product recording and the edge of the background. Sliding it to the right increases the canvas border, giving your recording more “room to breathe”.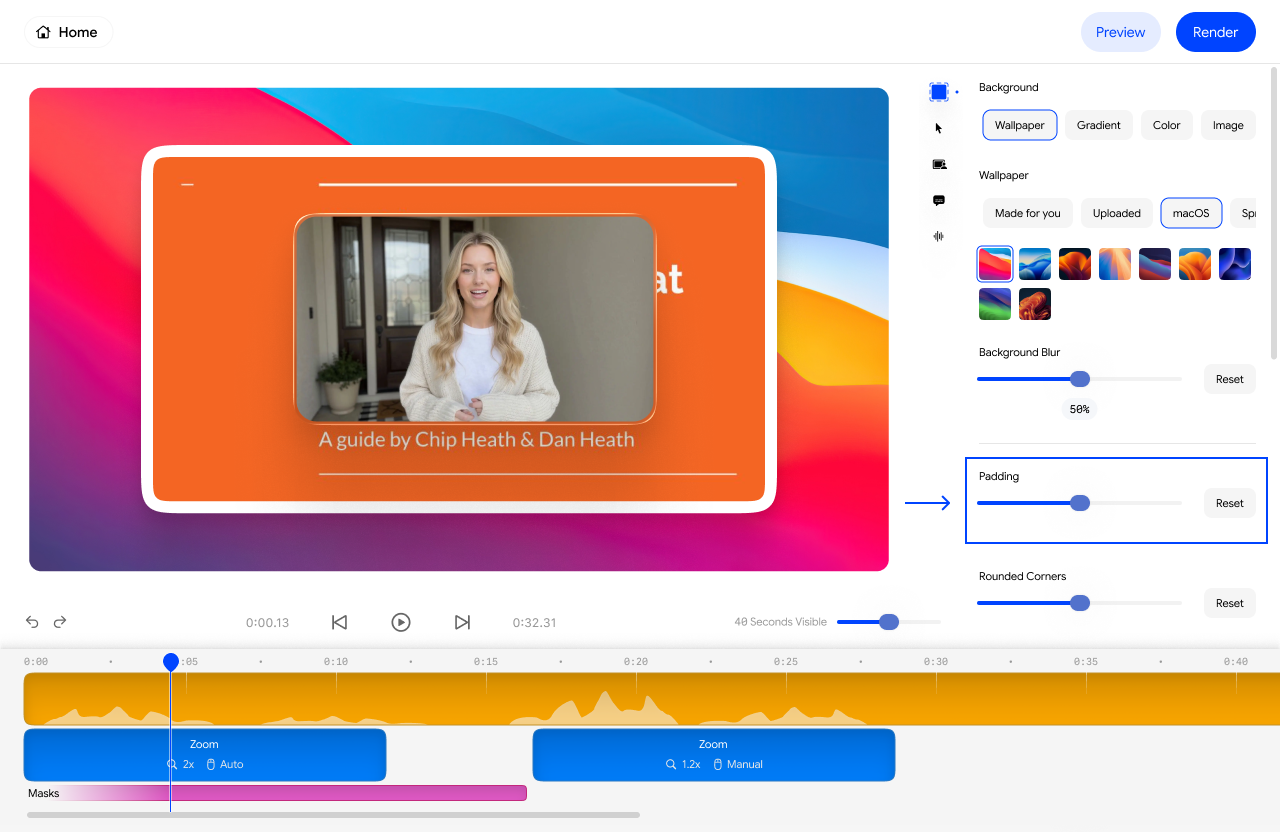
4. How to make my corners rounded in a Velo
Use the Rounded Corners slider to soften the edges of your screen capture. Moving the slider to the right creates a modern, curved look for your recording.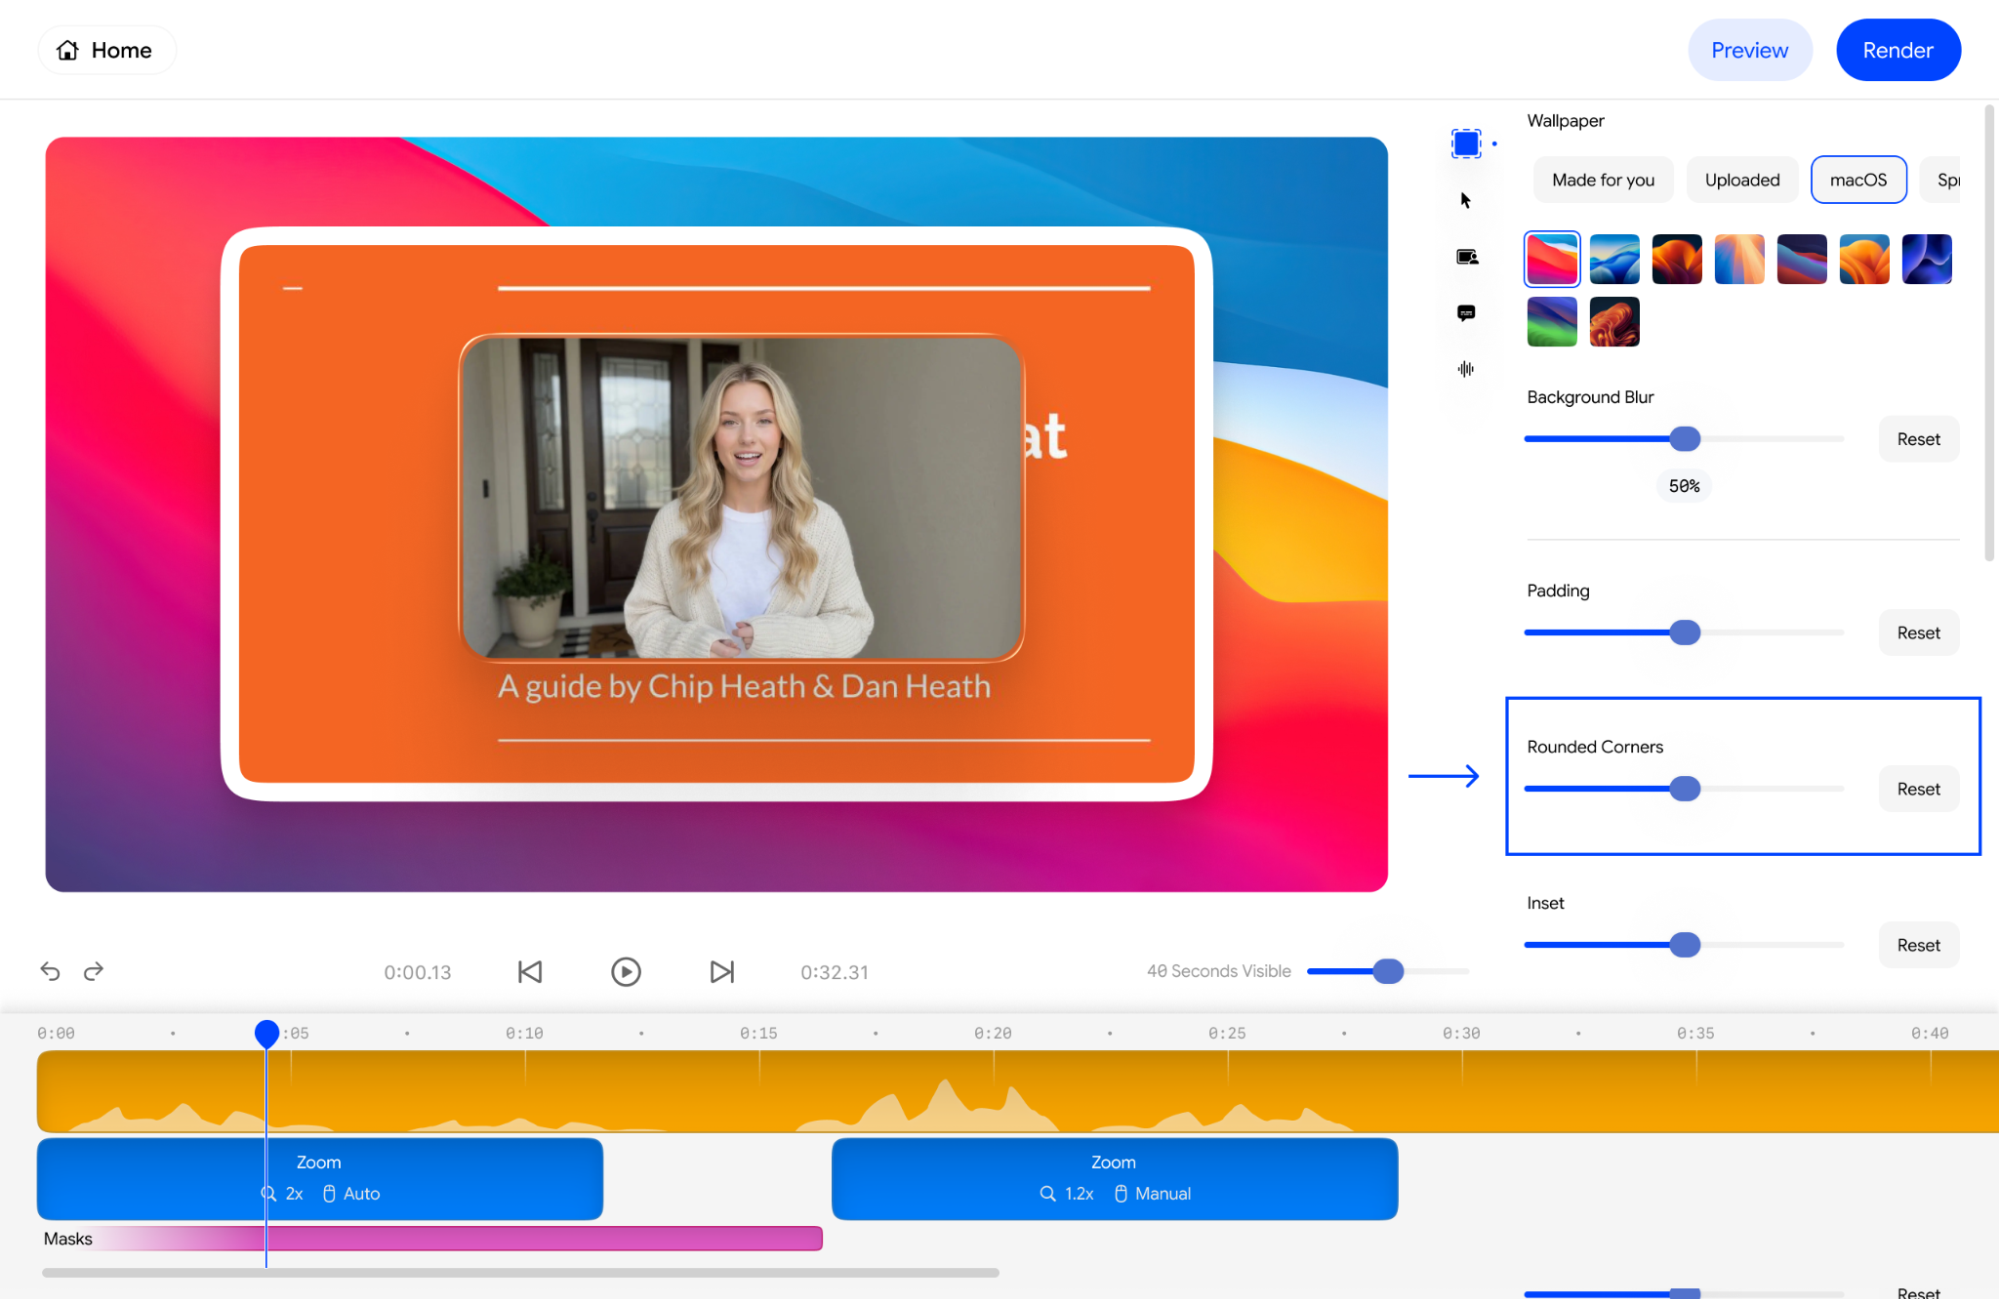
5. How to add inset/border of my velo
You can add a visual border (inset) around your screen recording using the Inset slider. To change the color of this border, go to the Inset Color section and select a preset or enter a specific hex code.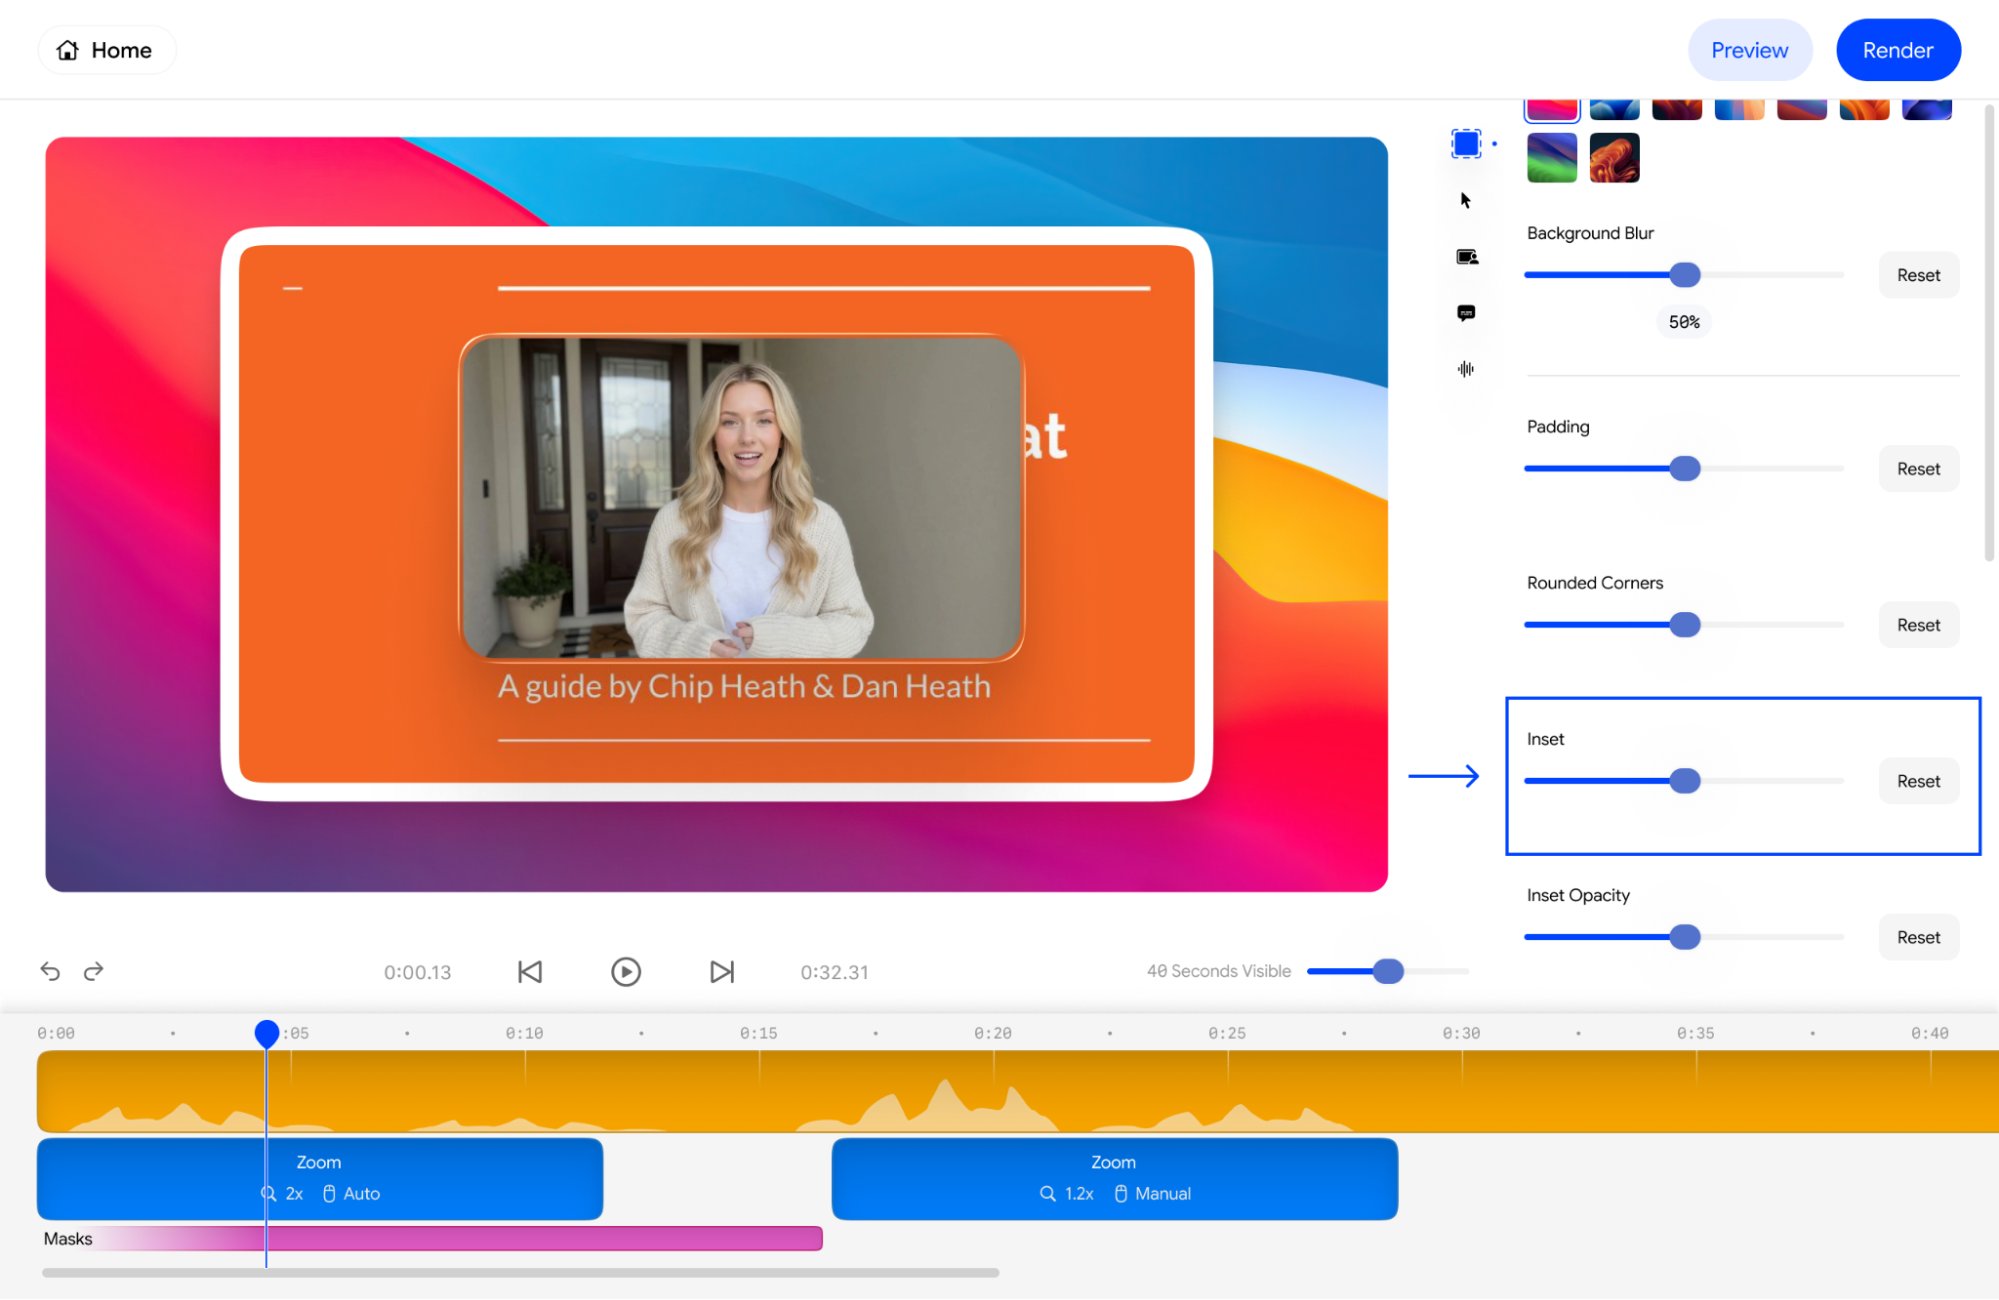
6. How to change inset opacity
The Inset Opacity slider allows you to control how transparent or solid your border appears. This is useful for creating a subtle glass-like effect over your background.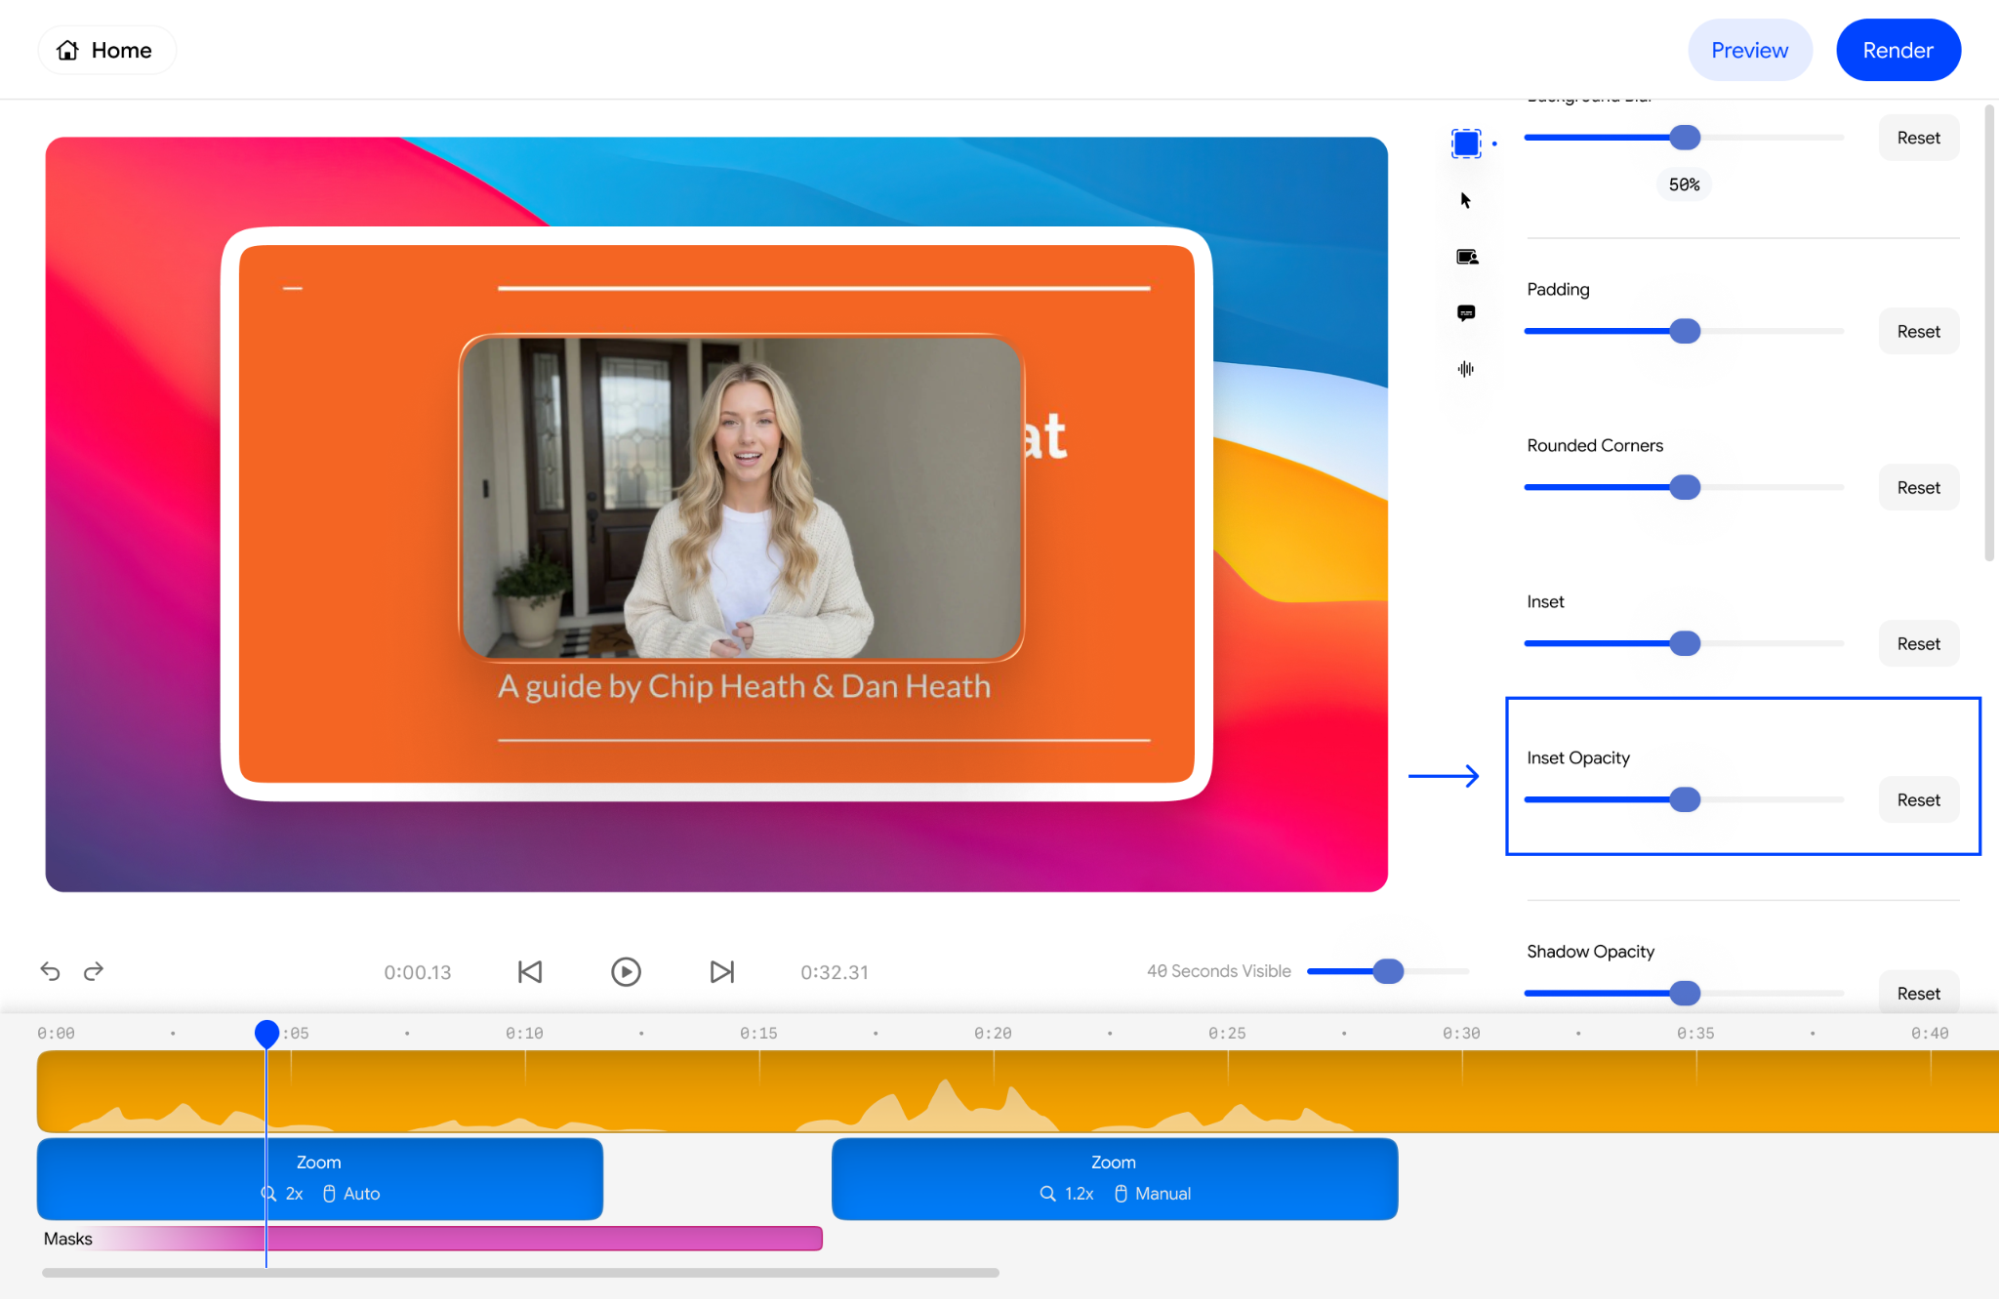
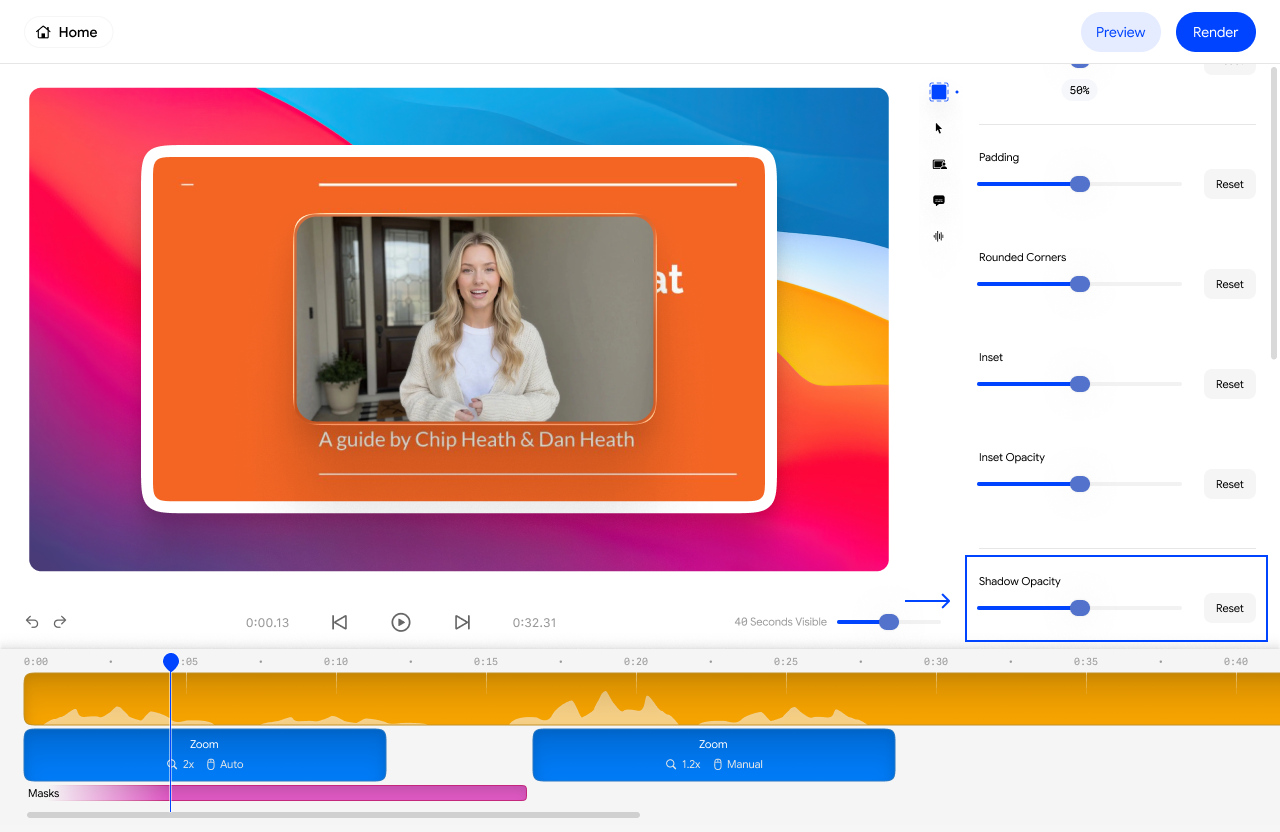
7. Adjusting Shadows on Velo Elements
At the bottom of the Background menu, you will find the Shadow Opacity slider. Adjusting this slider adds depth, making your product recording look like it is floating above the background.