> ## Documentation Index
> Fetch the complete documentation index at: https://docs.usevelo.ai/llms.txt
> Use this file to discover all available pages before exploring further.
# Voice Clone
> Record a short calibration script to create a personalized AI voice for use across all your Velo projects.
Voice cloning allows you to generate high-quality AI narration that sounds exactly like you. By recording a short script, you can create a personalised digital voice to use across all your video projects.
## Accessing the Voice Library
**Step 1:** Select **Voice clone** from the left sidebar navigation menu.
**Step 2:** Review the available options. You can choose from five **Public Voices** or manage your **Custom Voices**.
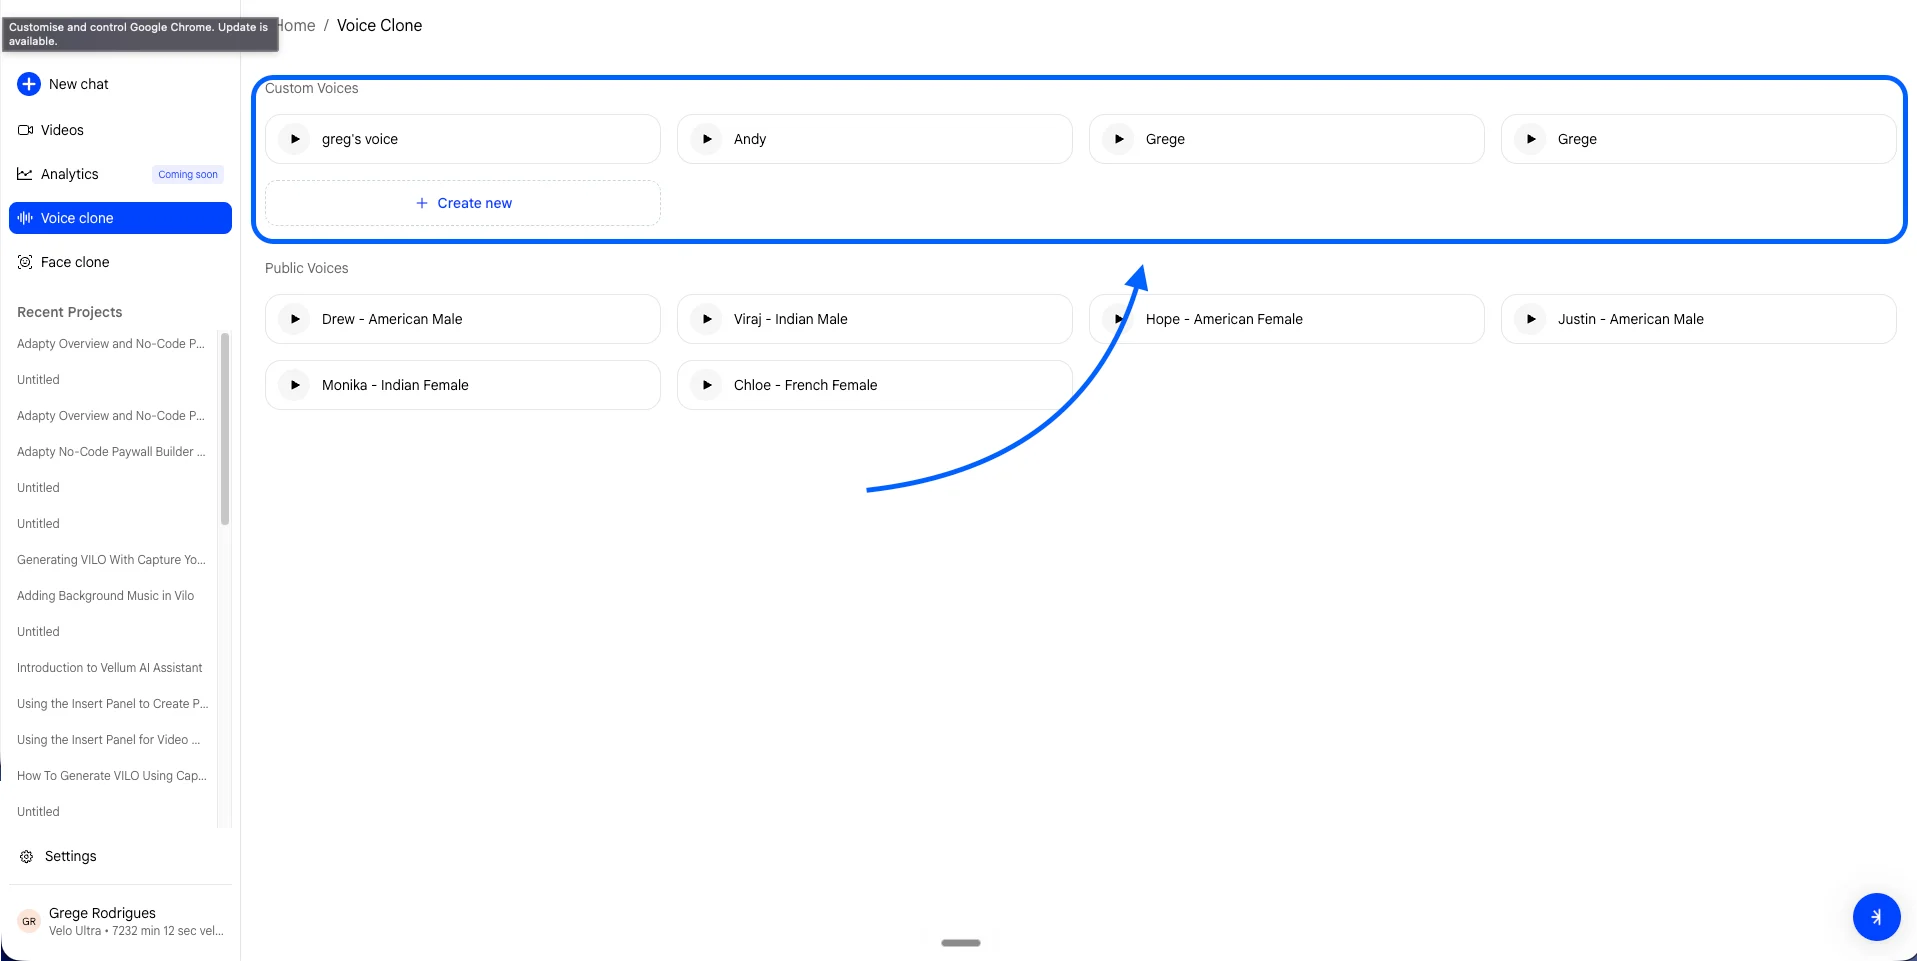 The Voice Clone library featuring custom and public voice options.
## Setting Up a New Clone
**Step 1:** Click **+ Create new** in the Custom Voices section.
**Step 2:** Enter a name for your voice clone in the text field (for example, "Andy") and click **Continue**.
The Voice Clone library featuring custom and public voice options.
## Setting Up a New Clone
**Step 1:** Click **+ Create new** in the Custom Voices section.
**Step 2:** Enter a name for your voice clone in the text field (for example, "Andy") and click **Continue**.
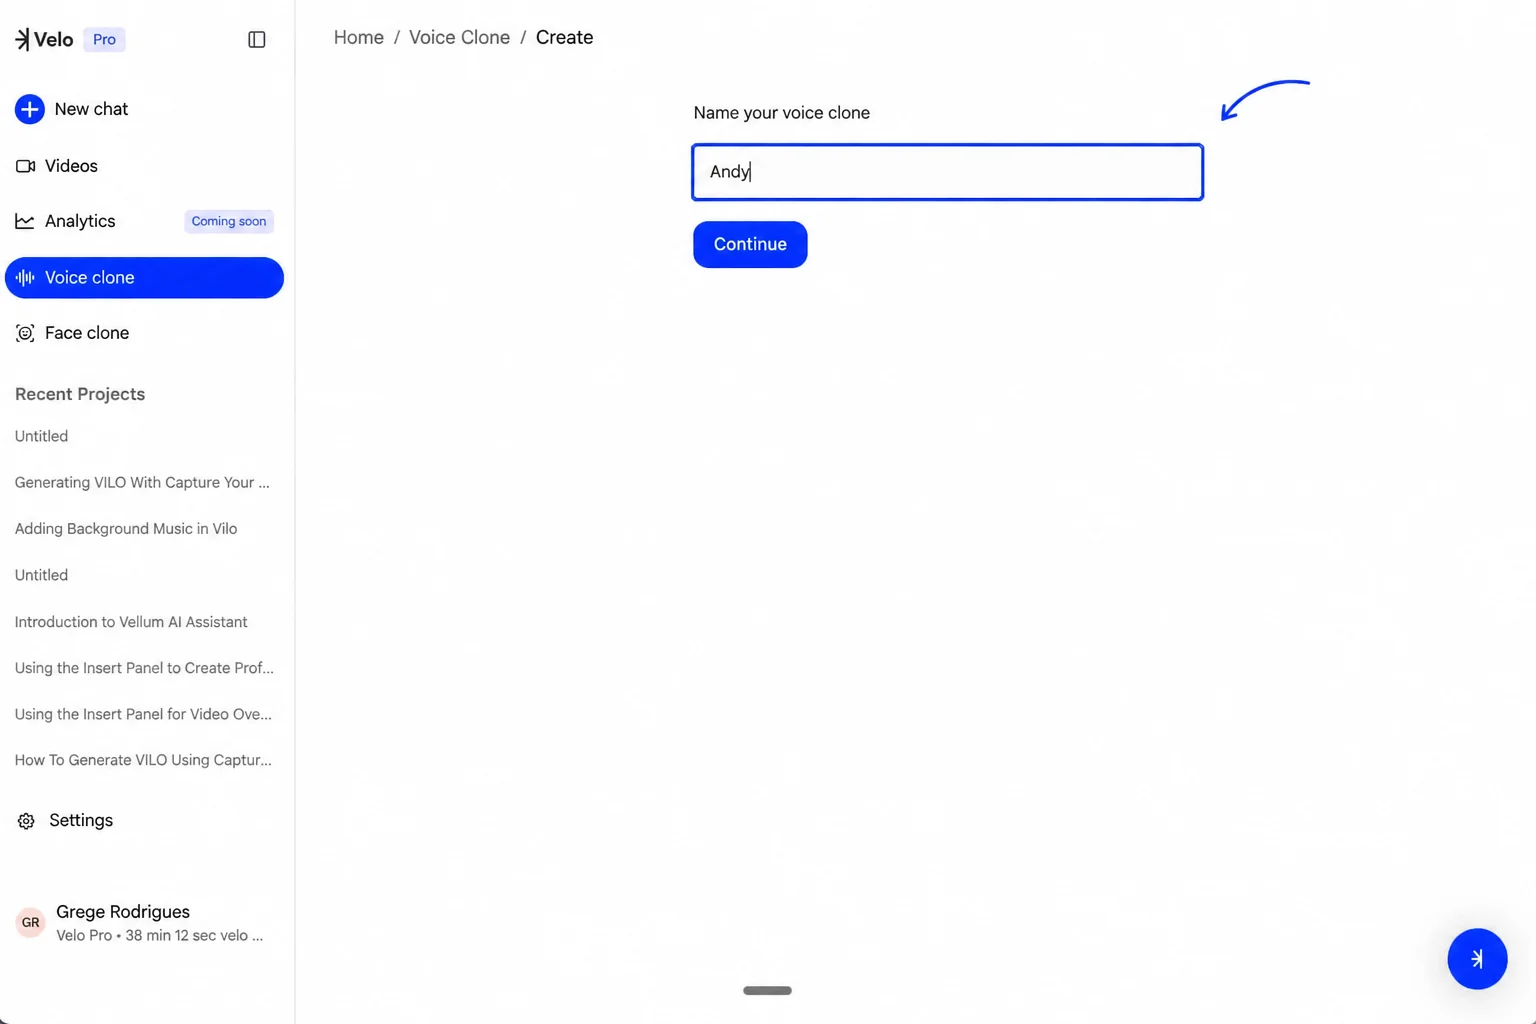 Naming the new custom voice clone before recording.
## Recording the Calibration Script
**Step 1:** Choose your preferred microphone from the dropdown menu.
**Step 2:** Click **Start recording** and read the provided script aloud.
**Step 3:** Speak at a steady pace and maintain a relaxed, natural tone as you would in a normal conversation. This helps the system capture your actual sound so the clone feels natural.
**Step 4:** Click **Finish recording** once you have completed the script.
Naming the new custom voice clone before recording.
## Recording the Calibration Script
**Step 1:** Choose your preferred microphone from the dropdown menu.
**Step 2:** Click **Start recording** and read the provided script aloud.
**Step 3:** Speak at a steady pace and maintain a relaxed, natural tone as you would in a normal conversation. This helps the system capture your actual sound so the clone feels natural.
**Step 4:** Click **Finish recording** once you have completed the script.
.png?fit=max&auto=format&n=Rr1R_9ovDeX34qDf&q=85&s=c97ae03bf9809014b2c8960cc9dd9cee)
.png) The recording interface with the required calibration script.
## Processing and Verification
After you finish recording, Velo will analyze the audio to clean up the sound and create your clone. If the system couldn't capture your voice cleanly - often due to background noise or missed words - you will see a "Couldn't capture your voice" notification. In this case, select **Re-record** to provide a clearer sample.
Once the analysis is complete, your new voice clone will appear in your custom library and is ready for use in any future video projects.
The recording interface with the required calibration script.
## Processing and Verification
After you finish recording, Velo will analyze the audio to clean up the sound and create your clone. If the system couldn't capture your voice cleanly - often due to background noise or missed words - you will see a "Couldn't capture your voice" notification. In this case, select **Re-record** to provide a clearer sample.
Once the analysis is complete, your new voice clone will appear in your custom library and is ready for use in any future video projects.
.png?fit=max&auto=format&n=Rr1R_9ovDeX34qDf&q=85&s=94dd211eb7e0910edfcfb37f5018976d)
.png) The custom voice library with the newly created clone ready for use.
The custom voice library with the newly created clone ready for use.