> ## Documentation Index
> Fetch the complete documentation index at: https://docs.usevelo.ai/llms.txt
> Use this file to discover all available pages before exploring further.
# Creating a video
> A full walkthrough of turning a prompt into a finished video.
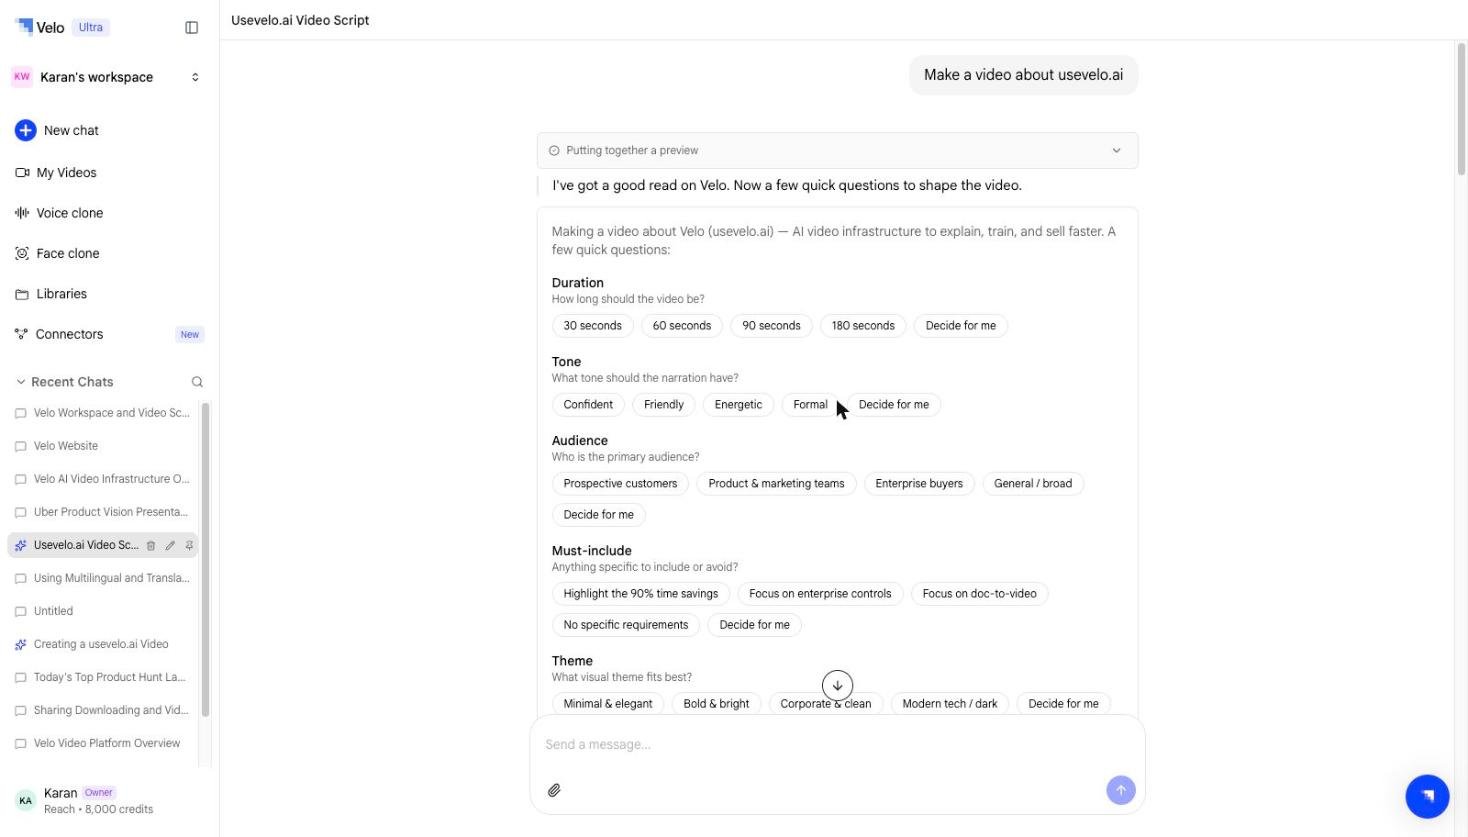 Velo builds a **live preview** in the panel as it works. The hint under it reads *"Live preview — ask for changes, or render when you're happy"* — so you can keep adjusting by message before committing to a render.
From your workspace, select **New chat → Prompt**. You'll land in a conversation with the Prompt to Video agent.
Type what you want the video to explain — for example, "Explain our new pricing tiers to existing customers" or "Walk a new hire through how our onboarding flow works." Be as specific as you'd be briefing a teammate.
If you want the script grounded in real product or company context, attach a [knowledge base, MCP server, or application](/prompt-to-video/connectors/overview). This step is optional — the agent can also work from your prompt alone.
The agent researches your topic and returns a script. Read it over, and ask for changes directly in the conversation — for example, "make this shorter" or "add a section on refunds."
Select a public voice or your own cloned voice (see [Voice clone](/velotwin/voice-clone)) for the voiceover.
Once you approve the script and voice, the agent renders the video. It appears in **My Videos** like any other videos — ready to share, edit further, or track.
## After it's rendered
A Prompt to Video video behaves like any other video in your workspace: it can be shared with a link, embedded, translated into other languages (see [Multilingual output](/editing-velo/translations)), and tracked with the same [view analytics](/creating-a-velo/video-analytics). You can also continue editing it by prompt — see [Editing in Prompt to Video](/prompt-to-video/editing).
## Rendering and sharing
When the preview is right, select **Render & share this video**. Velo offers an **Add background music** step, which you can take or **Skip**.
Velo builds a **live preview** in the panel as it works. The hint under it reads *"Live preview — ask for changes, or render when you're happy"* — so you can keep adjusting by message before committing to a render.
From your workspace, select **New chat → Prompt**. You'll land in a conversation with the Prompt to Video agent.
Type what you want the video to explain — for example, "Explain our new pricing tiers to existing customers" or "Walk a new hire through how our onboarding flow works." Be as specific as you'd be briefing a teammate.
If you want the script grounded in real product or company context, attach a [knowledge base, MCP server, or application](/prompt-to-video/connectors/overview). This step is optional — the agent can also work from your prompt alone.
The agent researches your topic and returns a script. Read it over, and ask for changes directly in the conversation — for example, "make this shorter" or "add a section on refunds."
Select a public voice or your own cloned voice (see [Voice clone](/velotwin/voice-clone)) for the voiceover.
Once you approve the script and voice, the agent renders the video. It appears in **My Videos** like any other videos — ready to share, edit further, or track.
## After it's rendered
A Prompt to Video video behaves like any other video in your workspace: it can be shared with a link, embedded, translated into other languages (see [Multilingual output](/editing-velo/translations)), and tracked with the same [view analytics](/creating-a-velo/video-analytics). You can also continue editing it by prompt — see [Editing in Prompt to Video](/prompt-to-video/editing).
## Rendering and sharing
When the preview is right, select **Render & share this video**. Velo offers an **Add background music** step, which you can take or **Skip**.
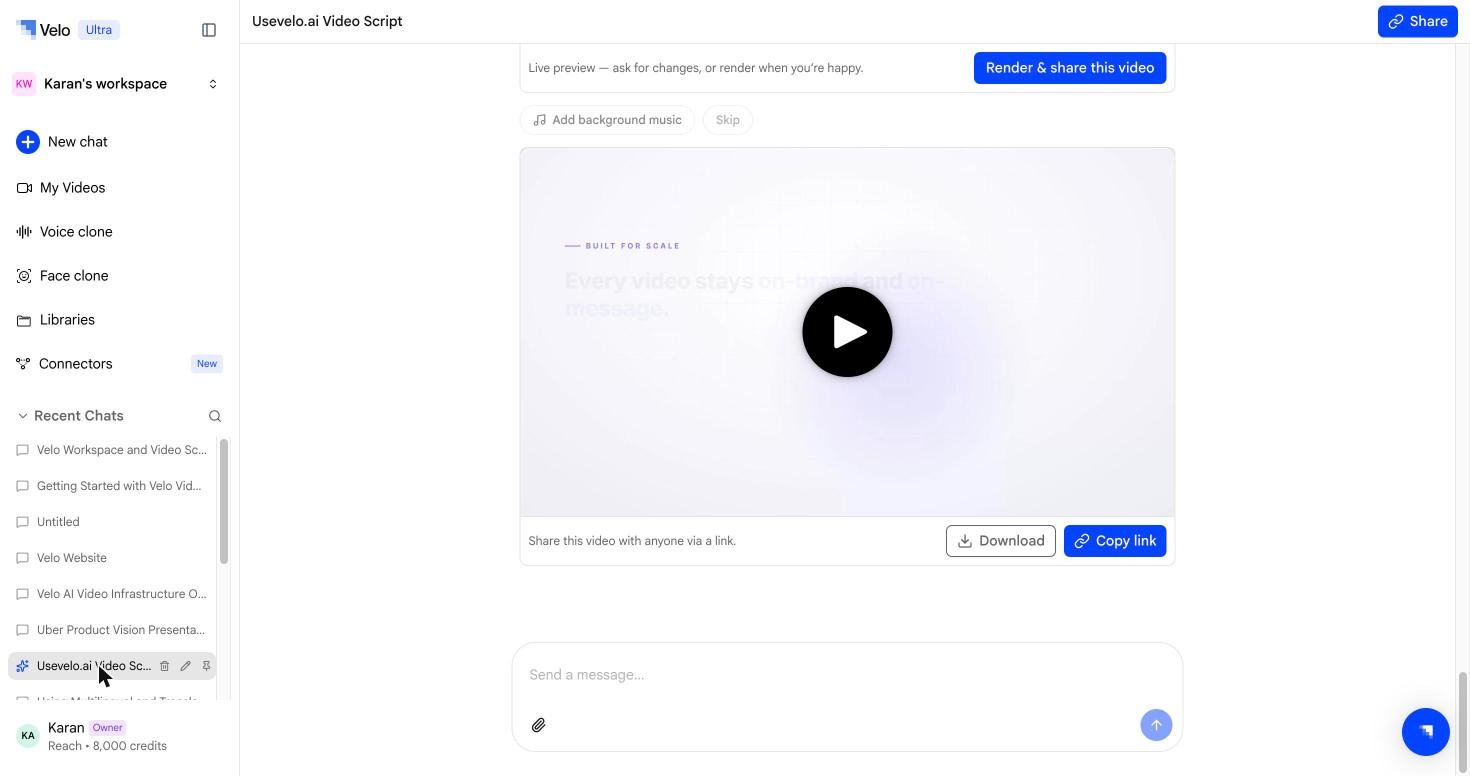 The finished video appears with **Download** and **Copy link** beneath it. From there it behaves like any other video — see [Sharing](/creating-a-velo/sharing) and [Video analytics](/creating-a-velo/video-analytics).