> ## Documentation Index
> Fetch the complete documentation index at: https://docs.usevelo.ai/llms.txt
> Use this file to discover all available pages before exploring further.
# Editing & Sharing
> Customize and format your generated Velo documents using direct text editing and the slash command menu.
Velo allows you to customize and structure your generated documents through direct text editing and a command-driven formatting menu. You can modify the narrative, adjust the hierarchy of information, and insert visual evidence directly from your project's recorded frames.
## Modifying Content
To edit existing text, click anywhere on the page and begin typing. You can update descriptions or rewrite sections to better align with your specific requirements.
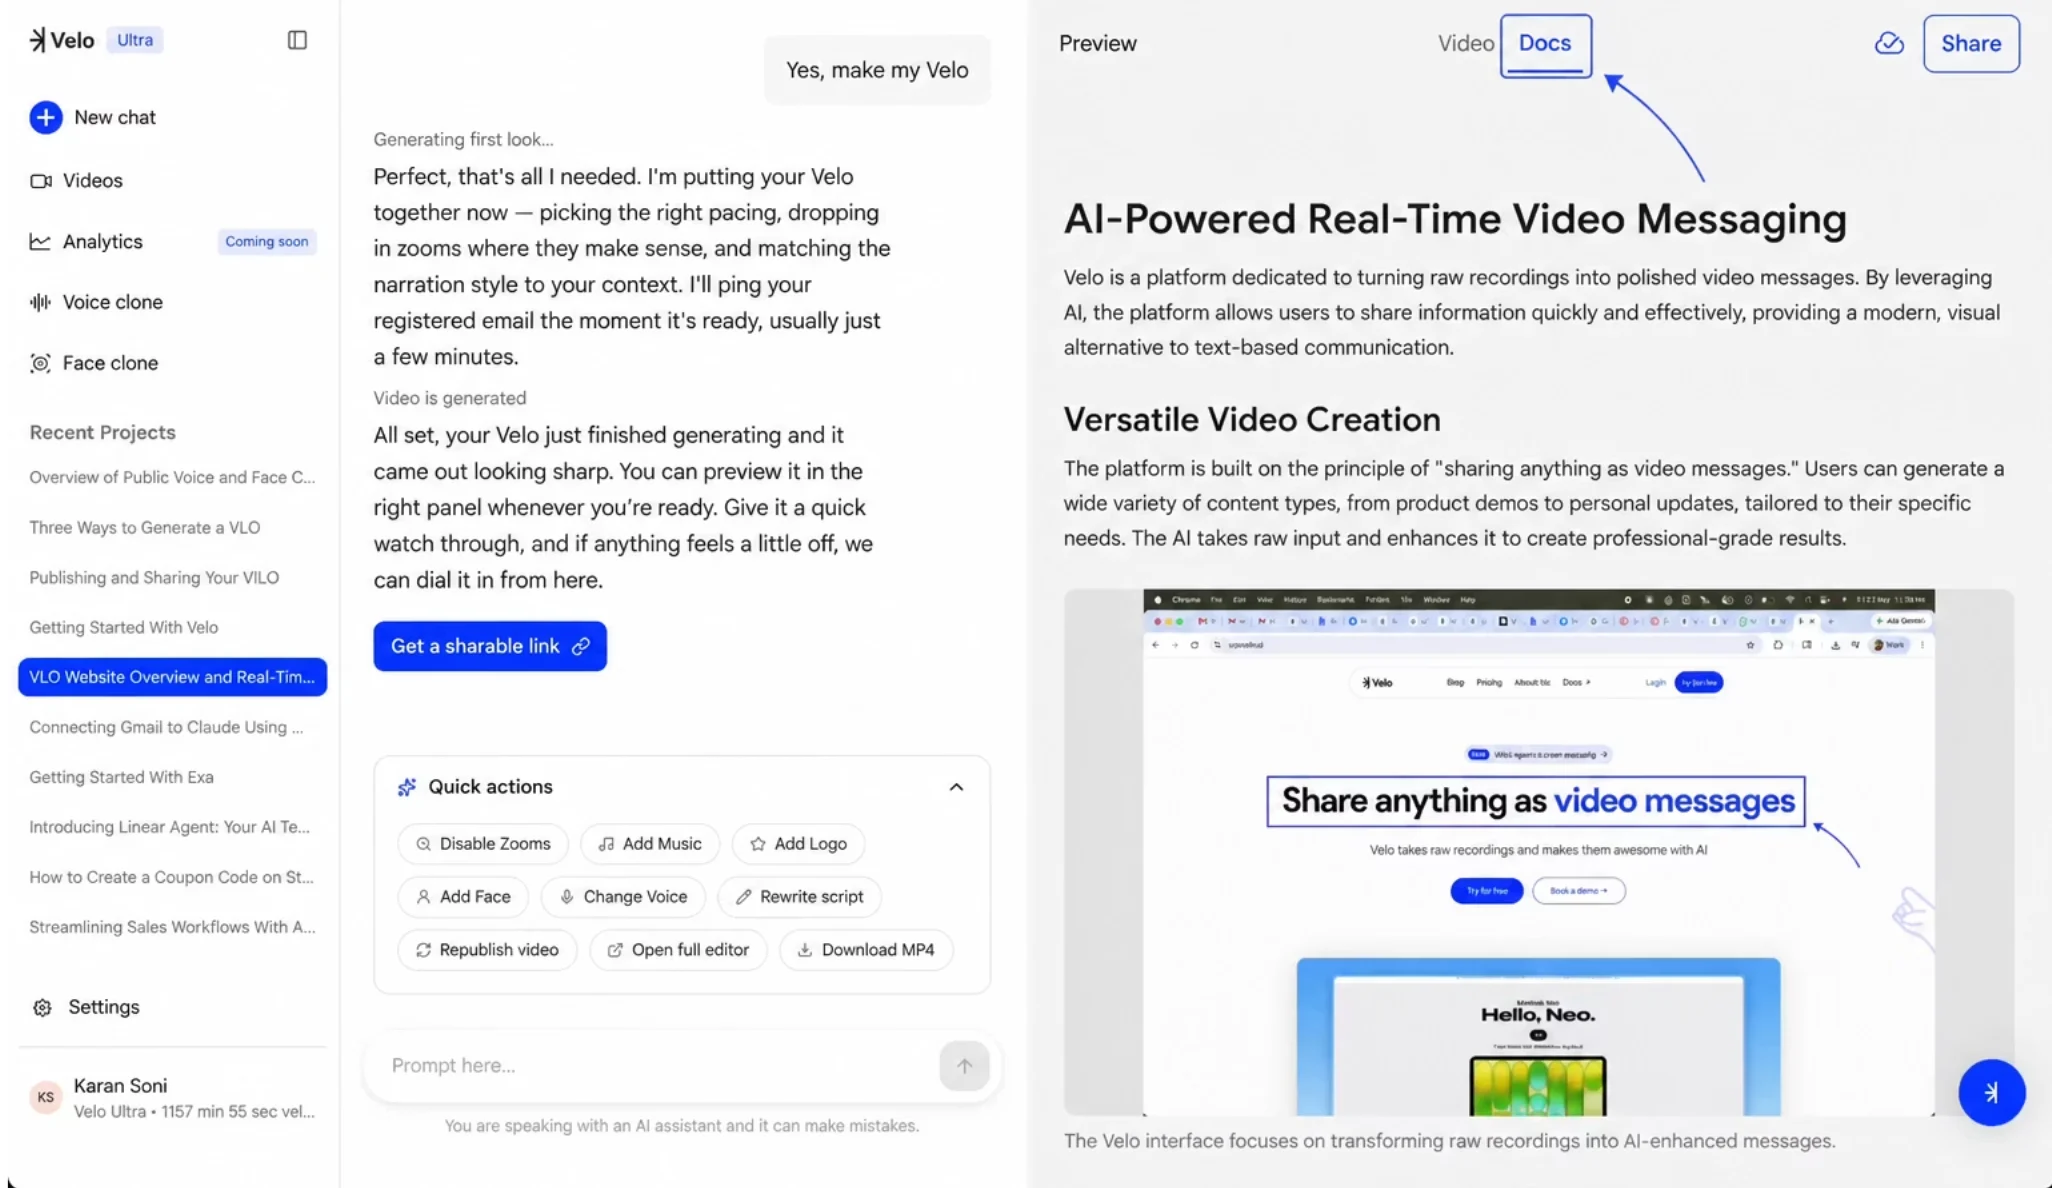 Editing document text directly in the Preview panel.
## Adding Sections and Formatting
To introduce new sections or change the style of your content, use the command menu.
**Step 1:** Create a new line and type a forward slash /.
**Step 2:** Select a formatting option from the dropdown menu. \
Options include; **Heading 1, Heading 2**, and **Heading 3** for document structure; **Bullet List** and **Numbered List** for sequential data; **Code** blocks for technical snippets; **Quote** for emphasis; and **Divider** to separate themes visually.to separate themes visually.
Editing document text directly in the Preview panel.
## Adding Sections and Formatting
To introduce new sections or change the style of your content, use the command menu.
**Step 1:** Create a new line and type a forward slash /.
**Step 2:** Select a formatting option from the dropdown menu. \
Options include; **Heading 1, Heading 2**, and **Heading 3** for document structure; **Bullet List** and **Numbered List** for sequential data; **Code** blocks for technical snippets; **Quote** for emphasis; and **Divider** to separate themes visually.to separate themes visually.
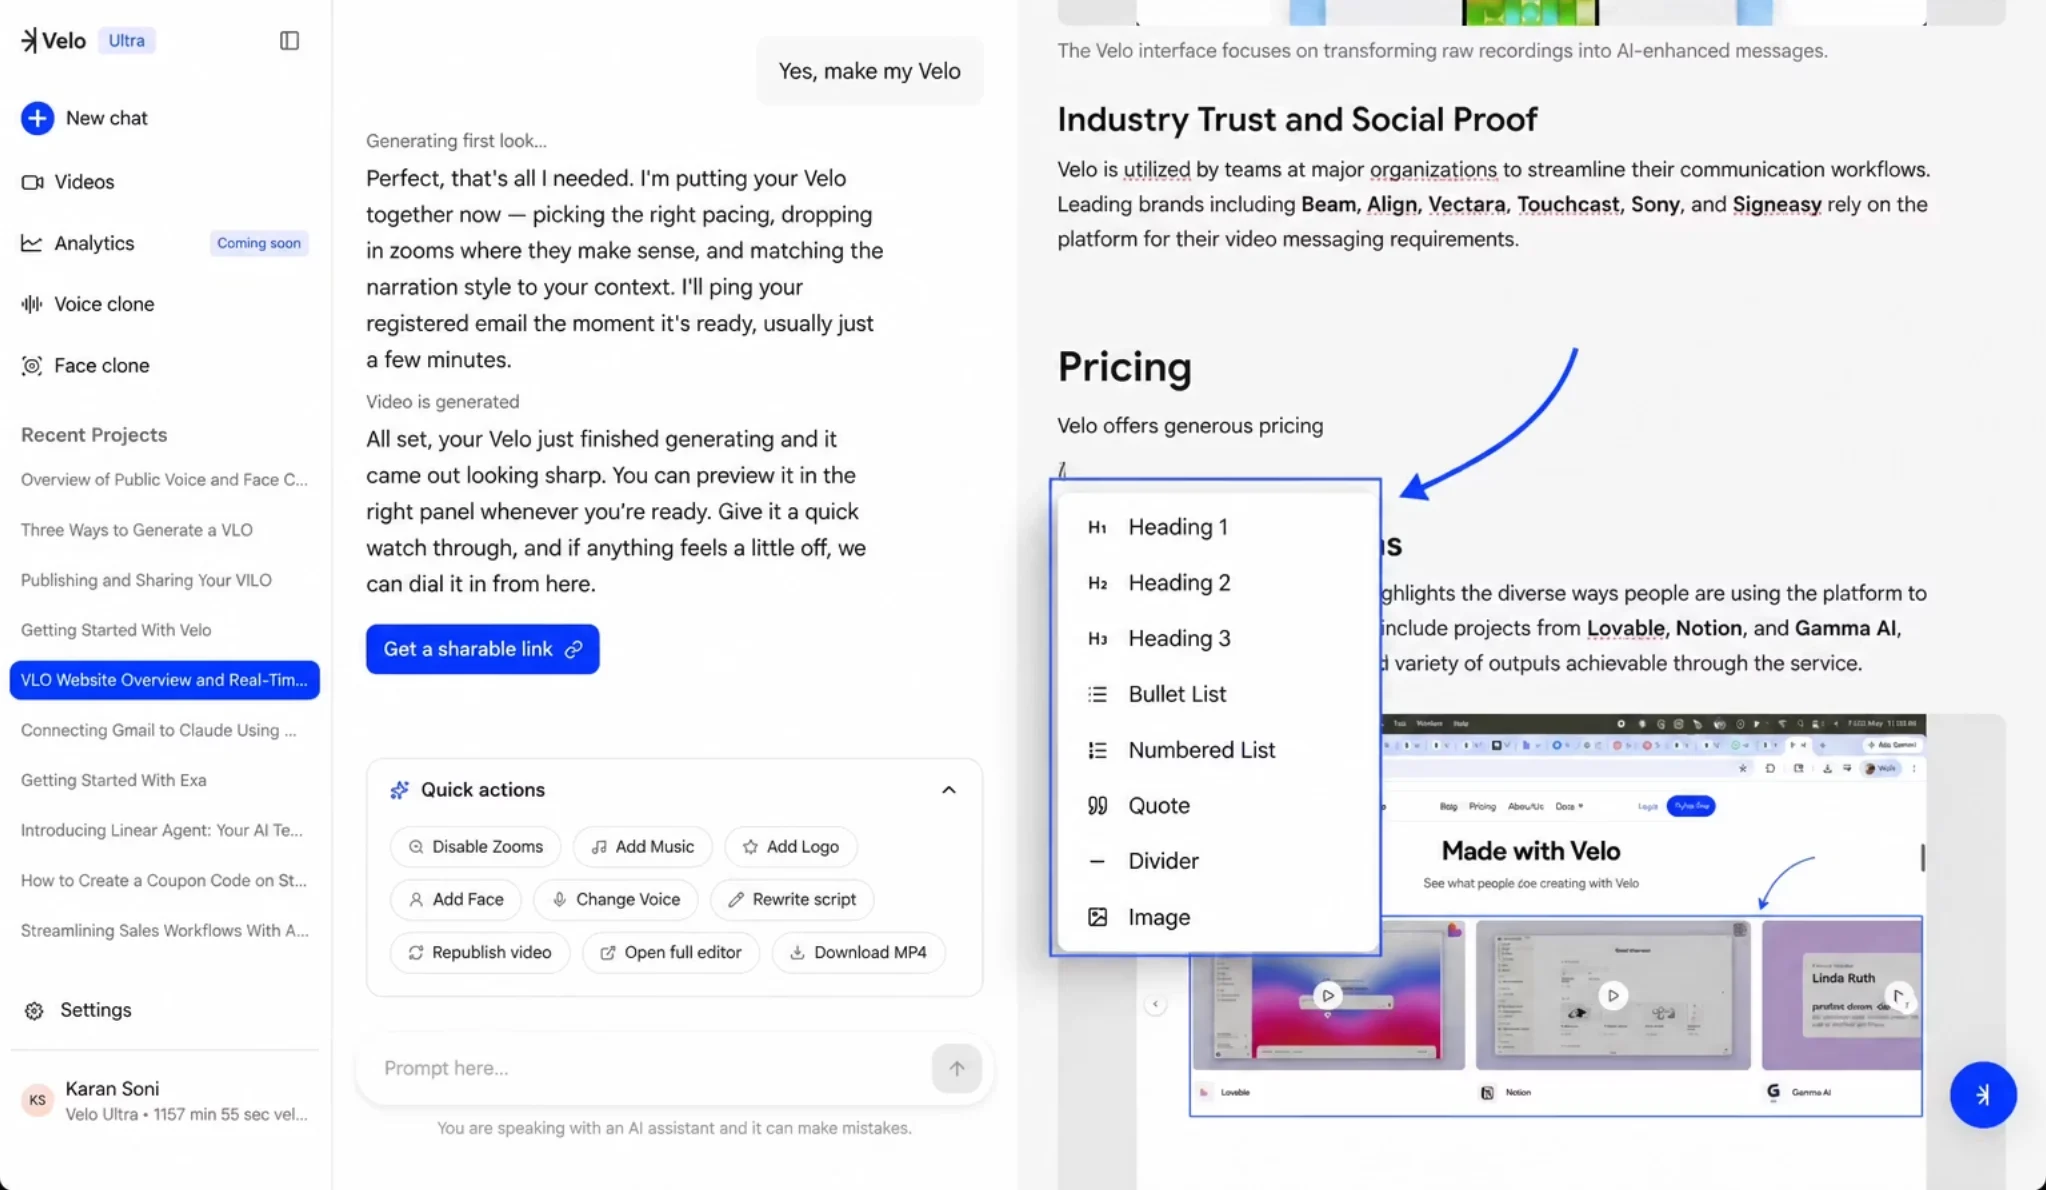 The slash command menu displaying formatting and insertion options.
## Inserting Project Screenshots
You can supplement your documentation with visual context by pulling screenshots directly from the video generation process.
**Step 1:** Type `/` and select **Image** from the menu.
**Step 2:** Browse the **Insert screenshot** gallery, which contains all frames captured during the Velo's creation.
**Step 3:** Click a specific frame to embed it into your document.
The slash command menu displaying formatting and insertion options.
## Inserting Project Screenshots
You can supplement your documentation with visual context by pulling screenshots directly from the video generation process.
**Step 1:** Type `/` and select **Image** from the menu.
**Step 2:** Browse the **Insert screenshot** gallery, which contains all frames captured during the Velo's creation.
**Step 3:** Click a specific frame to embed it into your document.
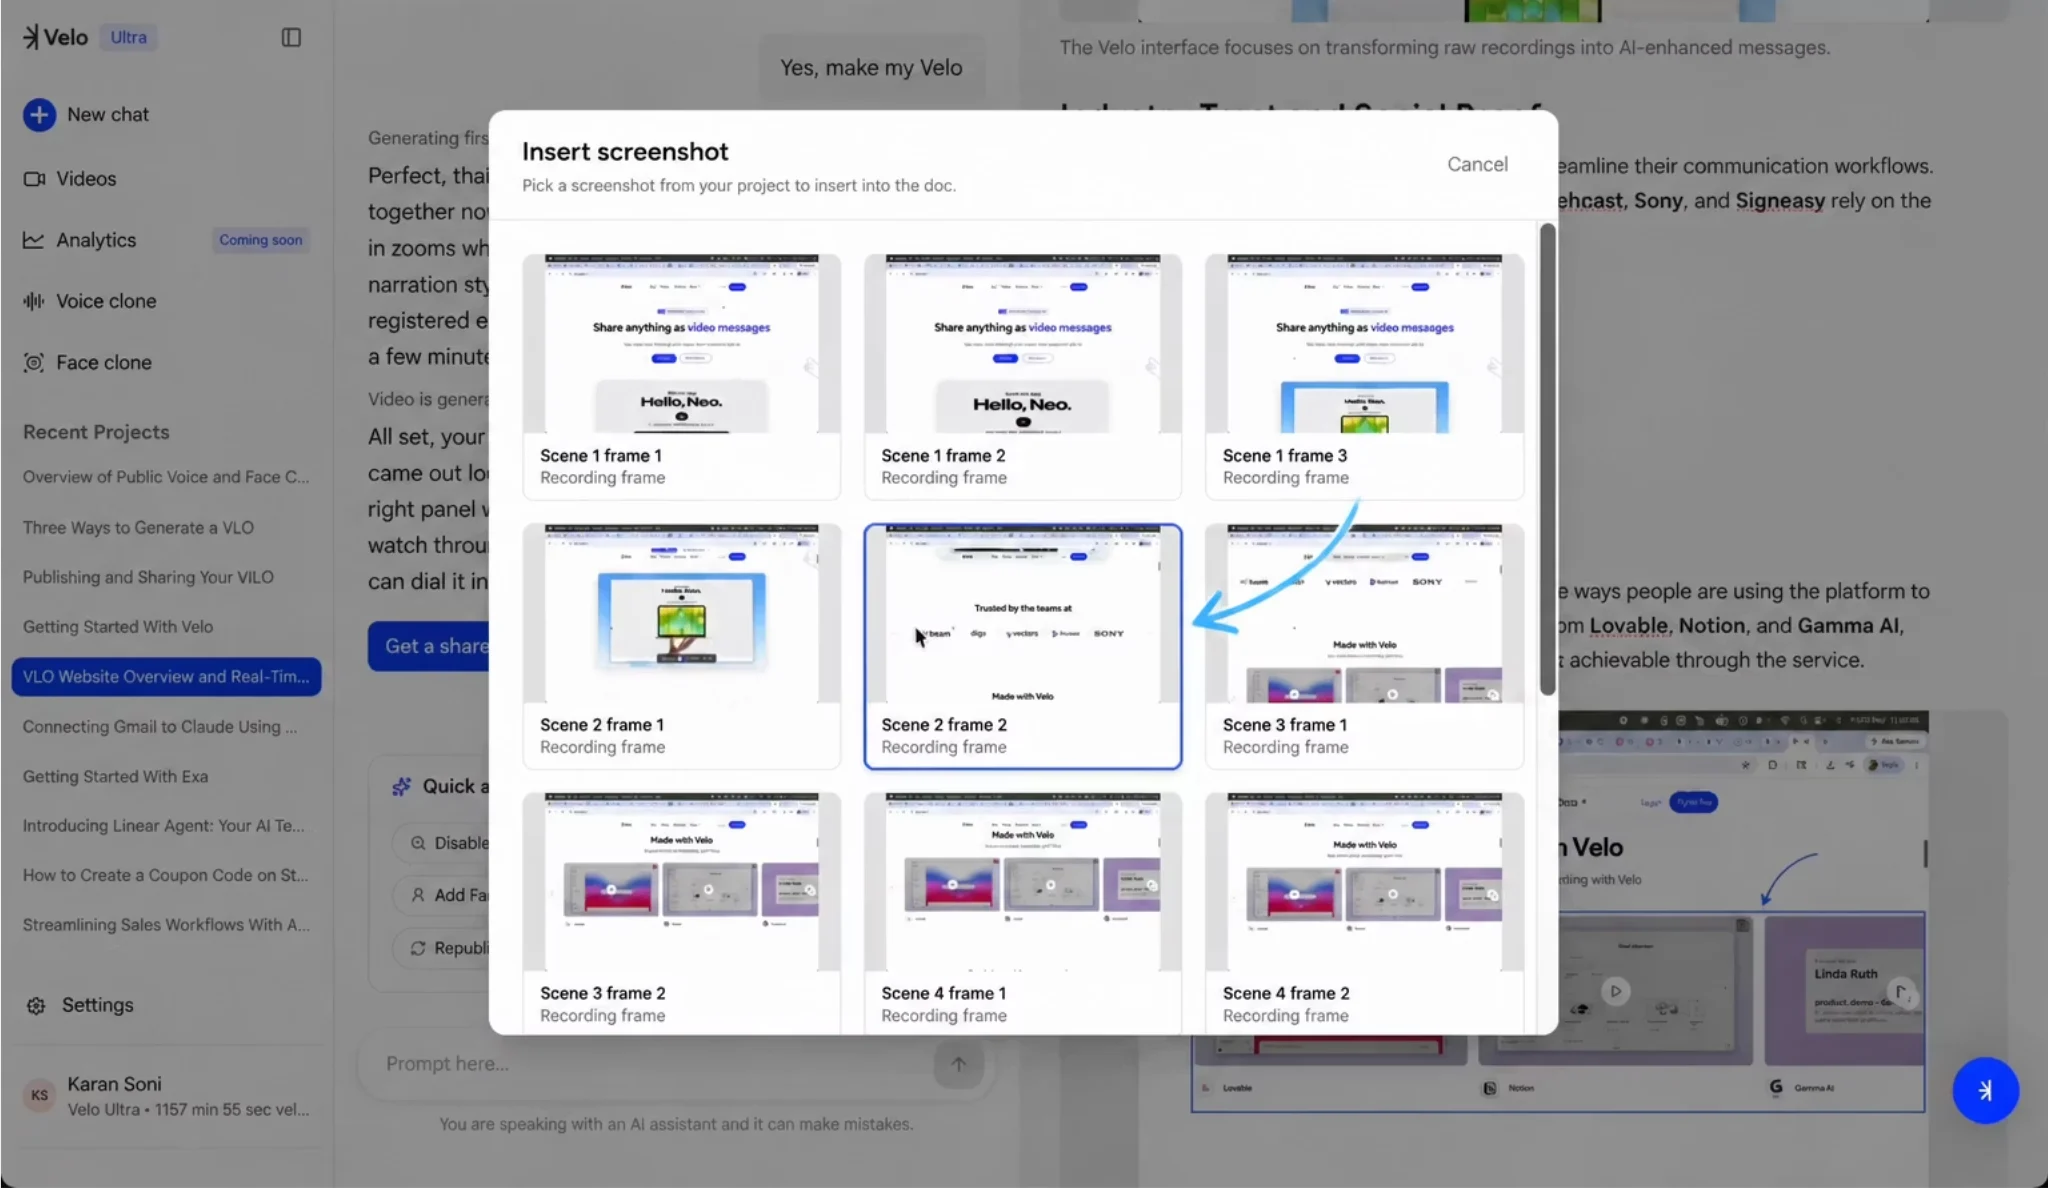 The screenshot gallery showing available frames from the recording.
Once selected, the image will appear directly within the flow of your document text.
The screenshot gallery showing available frames from the recording.
Once selected, the image will appear directly within the flow of your document text.