> ## Documentation Index
> Fetch the complete documentation index at: https://docs.usevelo.ai/llms.txt
> Use this file to discover all available pages before exploring further.
# Capture Screen
> Record your desktop, a window, or a browser tab to create a polished Velo video message using the Velo extension.
The Capture Screen feature allows you to record your desktop, specific windows, or browser tabs to create polished video messages. Using the Velo extension, you can choose between different processing modes to either see results instantly or let the AI enhance the video after you finish.
## Configuring Recording Settings
**Step 1:** Select **Capture screen** from the main dashboard to open the recording configuration panel.
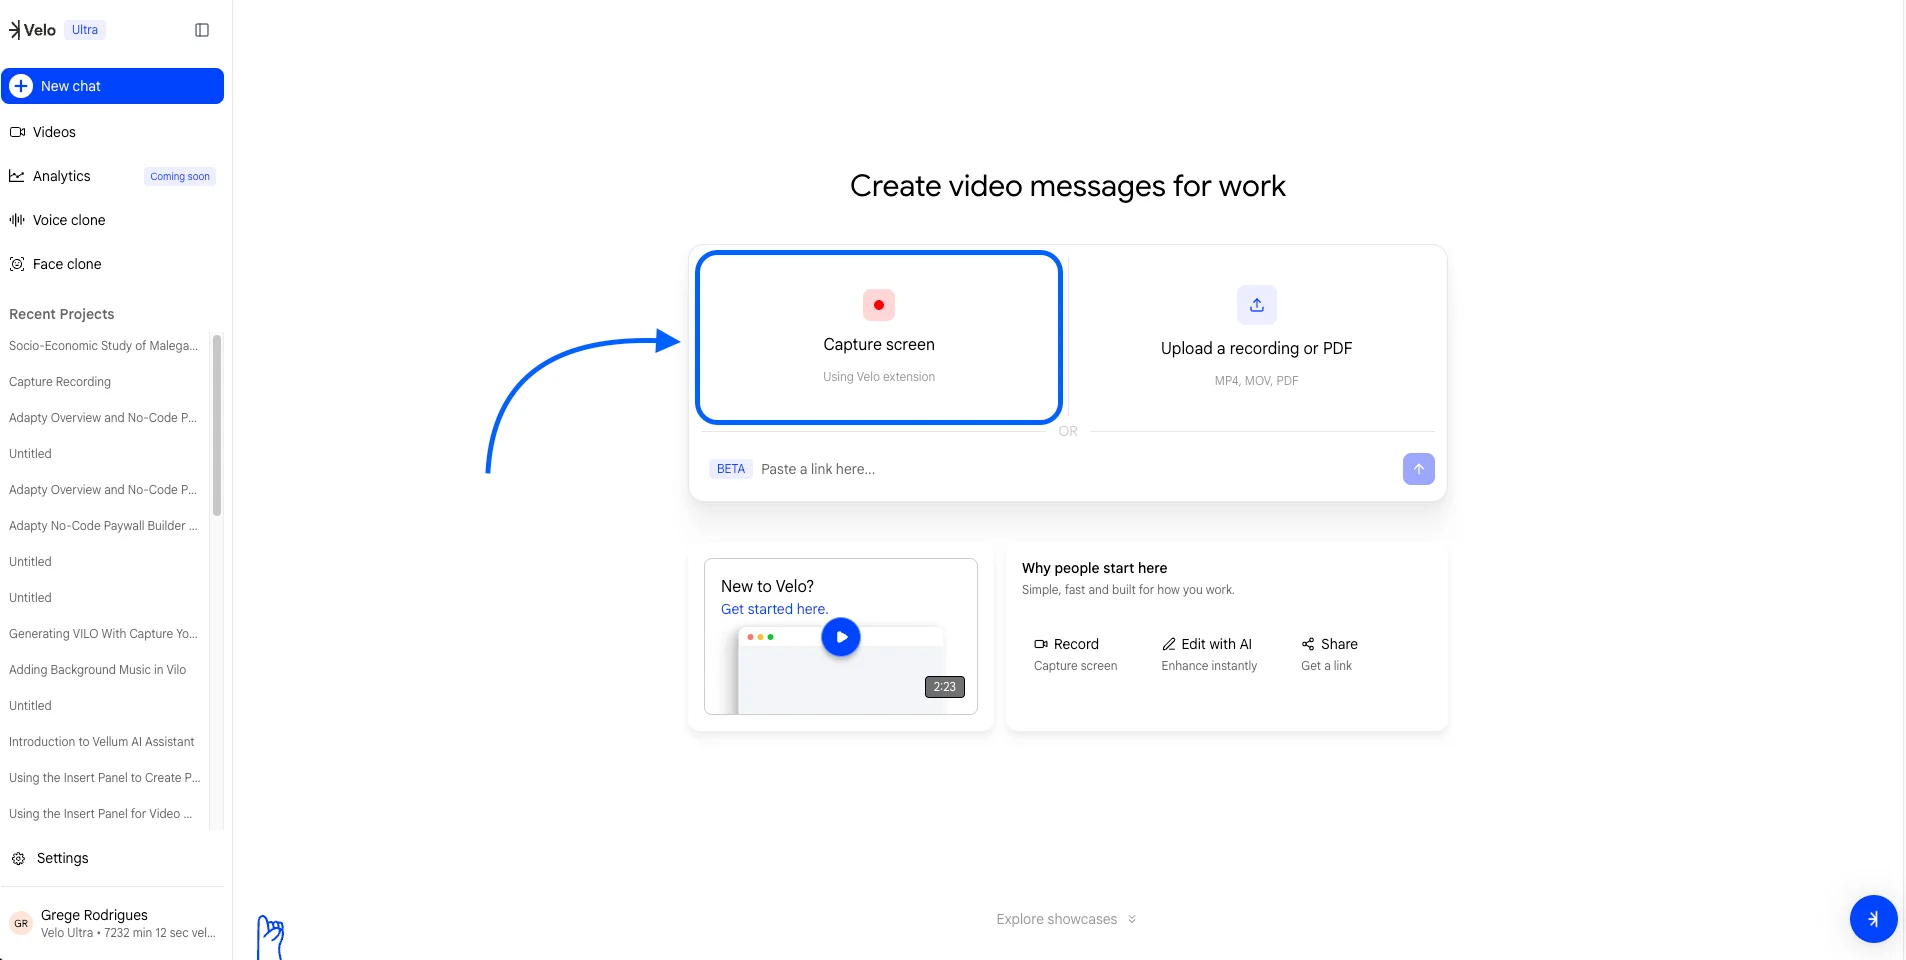 \
Dashboard options for creating a new video message.\
\
**Step 2:** Choose your preferred processing mode. **Normal processing** enhances the video after the recording is complete. **Real-time processing** starts processing as you record for faster delivery.
**Step 3:** Verify your audio input is selected in the microphone dropdown and click **Start Recording**.
## Selecting a Source and Recording
**Step 4:** Choose the content you wish to share from the browser's media picker. You can select an **Entire screen**, a specific **Window**, or a **Chrome tab**.
\
Dashboard options for creating a new video message.\
\
**Step 2:** Choose your preferred processing mode. **Normal processing** enhances the video after the recording is complete. **Real-time processing** starts processing as you record for faster delivery.
**Step 3:** Verify your audio input is selected in the microphone dropdown and click **Start Recording**.
## Selecting a Source and Recording
**Step 4:** Choose the content you wish to share from the browser's media picker. You can select an **Entire screen**, a specific **Window**, or a **Chrome tab**.
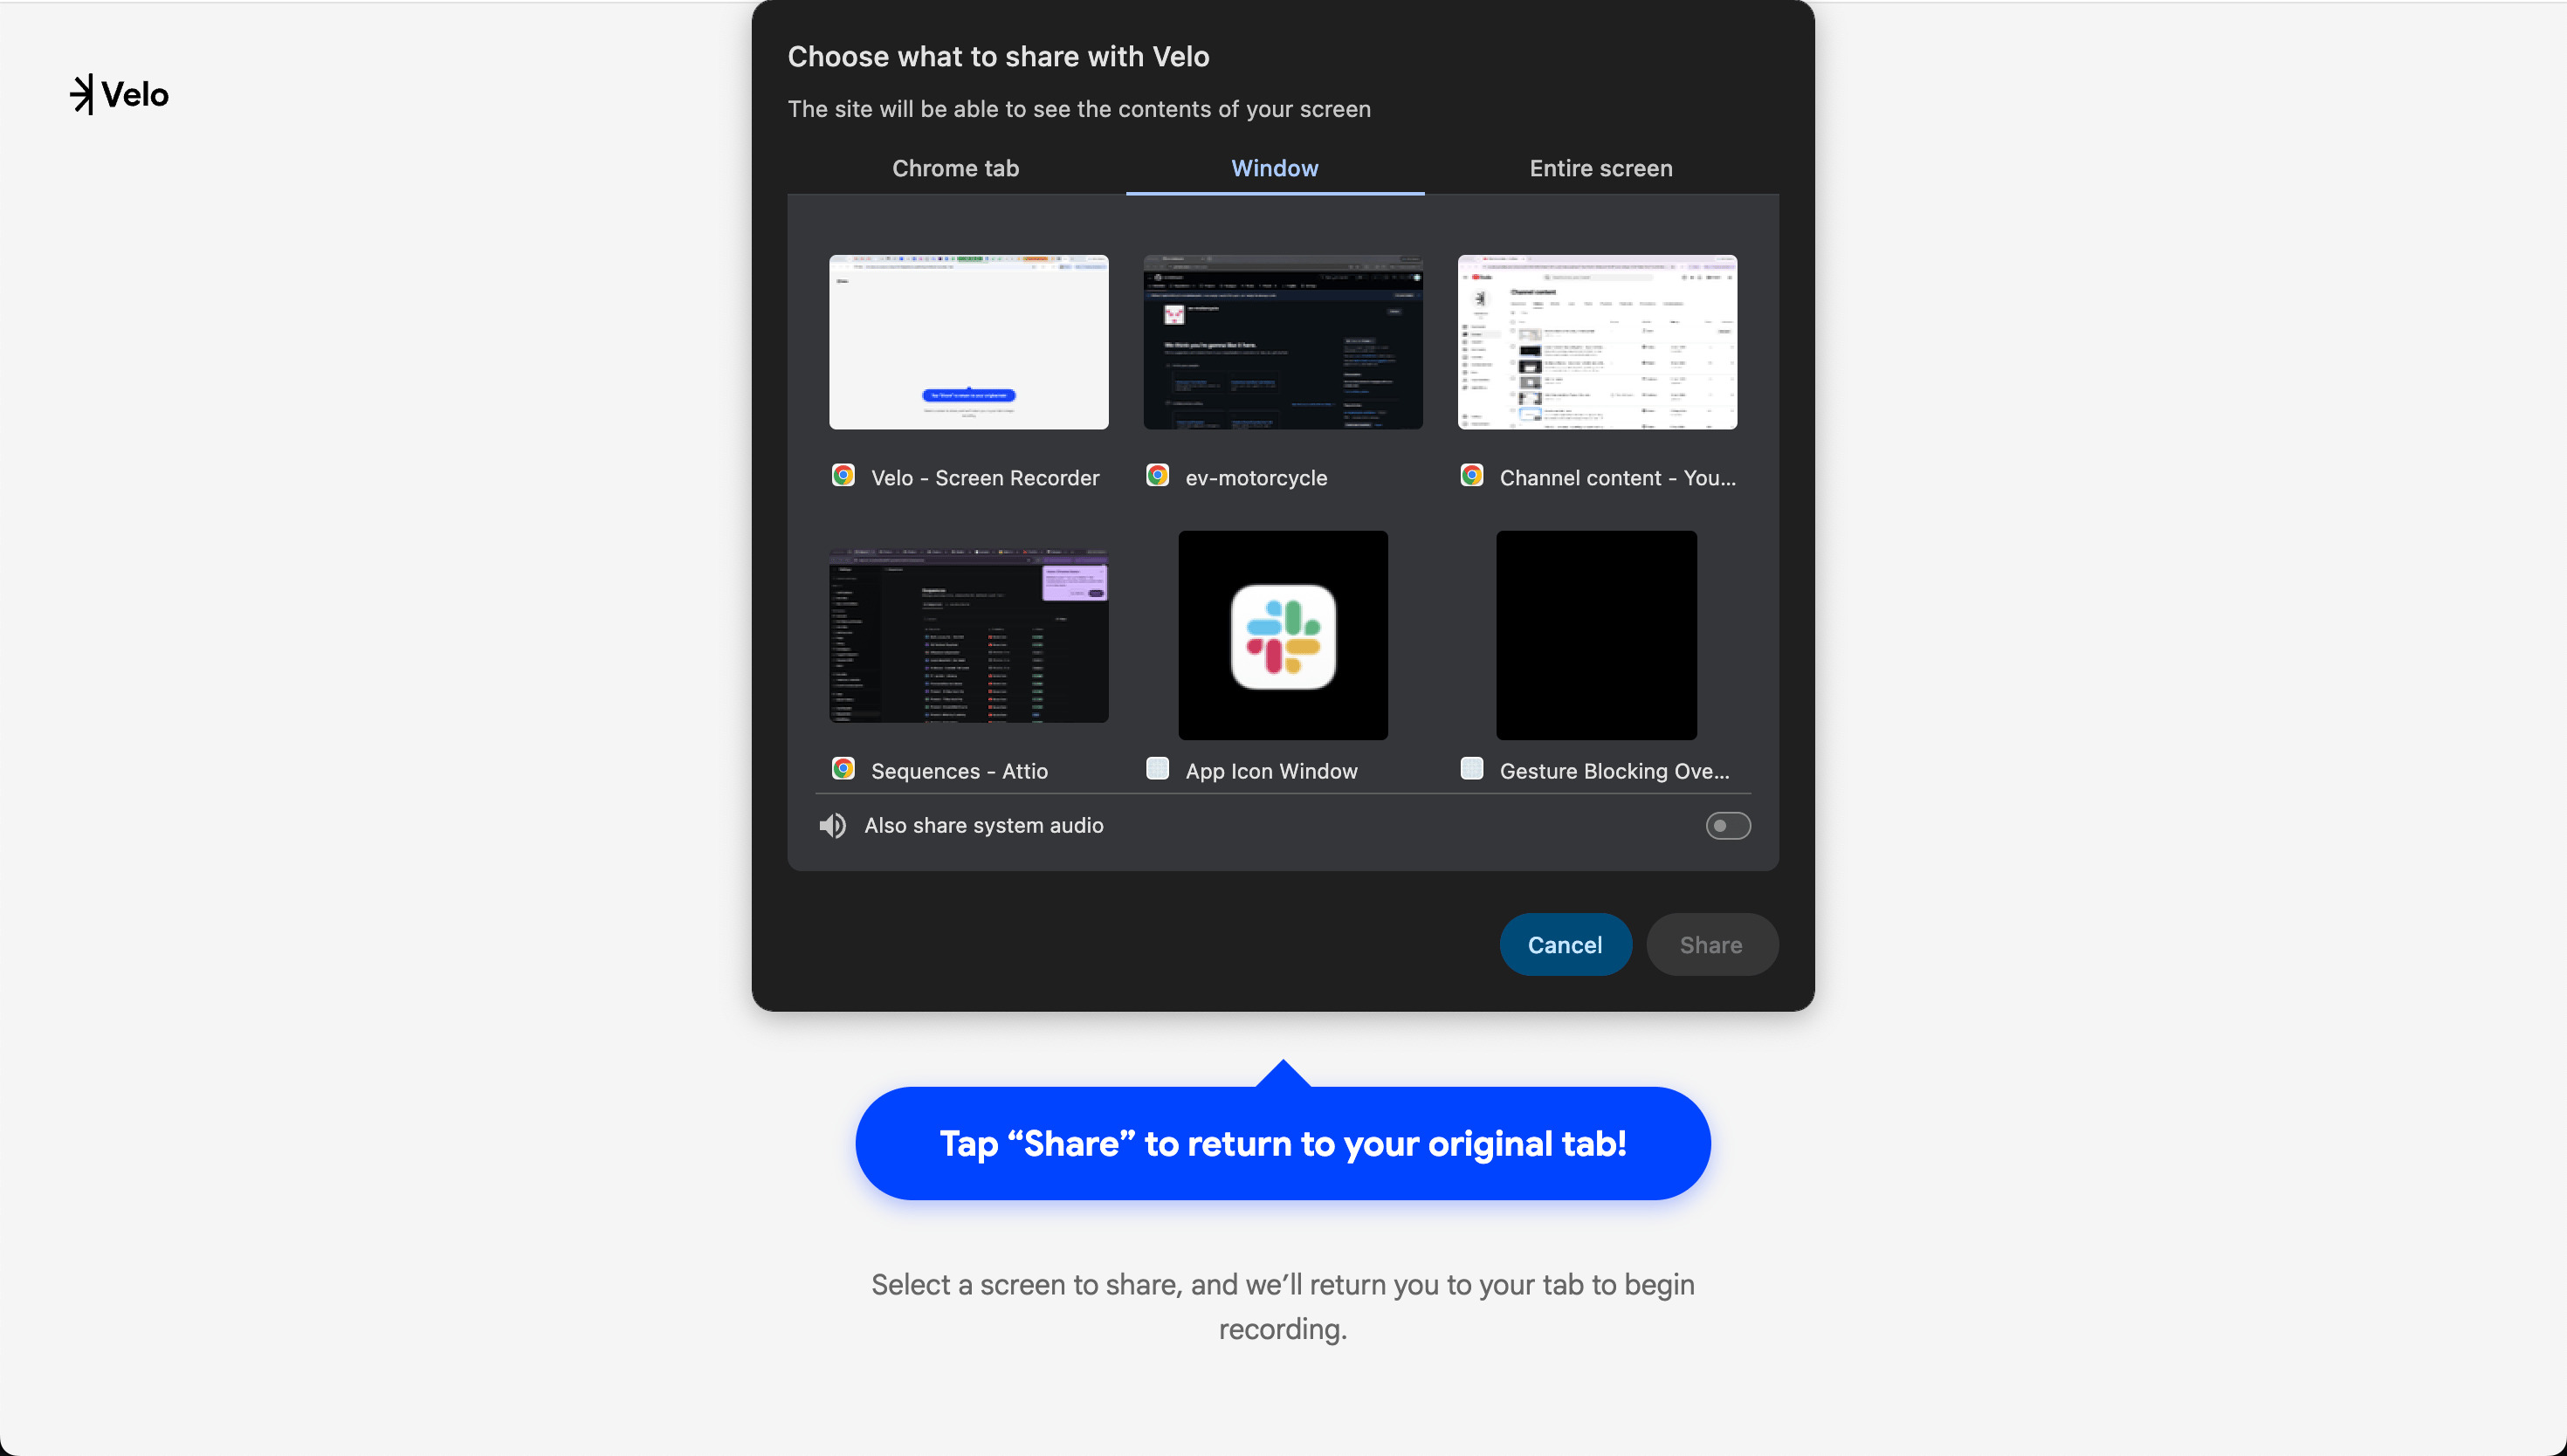 Choose the specific tab or window you want to record.
**Step 5:** Click **Share** to begin the session. A brief countdown will appear before the recording goes live.
**Step 6:** Deliver your message. You can navigate through the selected tab or window while Velo captures the activity.
## Finalizing the Video
**Step 7:** Click "**Stop sharing"** in the browser's recording banner to end the session.
**Step 8:** Review the initial capture and click "**Yes, make my Velo"** to trigger the AI enhancement and generation process.
Choose the specific tab or window you want to record.
**Step 5:** Click **Share** to begin the session. A brief countdown will appear before the recording goes live.
**Step 6:** Deliver your message. You can navigate through the selected tab or window while Velo captures the activity.
## Finalizing the Video
**Step 7:** Click "**Stop sharing"** in the browser's recording banner to end the session.
**Step 8:** Review the initial capture and click "**Yes, make my Velo"** to trigger the AI enhancement and generation process.
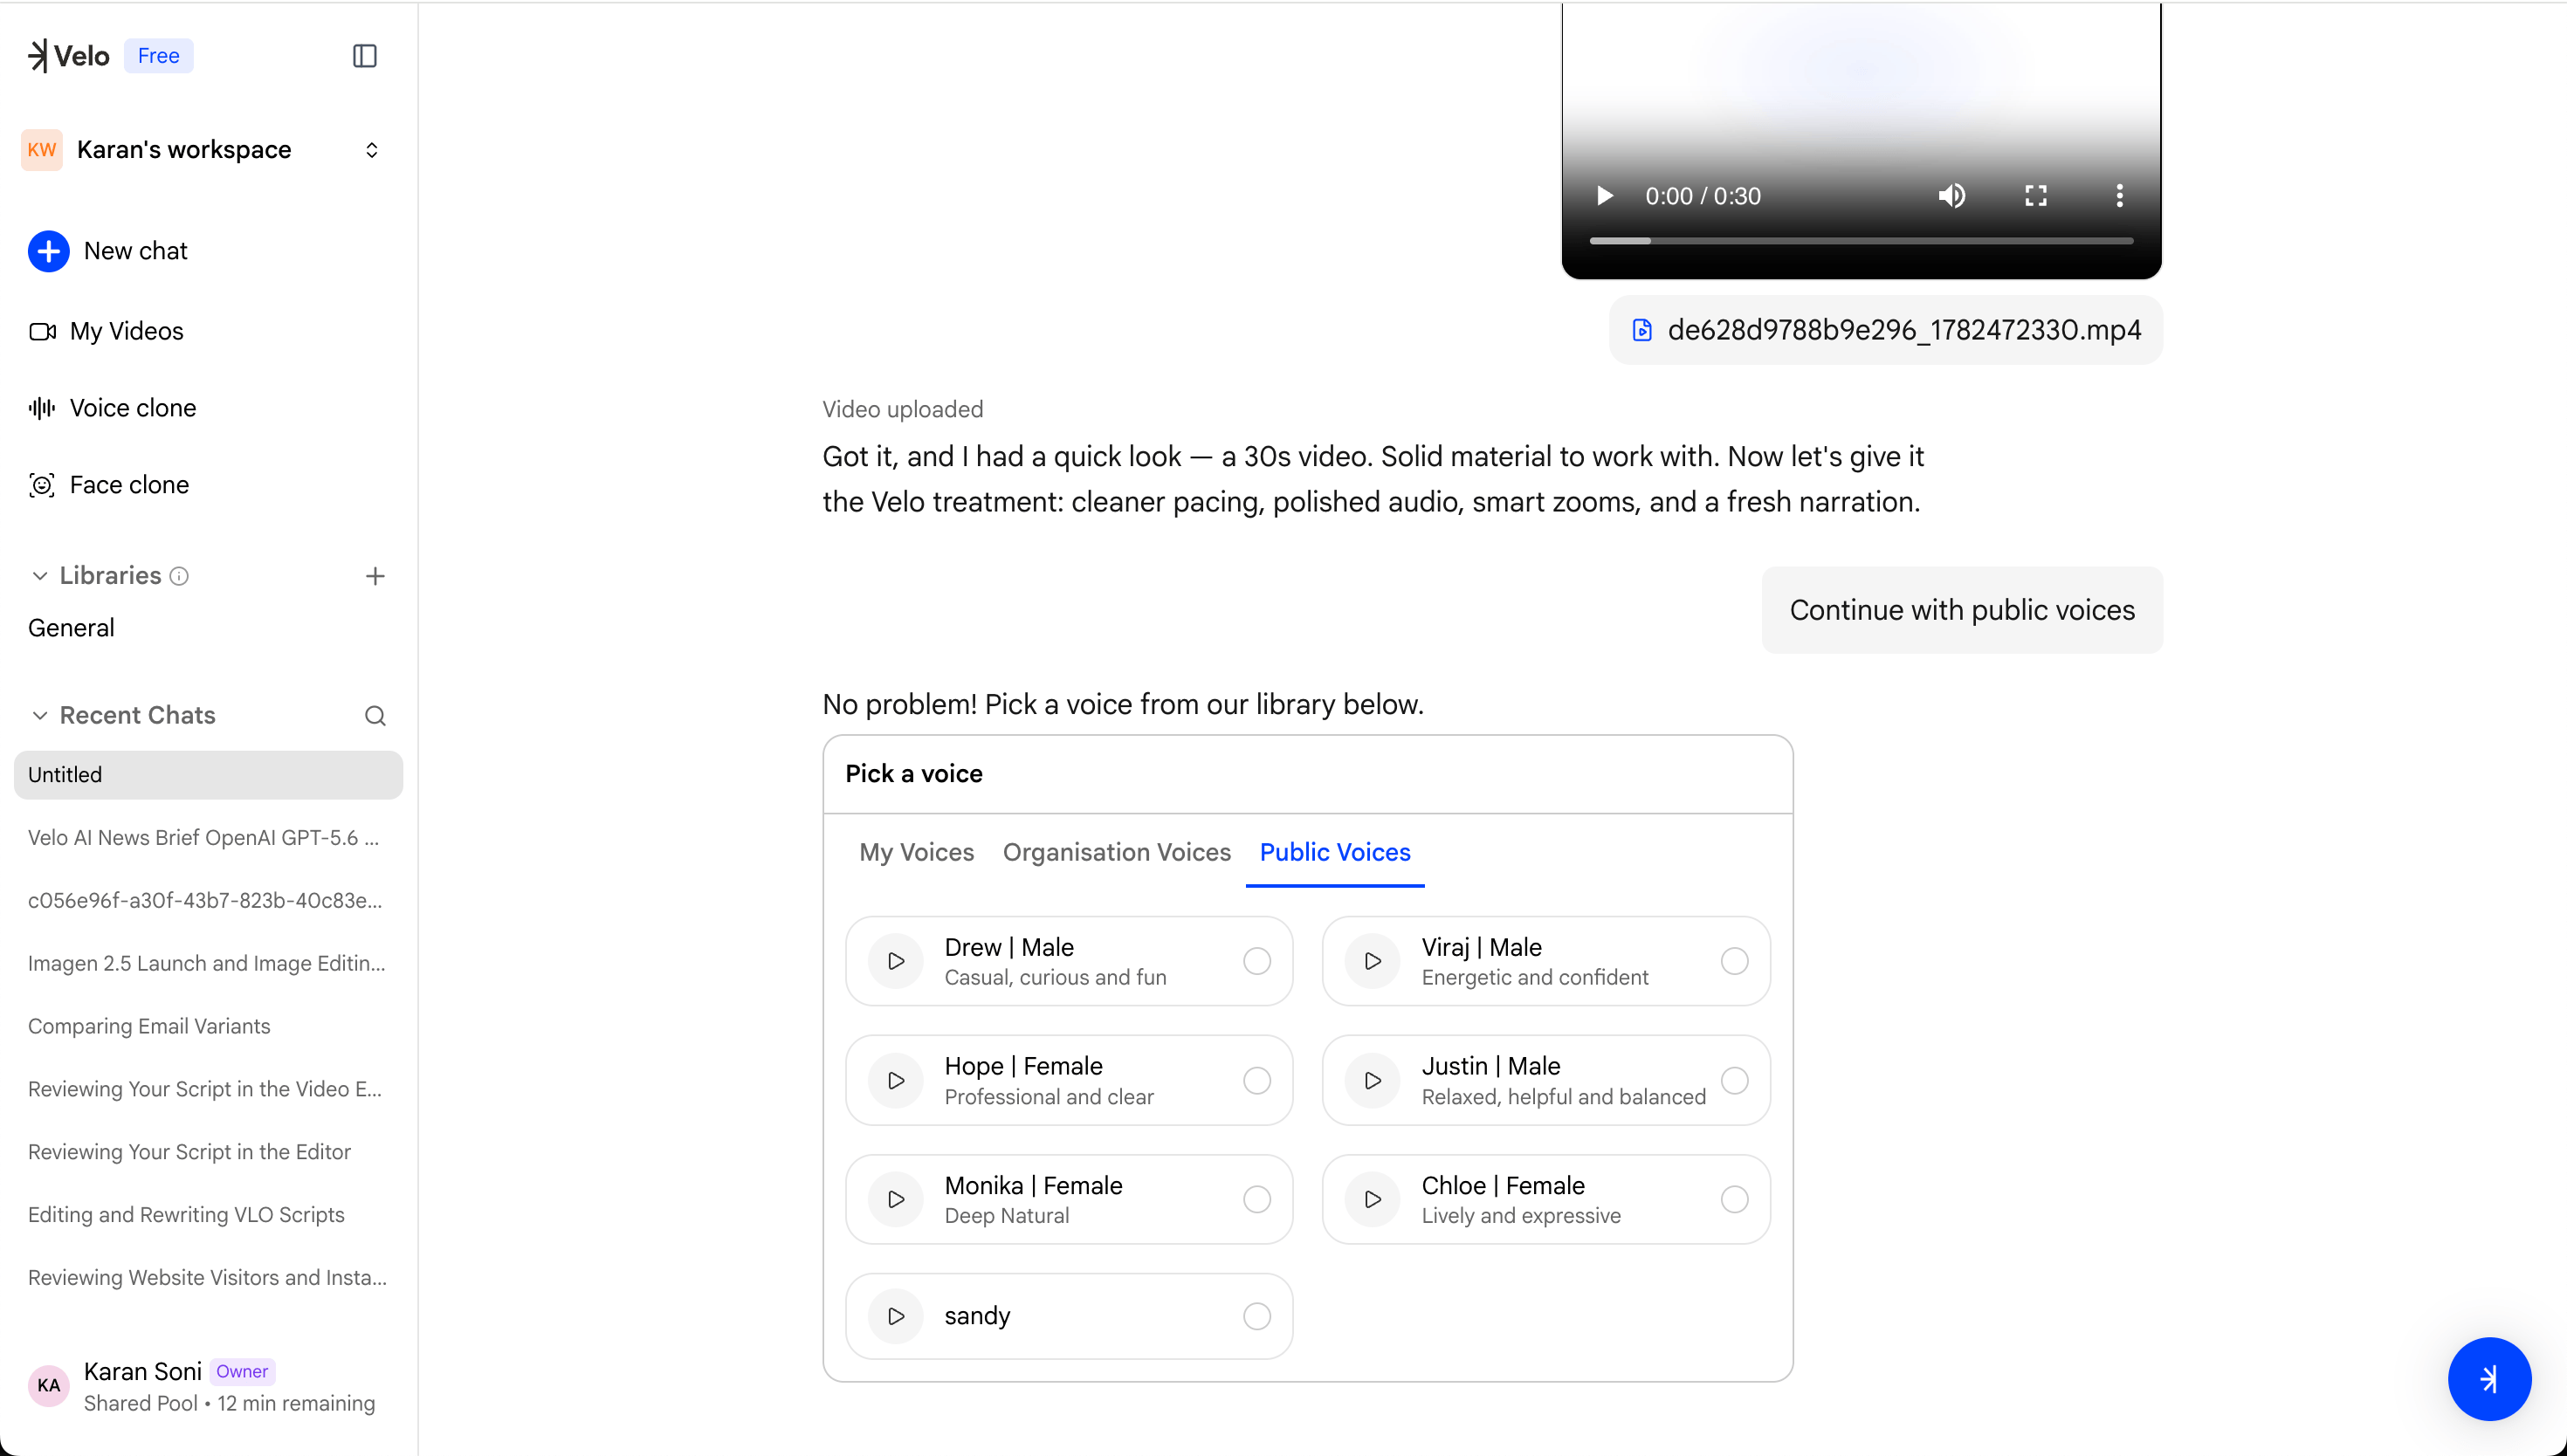 Choose the voice of narration, before generating velo
Once processing is complete, you can preview the video, apply quick actions like adding music or a logo, and click "**Get a sharable link"** to distribute your message.
Choose the voice of narration, before generating velo
Once processing is complete, you can preview the video, apply quick actions like adding music or a logo, and click "**Get a sharable link"** to distribute your message.
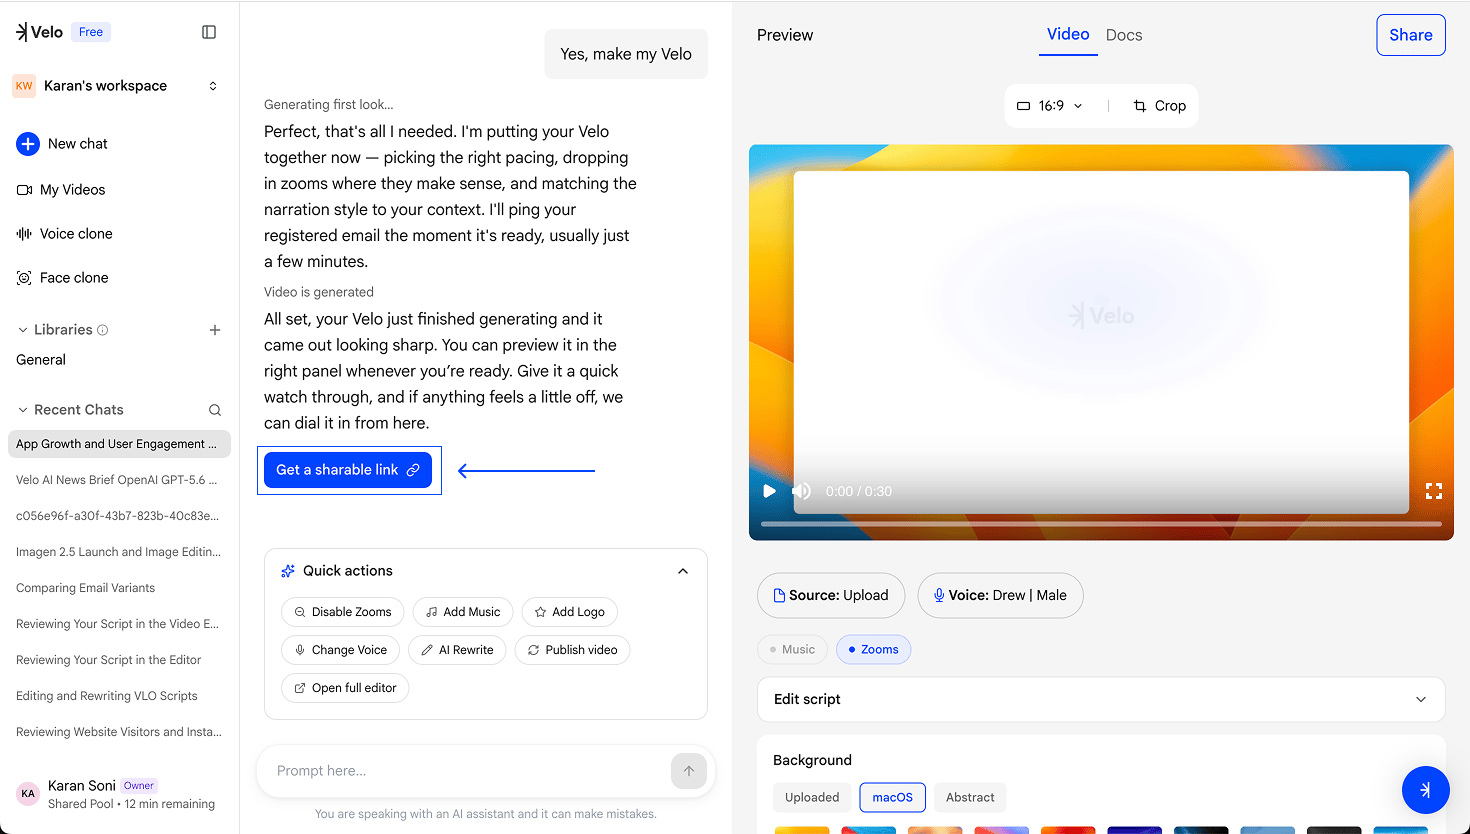 The final video is ready for review and sharing.