> ## Documentation Index
> Fetch the complete documentation index at: https://docs.usevelo.ai/llms.txt
> Use this file to discover all available pages before exploring further.
# Recording
Velo allows you to capture raw screen recordings and transform them into polished video messages using AI. By using the Chrome extension, you can configure audio and narration settings before capturing your screen for automated editing.
## Configuring Your Recording
**Step 1:** Open the Velo Chrome extension from your browser toolbar.
**Step 2:** Select your input device from the **MacBook Air Microphone (Built-in)** or other available microphone options.
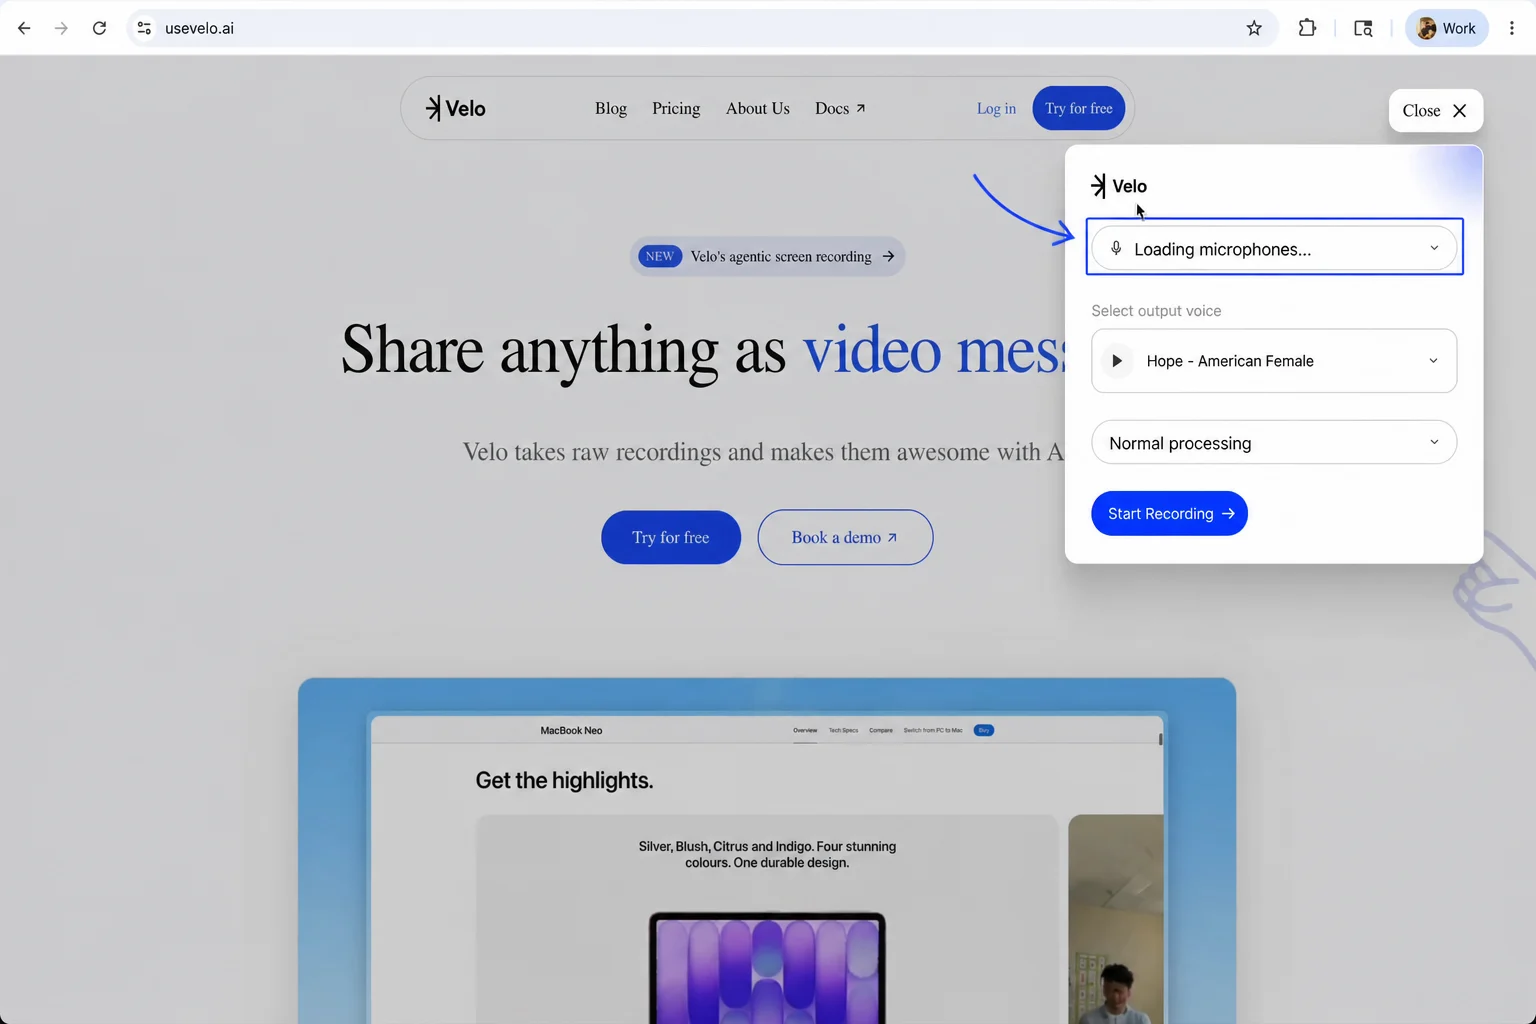 **Step 3:** Choose an AI narrator from the **Public Voices** list, or select a custom voice from the **My Voices** tab.
**Step 4:** Choose between **Normal processing** for standard generation or **Realtime processing** for faster results.
**Step 3:** Choose an AI narrator from the **Public Voices** list, or select a custom voice from the **My Voices** tab.
**Step 4:** Choose between **Normal processing** for standard generation or **Realtime processing** for faster results.
 ## Capturing Your Screen
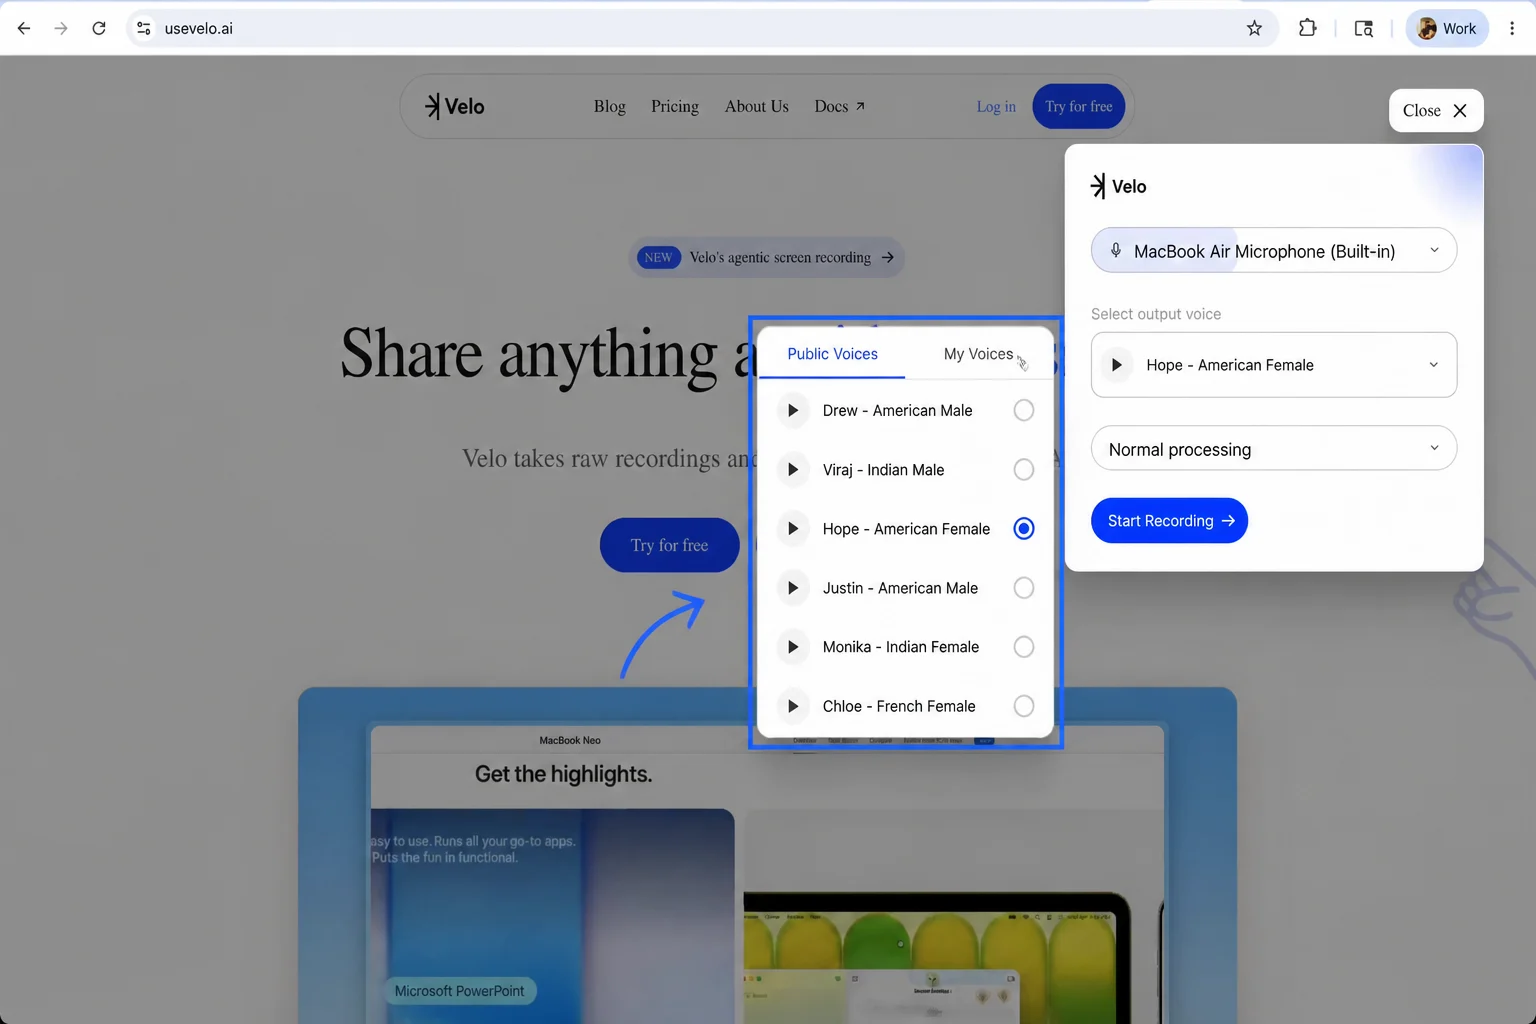
**Step 5:** Select **Start Recording** to open the browser's sharing dialog.
**Step 6:** Navigate between the **Chrome tab**, **Window**, or **Entire screen** categories and select the specific content you wish to record.
**Step 7:** Ensure **Also share tab audio** is enabled if you are capturing video with sound, then select **Share**.
## Capturing Your Screen
**Step 5:** Select **Start Recording** to open the browser's sharing dialog.
**Step 6:** Navigate between the **Chrome tab**, **Window**, or **Entire screen** categories and select the specific content you wish to record.
**Step 7:** Ensure **Also share tab audio** is enabled if you are capturing video with sound, then select **Share**.
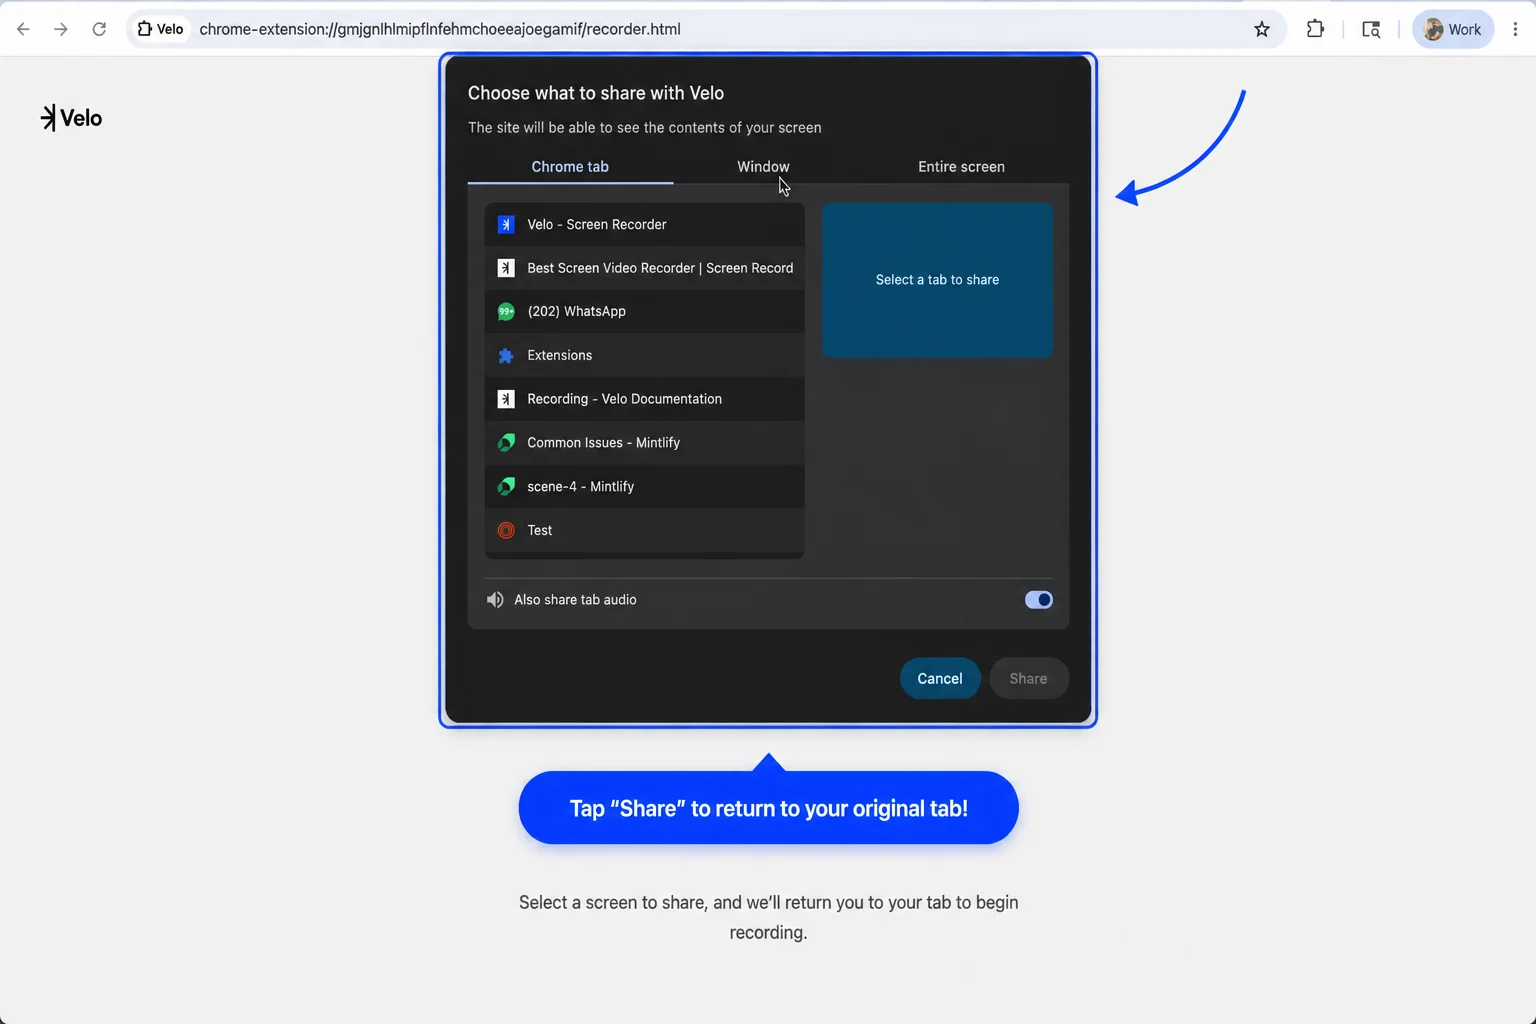 **Step 8:** Deliver your message after the three-second countdown finishes.
**Step 9:** Select the **Stop** button on the recording controls or **Stop sharing** in the browser header to conclude the session and begin the upload.
## Generating the Final Velo
**Step 10:** Monitor the upload progress on the automated status page while the recording is sent to the platform.
**Step 11:** Once the recording opens in the chat interface, select **Yes, make my Velo** to trigger AI processing.
**Step 8:** Deliver your message after the three-second countdown finishes.
**Step 9:** Select the **Stop** button on the recording controls or **Stop sharing** in the browser header to conclude the session and begin the upload.
## Generating the Final Velo
**Step 10:** Monitor the upload progress on the automated status page while the recording is sent to the platform.
**Step 11:** Once the recording opens in the chat interface, select **Yes, make my Velo** to trigger AI processing.
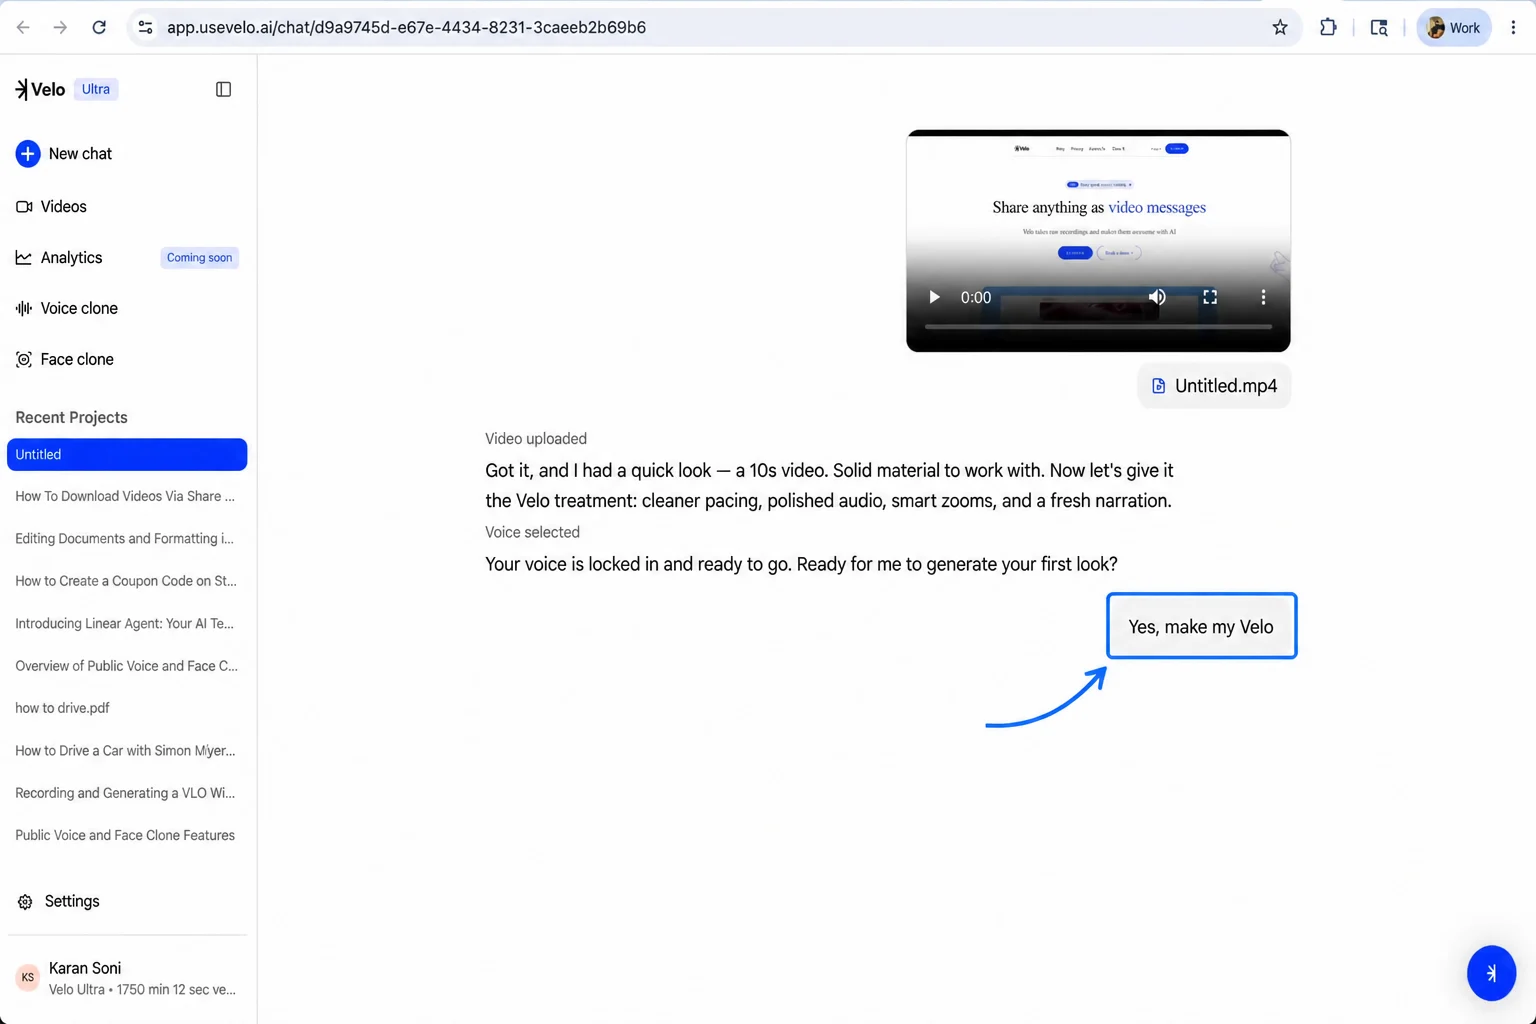 The platform will then apply the Velo treatment - including cleaner pacing, polished audio, and smart zooms - and will notify you once the finalized video is ready for viewing.